STEP 3
Mount the mattress support (MS) on the stabilizing
bars as these resulted after STEP 2, using all four
smaller rounded head bolts (6) and four washers (11)
supplied and a Phillips screwdriver (not supplied).
The lock washer must be attached to the bolt before
inserting the bolt through the metallic bracket of the
mattress support.
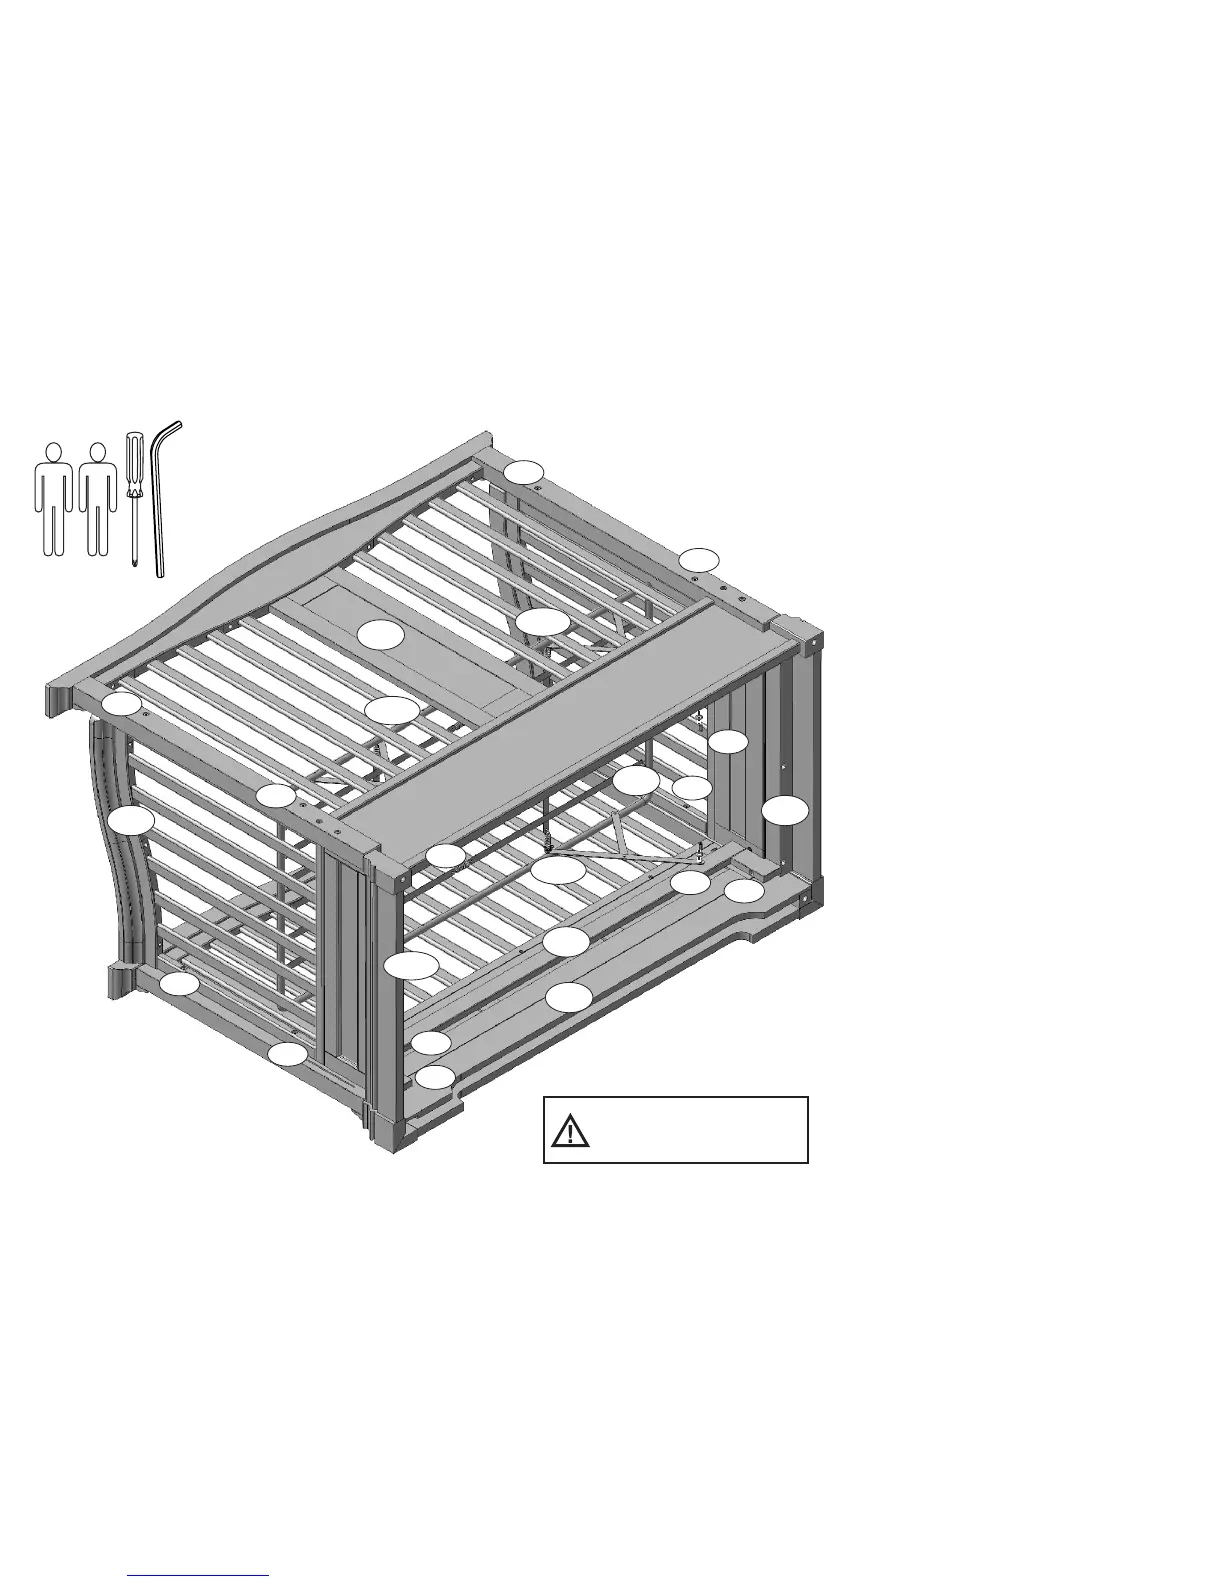
Now, you must completely tighten all 8 bolts
(5+11+7, 6+11) involved in mattress support fixing
using a Phillips screwdriver (not supplied) and all 12
Allen bolts remains not tightened from all previous
steps (see FIGURE 3).
REMINDER
You have a total of 20 bolts, distributed as following:
- 4 smaller Allen bolts (3+10) in the stabilizing bars
(SB);
- 8 bigger Allen bolts (4+10) in the headboard and
footboard (HB) & (FB);
- 4 smaller rounded head bolts (6+11) in the stabilizing
bars (SB);
- 4 bigger rounded head bolts (5+11+7) in the mattress
support (MS).
STEP 4 (Two adults are required to complete this
step)
Turn your crib with its feet back on the floor.
Attach the storage pouch supplied to the mattress
support spring using two plastic ties (also supplied).
Store this instruction booklet in the storage pouch for
future use.
After completing assembly, your crib should look like
the one depicted on the first page of this manual
HB
FB
RP
LP
SB
MS
WARNING!
COMPLETELY TIGHTEN!
REQUIRED
WARNING: TO KEEP YOUR BABY
SECURE AND SAFE, AND TO AVOID
POTENTIAL INJURY OR DEATH, IT'S VERY
IMPORTANT TO COMPLETELY TIGHTEN
ALL 20 BOLTS LISTED IN STEP 3.
FIGURE 3
4+10
5+11+7
6+11
4+10
4+10
4+10
4+10
4+10
5+11+7
5+11+7
5+11+7
6+11
6+11
6+11
3+10
3+10
4+10
NOTE: THE STYLE OF YOUR
CRIB, HEADBOARD OR OF
YOUR MATTRESS SUPPORT
MAY VARY FROM WHAT IS
P I C T U R E D I N T H E
INSTRUCTION SHEET
 Loading...