Do you have a question about the Rongta Technology RP410 and is the answer not in the manual?
Warnings about the hot print head and avoiding electrostatic damage to the print head.
List of precautions for safe operation, including power, handling, and environment.
Details of standard and optional accessories included with the printer.
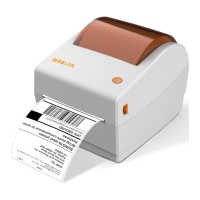
Detailed description of the printer's external and internal parts.
Detailed technical specifications including printing, storage, barcode types, and environment.
Step-by-step guide for connecting the printer to a power source.
Procedure for establishing a communication link between the printer and a computer.
Instructions for loading the paper roll into the printer.
Steps for installing the paper roll using an external holder.
How to use the FEED button for paper feeding and other functions.
Meaning of the different LED lights indicating printer status.
How to print a self-test page to check printer status and settings.
Guidance on printing tests using the Windows driver software.
Advice on learning label positioning for accurate printing.
Instructions for cleaning the printer head using a cleaning pen or swab.
Procedure for cleaning printer components like sensors, rollers, and paper path.
Frequently asked questions and their recommended solutions.
Solutions for issues affecting print quality, such as loading, settings, and component cleanliness.
Remedies for incomplete printing due to paper placement or label size settings.
The device described in this manual is the RP410, a label printer designed for various printing needs. This user manual provides comprehensive information for product usage, installation, and maintenance, addressing technical issues and operational procedures. It is complemented by a driver and program manual, a practical tools manual for product function options and operating condition amendments, and a program manual detailing label printer commands.
The RP410 printer is capable of both thermal transfer and direct thermal printing, offering versatility for different label types. It is designed to print various barcodes, including 1D barcodes such as Code 39, Code 93, ITF, EAN 128, Code 128 (subsets A, B, C), Codabar, EAN-8, EAN-13, UPC-A, UPC-E, EAN and UPC 2(5) digits add-on, MSI, MSIC, PLESSEY, CPOST, ITF 14, and EAN 14, as well as 2D QR codes.
The printer incorporates several sensors to ensure accurate and reliable operation. These include a gap sensor for detecting spaces between labels, a paper end sensor to alert users when the paper supply is low, an uncover sensor to indicate if the printer cover is open, and a black mark sensor for precise positioning on black mark paper.
The RP410 supports various paper types, including tagboard, continuation paper, and black mark paper, accommodating different labeling requirements. It operates using the TSC command language, which is standard for many label printers.
A key feature of the RP410 is its Bluetooth communication capability. It offers dual-mode Bluetooth 4.0 (SPP+BLE), allowing it to communicate with a wide range of devices, including Apple 4S, iPad 3, and iPad 4 models and later. The effective communication distance for Bluetooth is up to 10 meters. The default Bluetooth pairing password is "0000," which can be customized through parameter settings using the printer's tool setting manual.
The RP410 is designed for ease of installation and operation. Power connection involves ensuring the printer's power button is in the "off" position, connecting the adapter plug to the printer outlet, then connecting the adapter pin plug to a power socket, and finally connecting the power cable to a power plug socket. Users are cautioned to use only the original compatible power adapter to prevent damage and to disconnect the printer from power if not in use for extended periods.
Connecting the printer to a PC is straightforward: ensure the printer is off, then connect the PC and printer using a communication cable (USB, Serial, or Parallel).
Installing paper rolls can be done in two ways: "Inside" or "Outside." For "Inside" installation, the fixing seat is opened, and the paper roll is placed with the printed face up. The paper is then guided through the paper guide, pulled past the rubber roller, and the paper guide is adjusted to fit the paper width. Finally, the printer cover is closed until a "ka" sound confirms it's locked. For "Outside" installation, paper is fed through the paper-feeding slot at the back of the printer, ensuring the printed face is up. The L seat is pushed up to lock the fixing seat, and then the paper is guided through the paper guide, pulled past the rubber roller, and the paper guide is adjusted. The cover is then closed until it locks.
The operator panel provides clear indications of the printer's status and allows for various operations:
LED indicators provide visual feedback on the printer's status:
The printer includes a self-test function, which is useful for checking firmware version, parameter settings, printing quality, and external equipment settings, especially during initial installation or troubleshooting. To print a self-test page, ensure the printer is powered off, the paper roll is installed, and the cover is closed. Then, hold the paper feed button while pressing the power button, releasing the feed button once the printer powers on.
For printing from a PC, users need to install the Windows driver (refer to the "RP4xx Windows Driver manual"), set the Windows driver "port" to the corresponding printer interface, and use the "print self-test page" function within the Windows driver.
Label study is an important feature for accurate label positioning. Users are advised to perform a label study when installing the printer for the first time, after sensor clearance, after a long period of disuse, when changing paper roll types, or if the printer fails to recognize marks effectively during printing. This process involves a long press of the paper feed button for 3 seconds in the ready state, until the blue status light flashes twice, then releasing the button.
Regular cleaning is crucial for maintaining print quality and extending the printer's lifespan. Dust, foreign matter, or sticky substances can degrade print quality.
Before cleaning, it's essential to turn off the printer and wait 2 to 3 minutes for the print head to cool down, as it can be hot after printing. Users should avoid touching the heated part of the print head to prevent electrostatic damage and should not scratch or damage the print head.
To clean the printer head:
To clean the sensor, rubber roller, and paper path:
The manual also includes a troubleshooting section with common problems and recommended solutions. For issues like the printer not powering on, users should check power connections and ensure the power switch is on. If the printer is not printing, communication cables should be reconnected, and the printer's status (green light normally on) should be confirmed using the LED indicator reference. Incorrect positioning can be resolved by performing label locating learning, checking the seam mark detection sensor components' position offset (adjusting for black mark paper or ensuring the sensor is within paper width for label/continuous paper), and using the setting tool to confirm the paper type matches the loaded media. Poor print quality issues can be addressed by reloading paper, adjusting printing density and speed via the setting tool or software, cleaning the printer head and rubber roller, and checking for head defects. If the print head is damaged, contact customer service. For incomplete printing, adjust paper position and set the correct label size.
| Brand | Rongta Technology |
|---|---|
| Model | RP410 |
| Type | Barcode Reader |
| Scanning Technology | Laser |
| Storage Temperature | -20°C to 60°C |
| Interface | USB, RS232 |
| Power Supply | 5V DC |
| Operating Temperature | 0°C to 50°C |
| Humidity | 5% to 85% RH (non-condensing) |