Roomie Remote Version 3 Quick Start Guide
Copyright © 2014 Roomie Remote, Inc. 8 roomieremote.com
The second option, Add Panasonic TV, is only for learning commands when Roomie
Remote does not support the full command set for a device. Roomie Remote fully supports
all Panasonic TVs, so it is not necessary to select the second option.
The Add Device screen appears, showing the selected controller (Roomie Blaster Wi-Fi)
and the TV type (Panasonic TV).
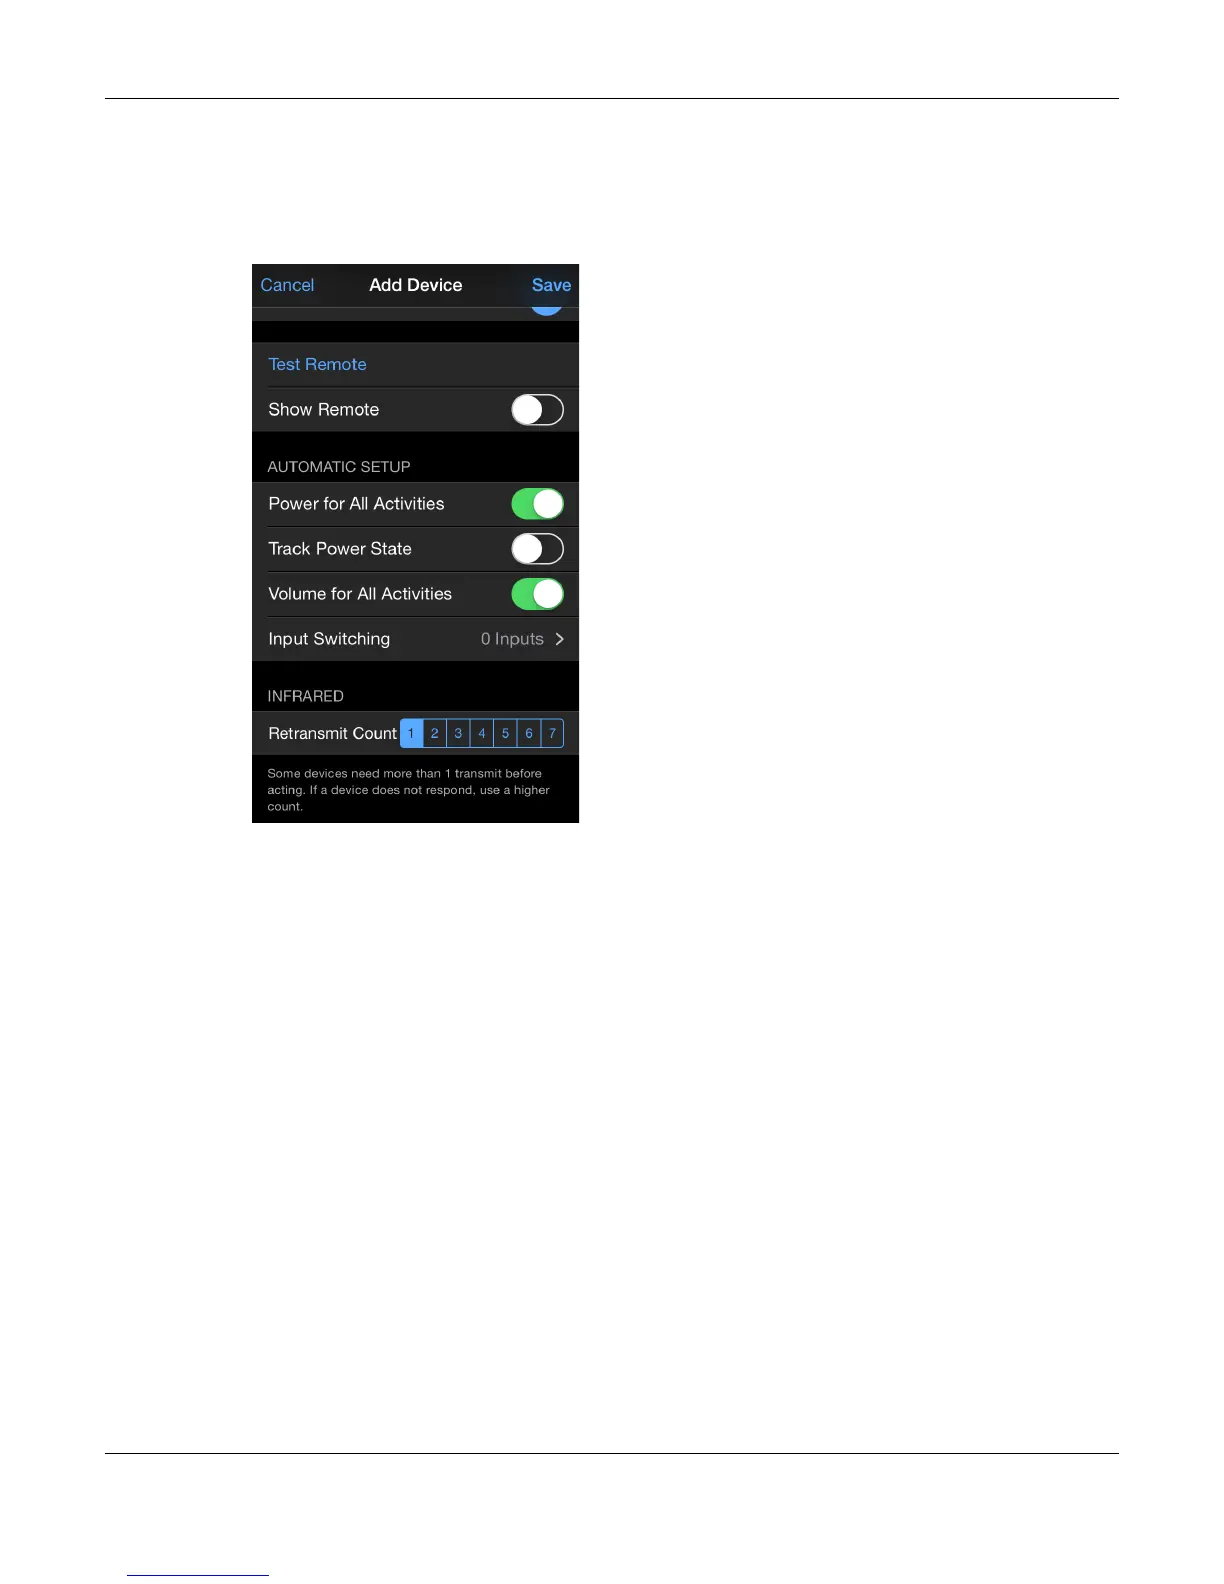
8. Locate Automatic Setup:
!
Power for All Activities: Enable if the device needs to be powered on for all activities.
Enable this option for this demonstration, as the TV needs to be on for both of the
activities we are creating.
!
Track Power State: Puts a power toggle control on the list of devices (in Edit mode) so
that you can easily switch the device to the desired power setting. Track Power State
should not be enabled if the device supports discrete on and off power commands; it is
included for legacy devices that only support toggling the power setting. Track Power
State does not need to be enabled for this demonstration.
!
Volume for All Activities: Enable if the device is providing sound for all activities.
Generally you only want to enable this option for one device in a room. Enable this
option for this demonstration, as the TV is providing the sound for both of the activities
we are creating. You would not enable this setting for the TV if a different device (a
receiver, for example) was providing the sound.
9. Tap Roomie Blaster Settings.
Because we are using a Roomie Blaster Adapter and the blaster is going to be controlling a
device, we need to configure the Roomie Blaster Settings appropriately.
 Loading...