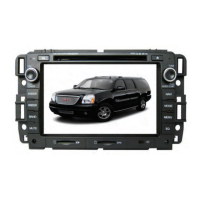
Do you have a question about the Rosen DS-GM1010 GM Series and is the answer not in the manual?
| Brand | Rosen |
|---|---|
| Model | DS-GM1010 GM Series |
| Category | Car Receiver |
| Language | English |
Video player is not intended for driver viewing while vehicle is in motion.
Installer must ensure the video disable connection works properly before vehicle delivery.
Improper installation can distract driver, causing injury or death, and violate law.
Rosen disclaims liability for injury or damage from improper installation or use.
Identify non-amplified vehicles, typically low-end, no BOSE logos.
Identify standard amplified vehicles, mid-range, may have BOSE logos.
Identify high-end Centerpoint vehicles, including GMC Yukon/Sierra Denalis.
Guide for when unsure, proceed to Step 1b to check RPO codes.
Use Regular Production Order (RPO) codes found in the glove box to determine audio platform type.
Details RPO codes for Buick, Chevrolet, and GMC trims to determine harness and settings.
Essential instruction to read the entire guide before starting installation.
Access latest updates, corrections, and technical tips online.
Test battery voltage to ensure it is fully charged before proceeding.
Keep the vehicle off during installation to prevent faults and protect components.
Carefully pull the top of the dash panel towards you to begin removal.
Carefully remove the lower portion of the vehicle's dashboard.
Carefully remove the entire dash panel and set it aside.
Locate and remove the four mounting screws securing the factory radio.
Remove the original equipment radio and disconnect all associated wiring harnesses.
Ensure safety equipment is not affected; route harnesses away from airbags.
Mount antennas on the vehicle exterior, routing harnesses away from power.
Locate iPod interface module in an accessible area for future servicing.
Remove two Phillips transport screws protecting the DVD mechanism before installation.
Securely connect GPS antenna harness with a wrench; use white clamp for cable.
Fully engage optional harnesses like iPod, Satellite Radio, Camera, and Sensors before installation.
Route and prepare vehicle side harnesses for connection, avoiding pinching or damage.
Connect all harnesses, secure unit, reinstall dash trim carefully, reconnect vehicle connectors.
Turn on the vehicle and unit, press reset for 5 seconds to confirm full functionality.
Insert DVD to verify the video disable circuit operates correctly with the park brake.
Access the installer settings screen via Menu > Settings > 7253.
Select individual settings based on installed optional components, e.g., Center Pt, Bluetooth.
Set Rosen Bluetooth to OFF if vehicle has factory Bluetooth to avoid conflicts.
Verify unit startup, connector installation, and system fuses are correct.
Confirm AM/FM reception is as expected after selecting RADIO as the source.
Confirm Channel 001 is present after approximately 5 minutes for Satellite Radio.
Confirm iPod is communicating and playback is OK if equipped.
Confirm CD audio playback is OK, checking disc condition and storage.
Confirm DVD video playback is OK, ensuring park brake is set and disc is good.
Confirm phone pairing is successful, checking Bluetooth and compatibility.
Confirm navigation loads and signal strength is OK, checking antenna connection.
Confirm backup camera screen shows in reverse, checking settings and power.
Confirm OnStar operator is heard, checking connector engagement.
Resolves issues where the system will not turn on, checking power, bus, and harness.
Resolves audio issues by correctly identifying vehicle's audio system and harness settings.
Resolves issues with steering wheel buttons, pairing, and using Rosen vs. Factory Bluetooth.
Resolves XM radio issues like 'No Device' or 'No Audio' by checking installation and registration.
List of Rosen part numbers for installation guides, harnesses, manuals, and accessories.
Part number for the XM Upgrade Kit, sourced from GM Dealerships.
Diagram and notes for connecting the main block and using the GPS ground plate.
Illustrates connections for the main non-amplified harness (DP-GM1016).
Illustrates connections for the optional iPod harness (DP-1013-1).
 Loading...