Do you have a question about the Rosewill RX358 Series and is the answer not in the manual?
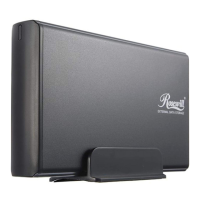
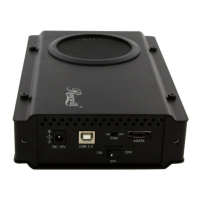
Identifies components and design elements visible from the front of the enclosure.
Shows ports, controls, and labels located on the back of the enclosure.
Instructions to release four screws and remove the bottom aluminum cover.
Guide to removing side plates by releasing two screws from the back panel.
Instructions for properly placing the HDD into the enclosure and connecting the SATA connector.
Securing the enclosure by tightening four screws from the sides.
Reattaching the two side plates back to the enclosure and fixing them with screws.
Reattaching the aluminum cover and tightening the final four screws.
Ensure the HDD does not interfere with the fan blades during the assembly process.
Maintain at least 5cm of space from the air intake ventilator.
Right-click 'My Computer' and select 'Manage' to access disk utilities.
Locate the external HDD showing as 'Unallocated' in Disk Management.
Right-click the 'Unallocated' blocks and select 'New Partition'.
Complete the partition creation process by following the New Partition Wizard instructions.
The formatted external HDD will be recognized as a 'New Volume'.
Double-click 'My Computer' to access the newly created volume on your PC.
Hot-swap is supported if the motherboard has an eSATA port and no bracket is needed.
Hot-swap requires an eSATA bracket if the motherboard lacks an eSATA port.
| Color | Black |
|---|---|
| Type | Enclosure |
| Internal Interface | SATA |
| External Interface | USB 3.0 |
| RAID | No |
| Operating Systems Supported | Windows, Mac, Linux |