This document describes the Rough Country Winch, a recovery system designed for vehicle and boat-mounted non-industrial applications. The manual covers two models: the PRO9500 and the PRO12000, detailing their features, specifications, usage, maintenance, and safety precautions.
Function Description
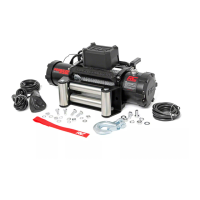
The Rough Country Winch is an electrically powered device designed to pull loads using a steel or synthetic rope. It is primarily used for vehicle recovery in situations where a vehicle is stuck or needs to be moved. The winch operates by winding a cable onto a drum, generating significant pulling force. It features a clutch mechanism for rapid uncoiling of the cable and a remote control for safe operation.
Important Technical Specifications
PRO9500 Model:
- Single line rated pull: 9500 Lbs (4300 kg)
- Motor: 5.5 HP Series Wound
- Control: Remote switch, 12 ft (3.7 m) lead
- Gear train: 3 Stage Planetary
- Gear reduction ratio: 265:1
- Clutch: Sliding Ring Gear
- Braking Action: Automatic In-The-Drum
- Drum size: Diameter 2.5" (63.5 mm), Length 8.8" (224 mm)
- Cable: 94 ft of 5/16" diameter (28 m of 8.3 mm diameter)
- Fairlead: 4-Way Roller Fairlead
- Battery: Recommended: 650 CCA minimum for winching
- Battery Leads: 2 gauge, 72" (1.83 m)
- Finish: Black/Dark Grey
- Weight: N.W. 84 lbs (38 kg), G.W. 94 lbs (42.5 kg)
- Overall dimensions (LxWxH): 21.3" x 6.3" x 8.6" (562 x 160 x 218 mm)
- Mounting Bolt Pattern: 10.00" x 0.015" x 4.50" ± 0.010" (254 x 114.3 mm)
- Line Speed (first layer): 5.2 ft/min (1.6 m/min) at 9500 Lbs pull
- Motor Current (first layer): 340 amps at 9500 Lbs pull
- Rated line pull per layer:
- Layer 1: 9500 Lbs (4300 kg)
- Layer 2: 7700 Lbs (3480 kg)
- Layer 3: 6500 Lbs (2940 kg)
- Layer 4: 5700 Lbs (2580 kg)
- Cumulative cable capacity:
- Layer 1: 16 Lbs (5 kg)
- Layer 2: 42 Lbs (12 kg)
- Layer 3: 72 Lbs (21 kg)
- Layer 4: 94 Lbs (28 kg)
PRO12000 Model:
- Single line rated pull: 12000 Lbs (5440 kg)
- Motor: 6 HP Series Wound
- Control: Remote switch, 12 ft (3.7 m) lead
- Gear train: 3 Stage Planetary
- Gear reduction ratio: 265:1
- Clutch: Sliding Ring Gear
- Braking Action: Automatic In-The-Drum
- Drum size: Diameter 2.52" (64 mm), Length 8.82" (224 mm)
- Cable: 94 ft of 3/8" diameter (28 m of 9.4 mm diameter)
- Fairlead: 4-Way Roller Fairlead
- Battery: Recommended: 650 CCA minimum for winching
- Battery Leads: 2 gauge, 72" (1.83 m)
- Finish: Grey Metallic
- Weight: N.W. 88 lbs (40 kg), G.W. 95 lbs (43 kg)
- Overall dimensions (LxWxH): 21.3" x 6.3" x 8.6" (562 x 160 x 218 mm)
- Mounting Bolt Pattern: 10.00" x 0.015" x 4.50" ± 0.010" (254 x 114.3 mm)
- Line Speed (first layer): 5.5 ft/min (1.7 m/min) at 12000 Lbs pull
- Motor Current (first layer): 360 amps at 12000 Lbs pull
- Rated line pull per layer:
- Layer 1: 12000 Lbs (5440 kg)
- Layer 2: 9210 Lbs (4170 kg)
- Layer 3: 8030 Lbs (3640 kg)
- Layer 4: 6894 Lbs (3125 kg)
- Cumulative cable capacity:
- Layer 1: 17 Lbs (4.8 kg)
- Layer 2: 41 Lbs (12 kg)
- Layer 3: 71 Lbs (21 kg)
- Layer 4: 82 Lbs (25 kg)
Usage Features
Safety Precautions:
- Dress Properly: Avoid loose clothing or jewelry. Wear leather gloves for handling cable, non-skid footwear, and protective hair covering.
- Maintain Safe Distance: Keep all persons clear of the cable and load during operation (1.5 times cable length recommended). Do not step over the cable.
- Cord Handling: Do not abuse the remote control cord; keep it away from heat, oil, and sharp edges.
- Avoid Overworking: Stop operation if the motor becomes uncomfortably hot. Do not maintain power if the motor stalls. Do not exceed maximum line pull ratings.
- Prevent Unintentional Starting: Keep the clutch disengaged when not in use and fully engaged when in use.
- Check for Damage: Inspect the winch carefully before each use. Repair or replace damaged parts at an authorized service center.
- Proper Repair: Use only identical replacement parts for repairs.
- Re-spooling Cable: Wear leather gloves. Maintain a slight load on the cable while re-spooling. Start from the center, walking up as the winch powers in. Do not allow the cable to slip or approach the winch too closely. Disconnect the remote control switch and finish spooling by hand with the clutch disengaged for hidden winches.
- Accessory Use: Use only recommended accessories to avoid personal injury.
Winch Operation Warnings:
- Cable Spooling: Uneven spooling is acceptable unless cable piles up on one end. If this occurs, reverse the winch to relieve the load and adjust the anchor point.
- Remote Control: Store the remote control switch safely. Plug it in with the clutch disengaged. Do not engage the clutch with the motor running.
- Hook Connection: Never connect the hook back to the cable; use a sling or chain.
- Observation: Observe the winch from a safe distance, stopping every 3-4 feet to ensure even cable pull.
- Mounting: Do not attach tow hooks to winch mounting apparatus; attach them to the vehicle frame.
- Snatch Block: Use a snatch block to double winch capacity and halve speed, maintaining a direct line pull. Attach the winch hook to the chassis when double loading.
- Anchor Points: Use rated "D" or bow shackles with an approved tree trunk protector.
- Cable Wraps: Ensure at least five wraps of cable remain on the drum at all times. A red cable marking indicates the minimum safe number of wraps.
- Pulling Power: Greatest pulling power is on the innermost layer. Pull off as much line as possible for heavy pulls (leaving at least 5 wraps). Use a snatch block for double line arrangement if necessary.
- Dampening: Drape a heavy blanket or similar object over the extended cable to dampen backlash.
- Cable Binding: Neat, tight spooling prevents binding. If binding occurs, power the winch in and out alternatively. Do not attempt to free a bound cable under load by hand.
- Vehicle Stability: Apply blocks to wheels when on an incline.
- Battery: Ensure the battery is in good condition. Avoid contact with battery acid. Wear eye protection. Keep the engine running during winching to avoid damaging the battery.
- Winch Cable: Ensure the cable is in good condition and properly attached. Do not use if frayed. Do not move the vehicle to pull a load. Do not replace with a cable of lesser strength.
- Cable Break-in: Wind the cable onto the drum under a load of at least 500 lbs (230 kg) after initial use to prevent inner wraps from drawing into outer wraps. Perform a familiarization run.
- Cable Replacement: Apply Loc-tite (7471 Primer and 222 Thread-locker recommended) to the cable clamp thread and tighten without overtightening.
- Pulling Limits: Do not exceed the winch's pulling limits.
- Vehicle Assistance: Do NOT drive the vehicle to assist the winch, as this can overload the cable/winch and cause shock loads.
- Shock Loads: Avoid sudden application of force to the cable.
- Application: Winches are for vehicle and boat-mounted non-industrial applications only. Not for hoisting or lifting/transporting personnel.
Operating Procedure:
- Familiarization: Perform test runs to become familiar with the winch's sounds and operation.
- Vehicle Security: Secure the vehicle with the parking brake or wheel chocks.
- Cable Deployment: Pull out the desired length of cable, leaving at least 5 full wraps on the drum, and connect to an anchor point.
- Clutch Operation:
- Disengage: Move the clutch shifter tab to the "OUT" position for rapid uncoiling.
- Engage: Move the clutch shifter tab to the "IN" position for pulling.
- Pre-Operation Check: Recheck all cable rigging.
- Remote Control: Plug in the hand control. Operate from the driver's position for safety.
- Winching: Start the vehicle engine, select neutral, maintain idle speed. Operate the remote control switch (IN/OUT) until the vehicle is retrieved. Regularly check for even cable winding.
- Important Notes:
- Never winch with the vehicle in gear or park.
- Never wrap the cable around an object and hook onto itself.
- Keep hands, clothing, hair, and jewelry clear of the drum and cable.
- Never use a frayed, kinked, or damaged cable.
- Never stand near or in line with the cable under power.
- Do not leave the switch plugged in when not in use.
Electrical Connections:
- System Adequacy: Existing electrical system is adequate for self-recovery. A fully charged battery and proper connections are essential. Run the engine during winching.
- Control Box Wiring: The control box is pre-wired. Check connections for tightness, but do not overtighten.
- Ground Connection: Connect the long black cable from the motor's bottom terminal to the negative (-) battery terminal.
- Positive Connection: Connect the long red cable to the positive (+) battery terminal.
- Battery Condition: Keep the battery in good condition.
- Cable Routing: Ensure battery cables are not drawn tight across surfaces that could damage them.
- Corrosion: Clean all electrical connections, especially in the remote control switch and receptacle. Use silicone sealer in salty environments.
Maintenance Features
- Regular Use: It is highly recommended to use the winch regularly (once a month). Power the cable out 15m, free spool 5m, and then power back in. This keeps components in good working condition.
- Technical Assistance: Contact an authorized Rough Country Recovery Systems outlet for technical assistance.
Troubleshooting
- Motor does not turn on:
- Possible Cause: Switch Assembly not connected properly.
- Remedy: Insert Switch Assembly firmly.
- Possible Cause: Loose Battery Cable.
- Remedy: Tighten nuts on cable connectors.
- Possible Cause: Solenoid Malfunctioning.
- Remedy: Tap solenoid to free contact, applying 12 volts to coil terminal directly.
- Possible Cause: Defective Switch assembly.
- Remedy: Replace Switch Assembly.
- Possible Cause: Water has entered the motor.
- Remedy: Drain and dry. Run in short bursts without load until completely dry.
- Motor runs too hot:
- Possible Cause: Long period of operation.
- Remedy: Let winch cool down periodically.
- Motor runs too slowly or without normal power:
- Possible Cause: Battery depleted.
- Remedy: Recharge battery by running vehicle engine.
- Possible Cause: Insufficient current or voltage.
- Remedy: Clean, tighten or replace the connector.
- Motor runs but cable drum does not turn:
- Possible Cause: Clutch (Cam Ring) not engaged.
- Remedy: Push Cam Ring into IN position. If this doesn't work, a qualified technician needs to check and repair.
- Motor runs in one direction only:
- Possible Cause: Defective or stuck solenoid.
- Remedy: Tap solenoid to free contacts. Repair or replace solenoid.
- Possible Cause: Defective Switch Assembly.
- Remedy: Replace Switch Assembly.
- Mechanical Components: Two (2) year warranty from the original purchase date.
- Electrical Components: One (1) year warranty from the original purchase date.
- Coverage: Applies to the original purchaser with proof of purchase. Rough Country will repair, replace, or refund the purchase price of defective components.
- Exclusions: Does not cover finish, wire rope, damage from accident, abuse, misuse, collision, overloading, modification, misapplication, improper installation, or improper service. Void if the serial number is removed or defaced. Commercial, industrial, or hoisting applications void the warranty.
- Limitations: This is the only warranty. No other warranties, express or implied, including merchantability or fitness for a particular purpose, are provided. Rough Country is not liable for special, indirect, incidental, or consequential damages.
- Product Design: Rough Country reserves the right to change product design without notice and is not obligated to upgrade previously manufactured products.