6
No Diving or Jumping. Observe all Safety Rules.
3-6
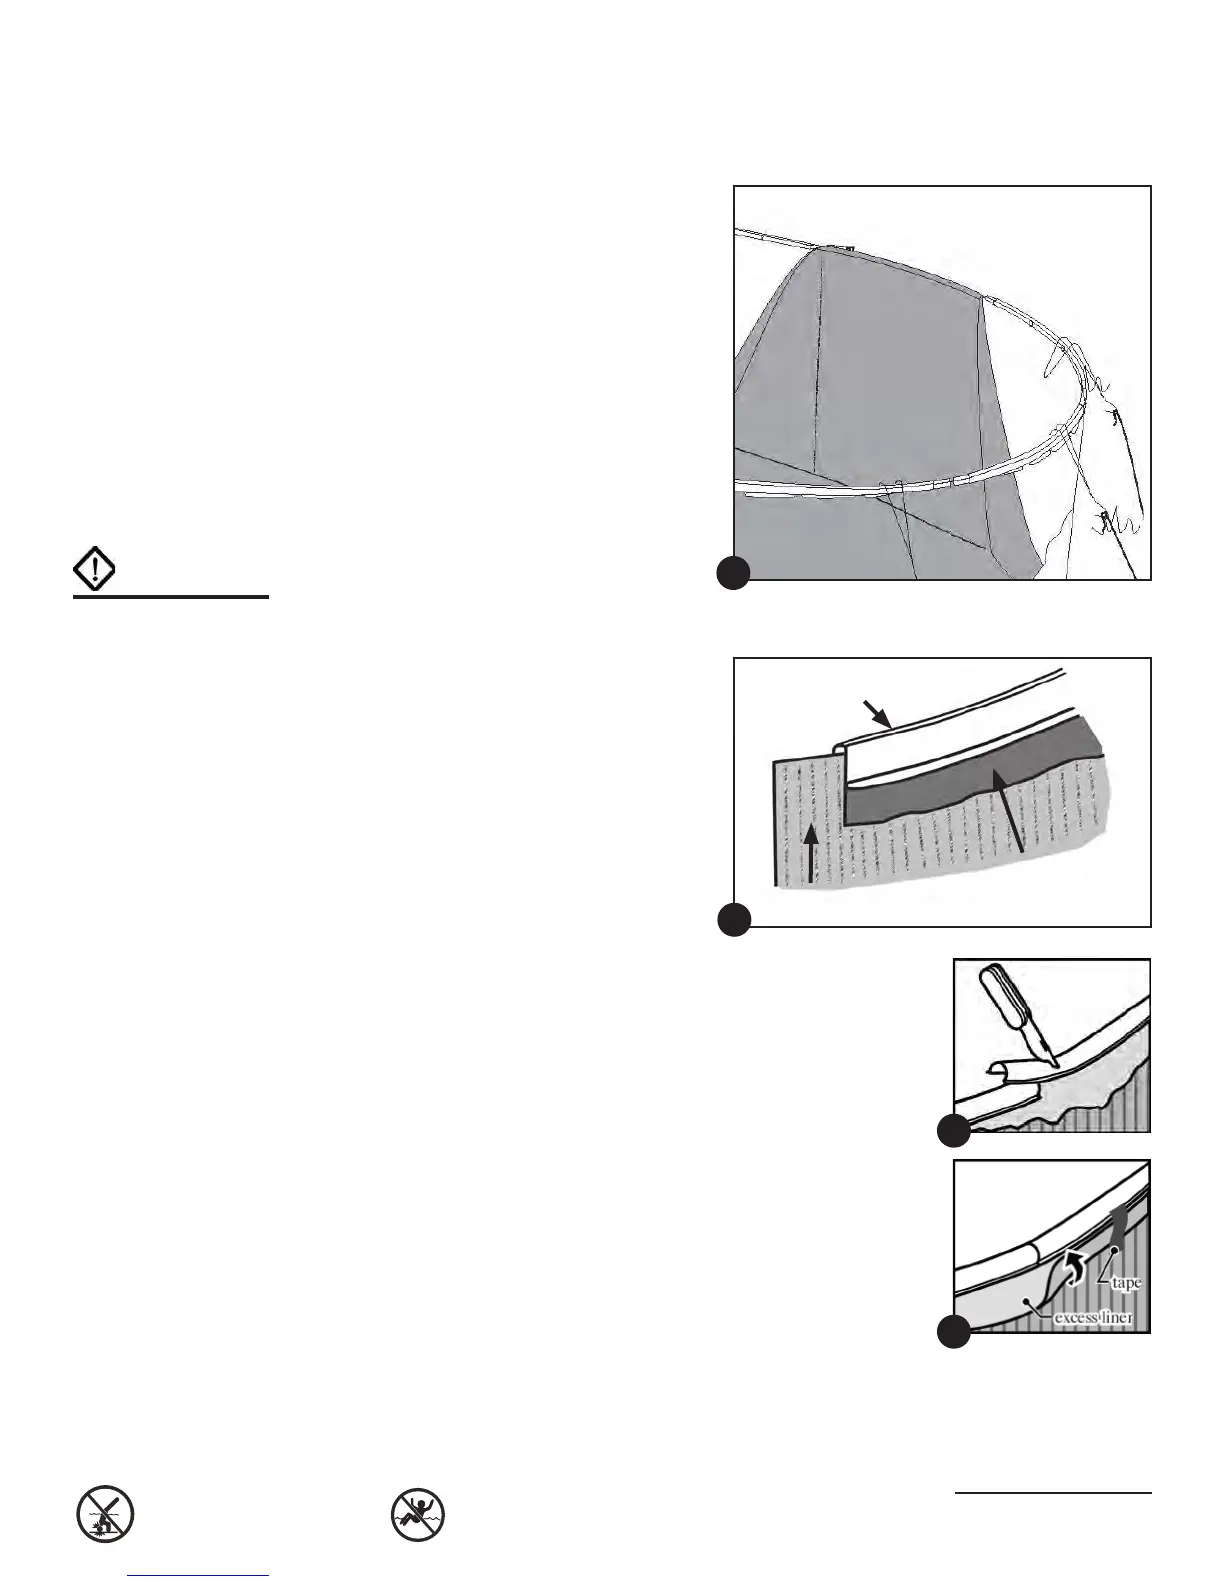
b. As you put the liner over the wall
you can secure it by using the plas-
tic coping strips to keep it in place.
If you end up with excess material,
continue around the pool, pulling ex-
cess liner evenly, and distribute over
the wall until the excess is gone.
c. Fasten the liner to the top of the wall
with plastic coping. Let the liner
hang slack for now. Do not pull the
liner tight.
NOTE: Some liners may t very tightly,
it is better to install uprights, top
plate and top ledge before going
onto next step. See Section 4.
d. Turn the vacuum cleaner on and
push the liner outward with your
feet to iron out any wrinkles. Once
nished, turn off vacuum cleaner.
e. Start lling the pool with water. As
the pool lls, work out all the wrin-
kles and smooth the liner to the wall.
Remove the plastic coping around
the top edge of the wall one piece
at a time and adjust the liner. Keep
smoothing out the wrinkles.
f. After all the wrinkles in the liner are
removed, trim any extra length of
plastic coping so there is no overlap.
g. Roll up any excess liner hanging
below the plastic coping and tape it
in place near the top of the pool wall.
Important: Do not trim off the excess
liner.
Plastic Coping
Outside Pool Wall
Liner Overlap
17
18
Important:
Do not trim off the excess
liner. (If the liner ever
needs to be removed,
trimming the liner will
make re-installation very
difcult.) Instead, roll up
any excess liner and tape it
in place near the top of the
pool wall.
19
20
 Loading...