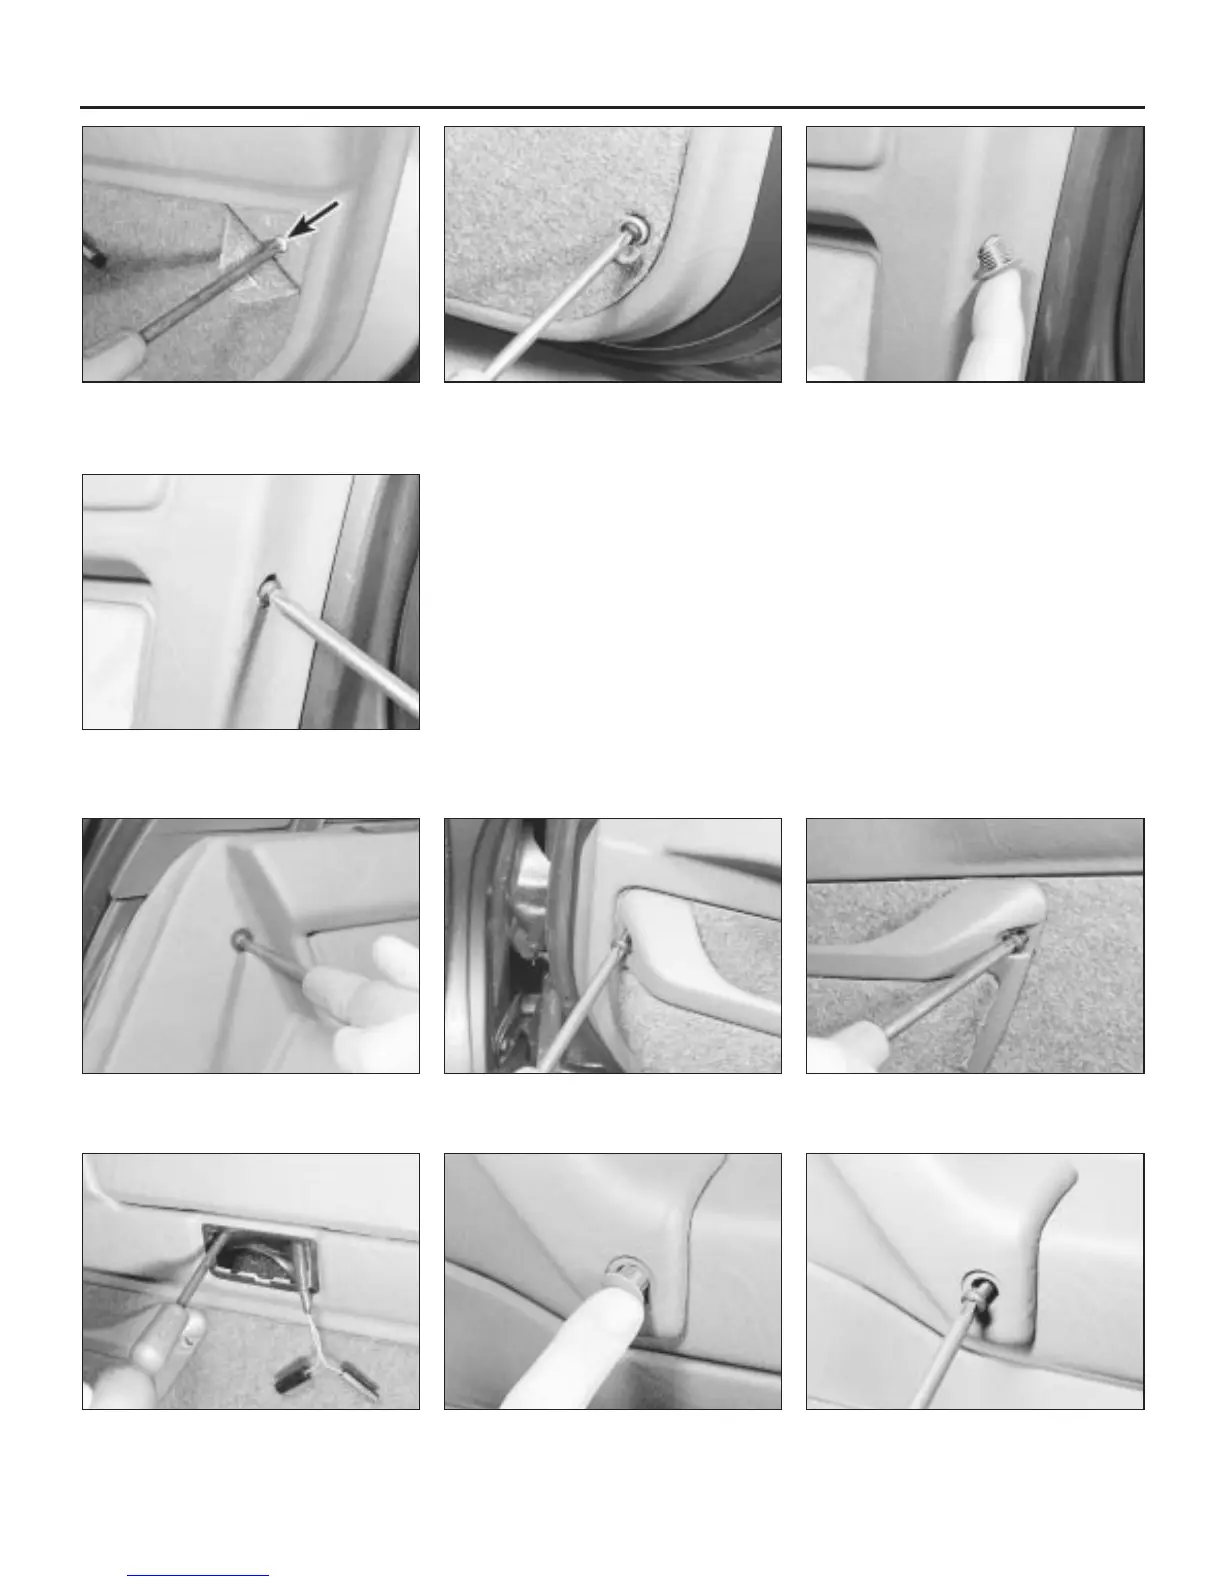
6 Ease back the padded trim at the bottom of
the panel, or lift off the plastic cap, to expose
the retaining screw, then undo the screw (see
illustrations).
7 Pull out the blanking plug on the rear side of
the panel, and undo the recessed screw
behind (see illustrations).
8 Undo the screw at the upper front corner of
the panel (see illustration).
9 Undo the screw at each end of the storage
bin (see illustrations).
10 Working through the blanking plate or
interior light aperture, undo the screw in the
recess (see illustration).
11 Where fitted, undo the screw from the
bottom of the door pull finger grip, and
remove the finger grip from the panel.
12 If the panel incorporates a moulded
door pull, prise out the blanking plug and
undo the recessed screw behind (see
illustrations).
13 Where applicable, release the rubber boot
over the door mirror adjustment stalk, release
the stalk retaining clips and push the stalk
through to the inside of the panel (see
illustrations).
14 Using a flat tool or your fingers, release
the eight studs securing the panel to the door
by prising the panel out, or sharply pulling it
out, in the vicinity of each stud. Lift the panel
11•10 Bodywork and fittings
21.12b . . . and undo the recessed screw
behind
21.12a If the panel has a moulded door
pull, prise out the blanking plug . . .
21.10 Undo the screw behind the blanking
plate or interior light
21.9b . . . and rear screw21.9a Undo the storage bin front screw . . .21.8 Undo the screw at the front corner
21.7b . . . and undo the recessed rear side
screw
21.7a Pull out the blanking plug . . .21.6b . . . or behind the plastic cap21.6a Undo the bottom screw behind the
padded trim . . .
1380 Rover 800 Series Remake



 To Next Page