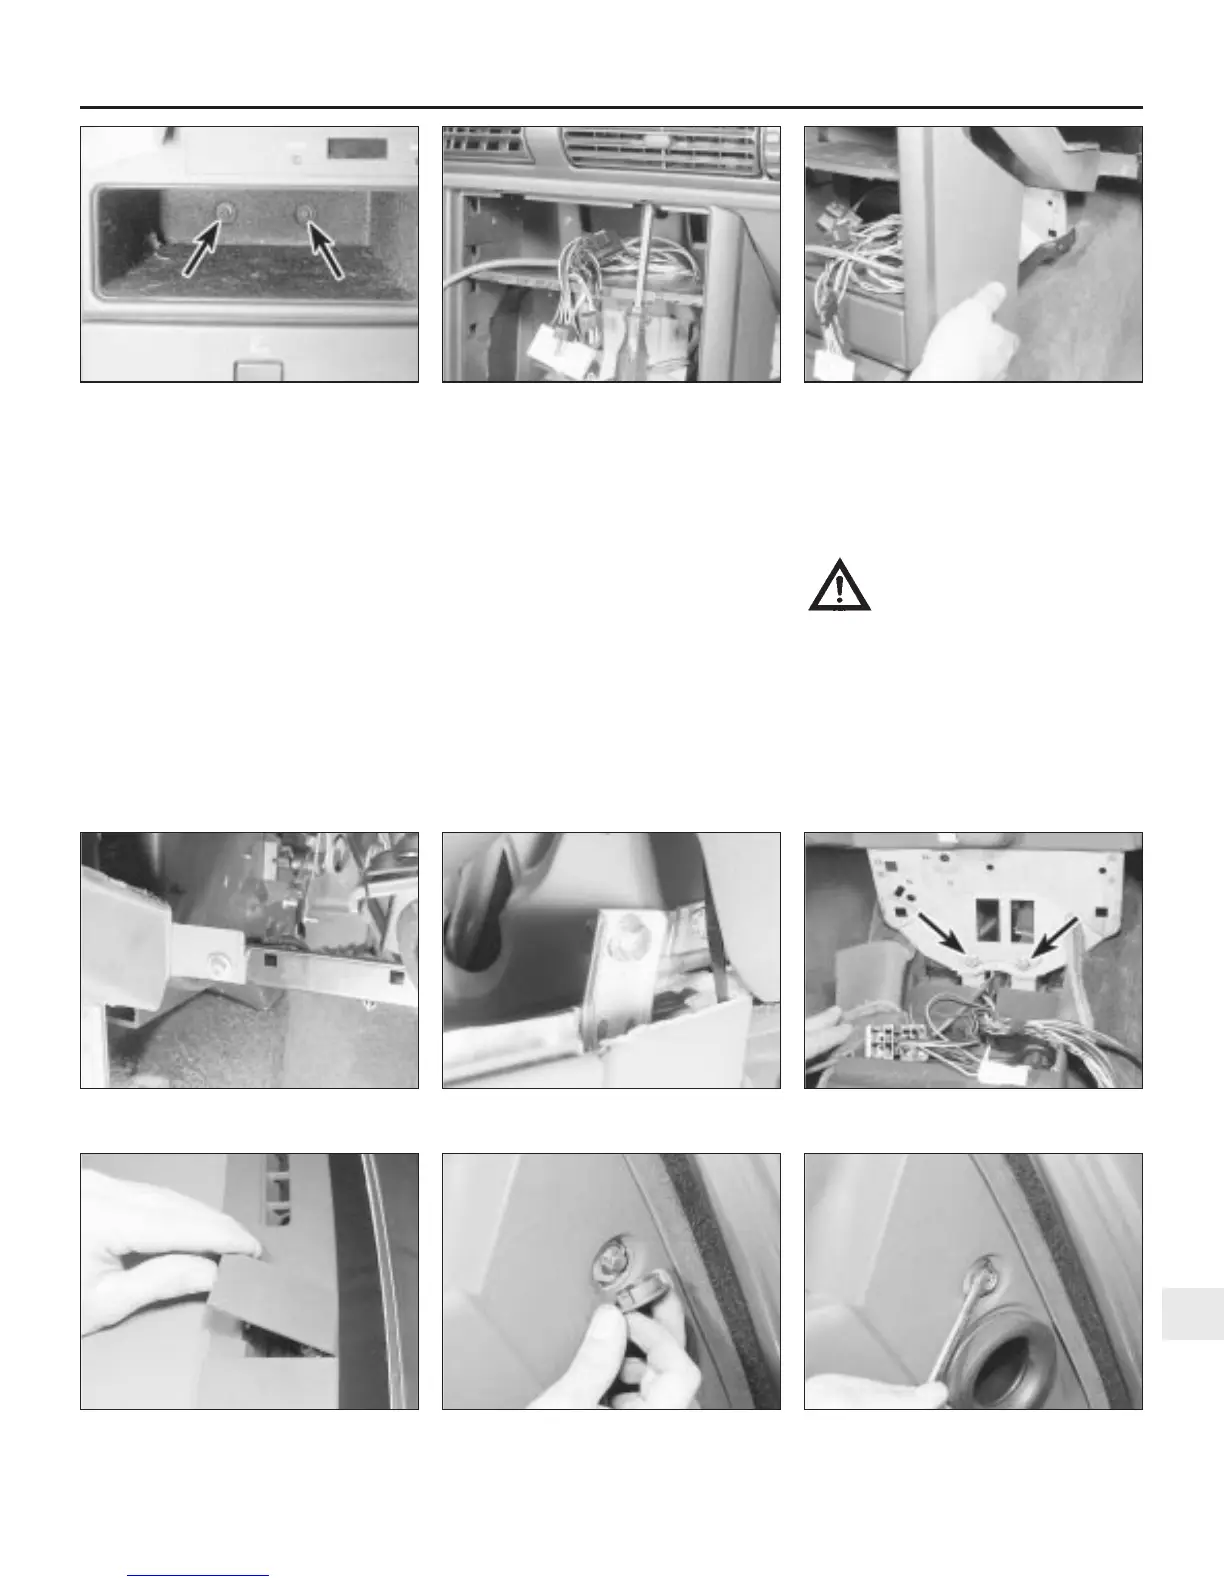
9 Undo the two screws at the base of the
oddments tray below the clock (see
illustration).
10 Withdraw the clock and oddments tray
housing from the lower facia, and disconnect
the clock wiring multiplug.
11 Undo the two upper screws securing the
lower facia, and withdraw the lower facia from
its location (see illustrations).
12 Disconnect the wiring multiplug at the rear
and remove the lower facia from the car.
13 Undo the screw at each end of the cross-
brace under the facia on the driver’s side (see
illustration).
14 Undo the bolt at each lower end of the
facia (see illustration).
15 Undo the two bolts on the front support
plate at the base of the facia (see
illustration).
16 Lift up the cover plate on the facia top, at
the centre below the windscreen, and undo
the bolt below the plate (see illustration).
17 Prise out the trim caps at each side of the
facia, adjacent to the door apertures and
undo the bolt behind (see illustrations).
18 With the help of an assistant, lift the facia
from its location and withdraw it slightly
forward.
19 Disconnect the wiring multiplug at the
inertia switch, and at the fusebox, and
disconnect the two main loom multiplugs.
20 With all the wiring disconnected, remove
the facia from the car.
Refitting
21 Refitting is a reversal of removal. When
connecting the heater cables, adjust the
position of the outer cables in their retaining
clips so as to give full travel of the heater
levers, consistent with full travel of the control
levers.
1992 model year onwards
Warning: On vehicles fitted with
a passenger’s side air bag, seek
the advice of a Rover dealer
concerning safety implications
before proceeding.
Removal
22 Where fitted, have the passenger side air-
bag module removed by a Rover dealer, or
seek his advise concerning the feasibility of
the following operations before proceeding.
23 Remove the steering wheel and steering
column as described in Chapter 10.
24 Remove the instrument panel, the radio
Bodywork and fittings 11•21
48.11b . . . and remove the lower facia48.11a Undo the lower facia upper
screws . . .
48.9 Undo the screws in the oddments
tray
48.17b . . . and undo the bolts in the door
apertures
48.17a Prise out the trim caps . . .48.16 Lift up the centre cover plate and
undo the bolt below the plate
48.15 Undo the front support plate bolts
(arrowed)
48.14 Undo the bolt at the facia lower end48.13 Undo the cross-brace screws
11
1380 Rover 800 Series Remake


 To Next Page
 Loading...
