P
O
R
Q
L
J
K
48
30
NK
NU
32
31
UN
NG
49
33
PN
P
50
PN
B
M
B
B
NN
N
N
B
NP
N
NP
WR
N
WR
Y
U
V
W
S
T
X
H
G
25
26
NS
NW
57
23
47
24
27
28
51
29
NS
NY
NO
NR
1
N
I
N
N
N
P
34
PU
PB
35
M
N
37
UG
38
UK
UW
36
39
NW
NS
46
BG
GY
GY
16
BR
BW
RS
B
2
GY
44
45
US
U
GY
N
NW
NW
Battery
Starter motor/
solenoid
Starter solenoid
relay
Auto. gearbox
inhibitor switch
Manifold heater
relay
Headlight
main/dip
relay
Horn
relay
Headlight
relay
Radiator
cooling
fan relay
Fusebox
1
2
3
NO
SU
SRNY
PN
P
PO
31
2
3
4
9
4
5
6
NG
8
7
RB
14
15
7
8
6
13
R
SG
20
21
9
10
19
S
RO
SO
LGS
52
11
LGO
10
11
12
16
17
18
5
12
13
LGY
14
GY
15
16
LG
LGN
17
LGW
18
19
G
22
WR
WR
24
WR
N
57
N
Fusebox
Ignition/
start
switch
BA CDEFGHJKLM
2
1
3
4
5
6
7
8
BA CDEFGHJKLM
2
1
3
4
5
6
7
8
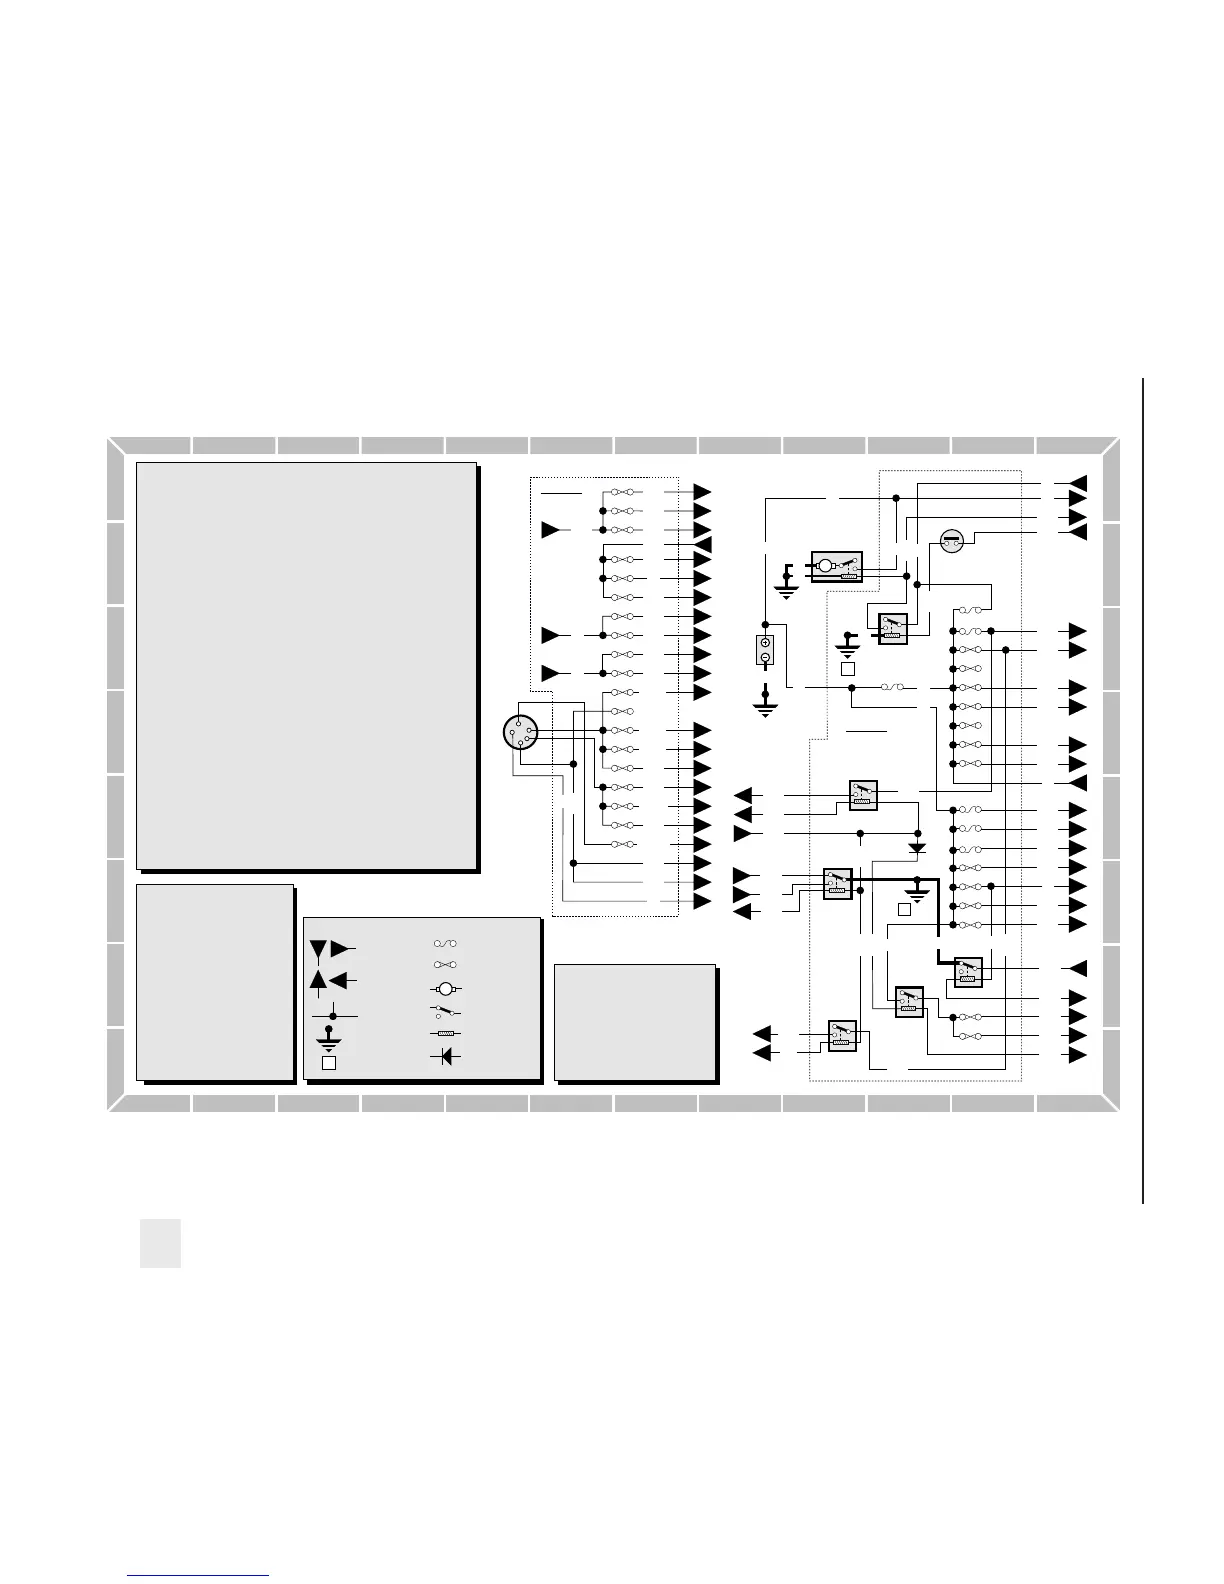
Diagram 1: Main wiring diagram (typical) - single-point fuel injection models
H29042/A
Connection details
No. Diagram/grid ref.
1 1/M5,4/A1
2 1/H2,4/E4,4/M8
3 1/H2,3/D3,3/K3,4/C6,4/L1,10/C1
4 1/H2,4/A4,10/K1
5 1/H5,4/G4,4/L1,10/C1
6 1/F2,2/B6
7 1/H1
8 1/H1,2/A1
9 1/H2,2/F1
10 1/H4,3/J6,3/L6
11 1/H4,3/G6,3/J2,4/C6,4/J4,4/K8,10/K7
12 1/H4,4/C3,4/F6,4/G4
13 1/F3,3/F4
14 1/H3,3/C6,3/H3,4/E6
15 1/H3,2/B1,3/D6,4/D4,4/D6,4/E6,
4/K1,4/L4,9/F1
16 1/H5,2/B6,3/C1,3/H4,9/C5
17 1/H5,2/K4
18 1/H5,2/B6,3/E1,9/J1
19 1/F3,2/C6
20 1/H3,2/K1,3/E1
21 1/H3,2/H1
22 1/H6,4/J1
23 1/M1,4/C3
24 1/H6,1/M2
25 1/M3,10/B1
26 1/M3,9/B7
27 1/M3,2/E5
28 1/M4,3/C1
29 1/M4,9/G1
30 1/M5,2/B6
31 1/H2,1/M5,3/G3
32 1/M6,3/J3
33 1/M6,3/E6,3/J3
34 1/M7,3/H3
35 1/M7,3/E5
36 1/M8,3/F6
37 1/M7,2/E5,3/A5,4/M6
38 1/M8,3/C5
No. Diagram/grid ref.
39 1/H5,3/L6
41 1/H6,3/A3
42 1/H6,3/A3,4/M4
43 1/H6,3/H4
44 1/H8,2/D6
45 1/H8,2/D6
46 1/H5,3/L6
47 1/M1,3/J6
48 1/M5,10/J7
49 1/M6,10/J7
50 1/M6,10/L7
51 1/M4,9/C5
52 1/H4,10/L7
53 3/H6,4/K4
54 4/A1,4/J4,10/J4
55 4/B1,4/G1
56 4/B1,4/J1,4/J6
57 1/H6,1/M1
58 4/J1,9/D5
59 4/H1,4/H6
60 3/B1,4/L1,10/B1
61 3/D1,9/F1
62 3/D1,9/E1
63 4/K4,10/K7
64 3/H1,4/L4
65 3/L1,4/E6,4/M4
66 3/M1,4/D6,4/M4
67 4/J1,4/L4
68 3/H6,4/H7
69 4/F4,4/K8
70 4/F4,4/K8
71 4/H6,4/M6
72 3/F6,4/D6,10/K7
73 3/K4,4/D6
75 3/B3,10/D1
76 4/F6,4/M8
77 2/B1,2/H4,2/L4
41
42
43
2
1 Battery
2 Ignition switch
3 Starter motor
4 Distribution block
5 Alternator
6 No charge warning light
7 Fusebox
8 Spark plugs
9 Ignition amplifier
10 Distributor
11 Ignition coil
12 Diagnostic socket
13 Tachometer
14 Ignition pulse amplifier
15 Cooling fan switch
16 Cooling fan motor
6
Key to symbols
Earth and
location
8
8
8
Connection
point input
Connection
point output
8
Sealed joint
Fusible link
Fuse
M Motor/pump
Switch
contacts
Diode
Solenoid
1 Battery
2 Ignition switch
3 Starter motor
4 Distribution block
5 Alternator
6 No charge warning light
7 Fusebox
8 Spark plugs
9 Ignition amplifier
10 Distributor
11 Ignition coil
12 Diagnostic socket
13 Tachometer
14 Ignition pulse amplifier
15 Cooling fan switch
16 Cooling fan motor
Earth point locations
1 Behind RH headlight
2 Behind LH headlight
3 Behind facia
4 Steering column bracket
5 Base of LH 'A' pillar
6 Base of RH 'A' pillar
7 Base of LH 'B' pillar
8 Base of RH 'B' pillar
9 Beneath rear parcel shelf
10Beneath LH rear light
11Beneath RH rear light
12LH side panel in luggage
compartment beneath carpet
1 Battery
2 Ignition switch
3 Starter motor
4 Distribution block
5 Alternator
6 No charge warning light
7 Fusebox
8 Spark plugs
9 Ignition amplifier
10 Distributor
11 Ignition coil
12 Diagnostic socket
13 Tachometer
14 Ignition pulse amplifier
15 Cooling fan switch
16 Cooling fan motor
B Black P Purple
G Green R Red
K Pink S Slate
LG Light green U Blue
N Brown W White
O Orange Y Yellow
Wire colours


 To Next Page
 Loading...
