0•8 Roadside Repairs
1380 Rover 800 Series Remake
Towing
Towing eyes are fitted to the front and rear
of the vehicle for attachment of a tow rope.
The front towing eye is situated under the
centre of the front bumper and the rear towing
eye is located under the centre of the rear
bumper behind a detachable trim plate.
Always turn the ignition key to position II to
ensure that the steering is unlocked and that
the various switches (indicators and lights) are
functional. It should also be noted that the
brake servo and power-assisted steering will
not be operating with the engine switched off
and therefore an allowance will need to be
made for reduced braking efficiency and
increased steering effort.
Before being towed, release the handbrake
and place the gear lever in neutral. Do not tow
at a speed greater than 30 mph. On no
account may the car be towed with the front
wheels on the ground if the transmission is
faulty, if the transmission oil or fluid is low or if
the towing distance is greater than 30 miles.
Wheel changing
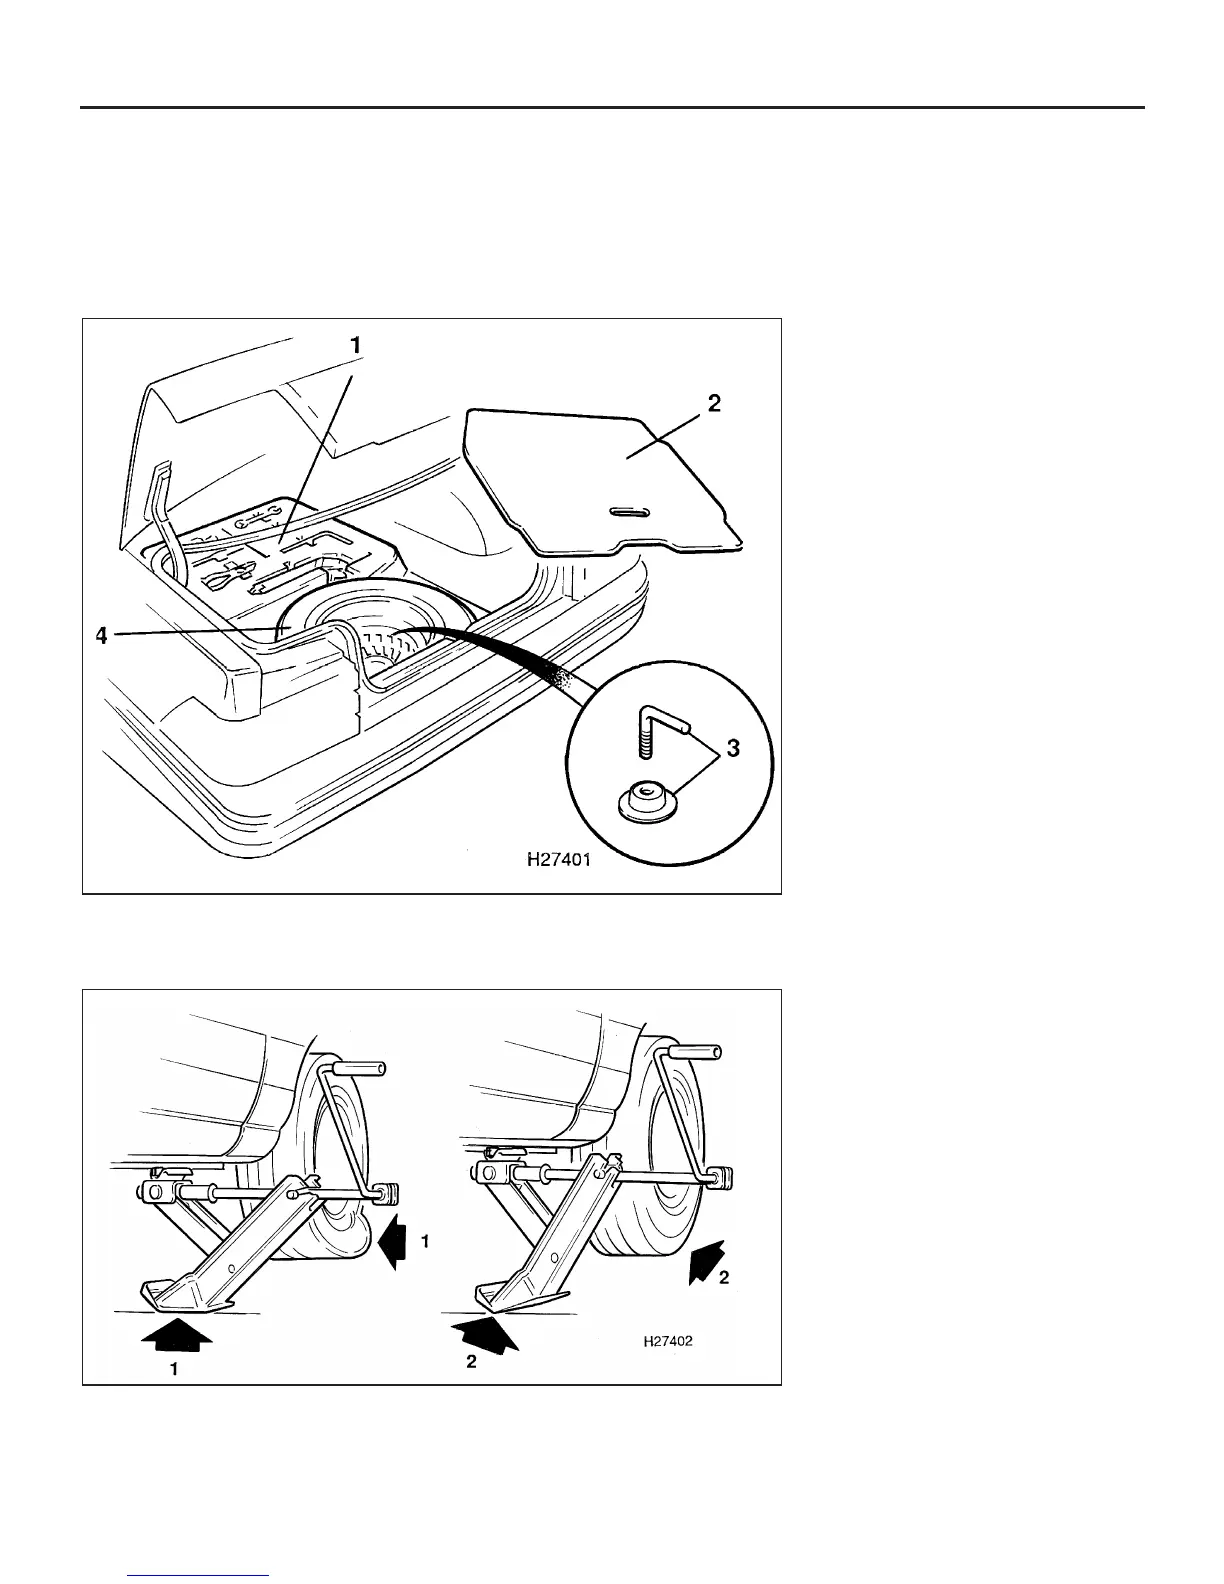
To change a roadwheel, first remove the
spare wheel and jack which are located under
the luggage compartment floor (see
illustration). Firmly apply the handbrake and
engage first gear on manual transmission
models or PARK on automatic transmission
models. Place chocks at the front and rear of
the wheel diagonally opposite the one to be
changed.
Remove the wheel trim and slacken the
wheel nuts with the tools provided in the tool
kit. Position the jack head in the reinforced
jacking point, at the base of the sill nearest to
the wheel to be changed. Raise the jack to just
take the weight of the car. If the tyre is flat,
position the base of the jack so that it is flat on
the ground. If the tyre is not flat, position the
jack so that the base elbow is resting on the
ground and the base is just clear (see
illustration). Raise the vehicle until the wheel
is just clear of the ground, then remove the
wheel nuts and the wheel. Fit the spare wheel
and screw on the wheel nuts. Lower the jack
until the tyre is just touching the ground, and
tighten the wheel nuts moderately tight. Now
lower the jack fully and tighten the wheel nuts
securely in a diagonal sequence. Refit the
wheel trim, then remove the jack and stow it
together with the wheel and tools in the
luggage compartment. Remember to check
the tightness of the wheel nuts using a torque
wrench at the earliest opportunity.
Spare wheel and tool locations
1 Tool kit
2 Floor panel
3 Spare wheel clamp
4 Spare wheel
Using the vehicle tool kit jack
1 Jack base positioned flat on the ground (deflated tyre)
2 Jack positioned with base elbow on the ground, and base just clear (inflated tyre)
 Loading...