12 13
CLICK
CLICK CLICK
EN Not included / FR Non inclus /
ES No incluido
57 INCH
MIN.
x2
x2
x4
12.60 14.60 15.60
Eco Max
Boost
Eco Eco+ Max
Boost
Eco Eco+ Max
Boost
(Up to/
Jusqu’à/
Hasta)
45
min
23
min
05
min
70
min
29
min
11
min
05
min
80
min
34
min
12
min
05
min
35
min
20
min
05
min
63
min
28
min
10
min
05
min
67
min
32
min
12
min
05
min
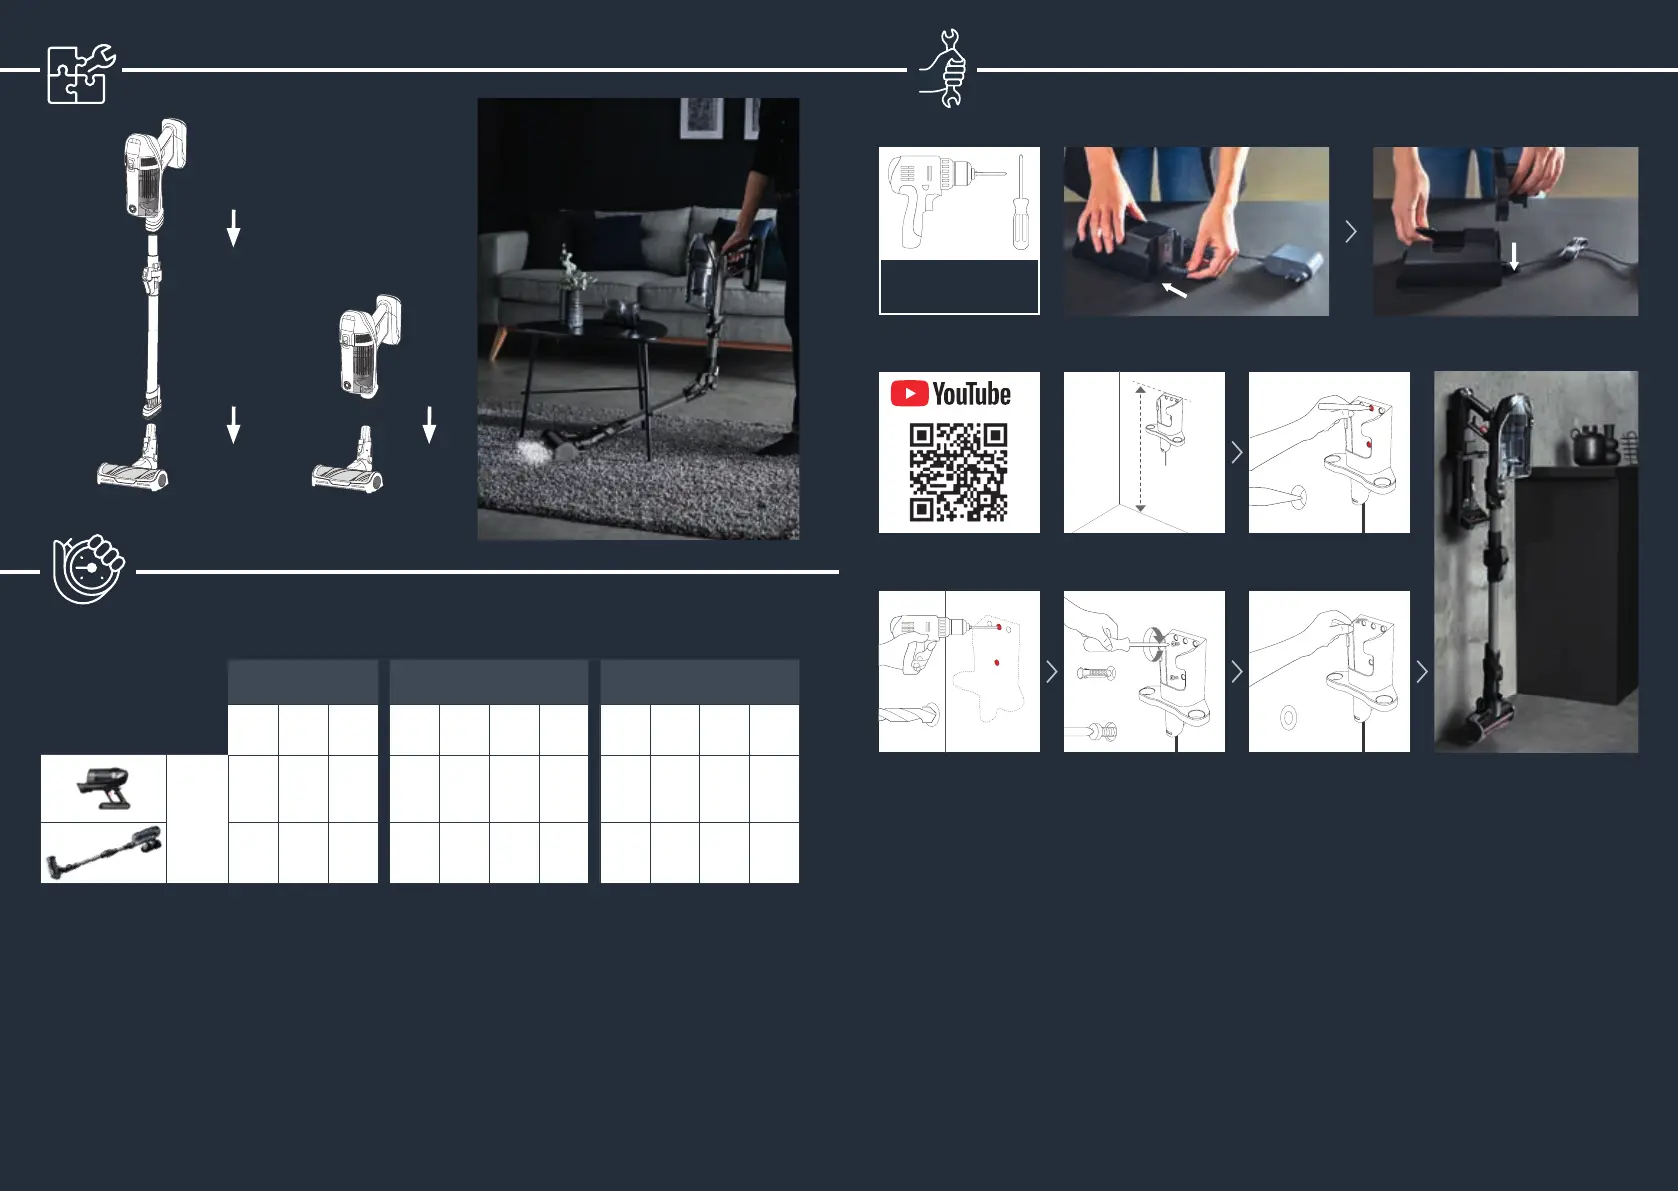
EN : Install the wall mount as
shown using the two screws and
anchors provided. Mark the hole
positions. Drill the holes with a
3/8”drill bit to a depth of min. 2’’.
Insert the anchors into the holes
and then secure the wall mount
with the two screws into the
anchors. Note: The anchors may
not be needed if mounting directly
to an underlying stud or hard wood
surface.
FR : Installez la base de charge
comme indiqué à l’aide des deux
vis et chevilles fournies. Marquez
les positions des trous. Percez les
trous à l’aide d’un foret de 3/8” à
une profondeur d’au moins 2’’.
Insérez les chevilles dans les trous,
puis xez le support mural à l’aide
des deux vis dans les chevilles.
Remarque : Les chevilles ne seront
peut-être pas nécessaires si la base
est montée directement sur un
montant sous-jacent ou une
surface en bois dur.
ES: Instale el soporte de pared como
se muestra utilizando los dos
tornillos y anclajes suministrados.
Marque las posiciones de los
oricios. Taladre los agujeros con
una broca de 3/8” a una profundidad
mínima de 2’’. Inserte los anclajes
en los oricios y je el soporte de
pared con los dos tornillos en los
anclajes. Nota: Los anclajes pueden
no ser necesarios si el montaje se
realiza directamente sobre un
montante subyacente o una
supercie de madera dura.




 To Next Page