This document is an owner's manual for RST suspension forks, covering various models including KILLAH, STITCH, STORM, ROGUE, RENEGADE, TITAN series, CHAMP series, F1RST series, AERIAL series, PULSE series, SPACE, VOGUE, VIVAir, and GUIDE. It provides essential information regarding the function, usage, and maintenance of these bicycle suspension components.
Function Description
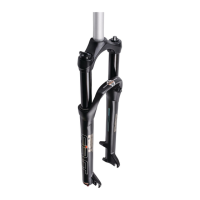
RST suspension forks are designed to enhance the performance and comfort of bicycles by absorbing shocks and vibrations from uneven terrain. They are fully assembled and ready for installation. The manual details several key functional features:
- Compression Adjuster (Crown-Mounted): For forks equipped with a crown-mounted compression adjuster, rotating it counterclockwise changes the amount of compression damping, leading to a lockout state.
- Remote Lever Adjuster: For forks with a remote lever adjuster, pressing the lever down changes the amount of compression damping to the lockout. More detailed installation and troubleshooting tips for the TRL (Tiny Remote Lockout) system are available on the RST website.
- Rebound Adjustment (RA): This hydraulic damping system allows for external rebound adjustment. Rotating the rebound adjuster as indicated on the sticker adjusts the rebound speed, making it faster or slower. Clockwise rotation increases rebound damping, while counterclockwise rotation decreases it. A minimum amount of fork movement (0-15mm) may occur in the lockout position, which is normal.
- Tiny Remote Lockout Assembly (TRL): The TRL lever is a small, lightweight, multi-setting remote lever. Its interchangeable release button allows the rider to choose the optimal position on either side of the handlebar.
- Air Spring System (AIR): The RST air spring system utilizes a positive air chamber and a negative coil spring to achieve a lightweight design and facilitate easy air pressure setup. This built-in system can be adjusted to suit different rider needs and preferences.
- Remote Lockout (RL): This hydraulic system provides an easy way to engage the lockout function directly from the handlebar.
- Hydraulic Lock-out (TNL): This system allows for gradual adjustment of the fork's compression from fast to slow using a lever, eventually reaching a full lockout position.
- Mechanical Lock-out (ML): This feature enables the fork to be locked out easily and rapidly at any point in its travel.
Usage Features
The manual emphasizes proper installation and adjustment for safe and optimal use:
- Installation: It is crucial that an RST fork is installed correctly by a qualified bicycle mechanic. Improper installation can lead to serious or fatal injuries. The steerer tube may need to be cut to length to fit the bicycle's head tube, following the stem manufacturer's instructions for sufficient length to install the stem. The headset crown race, bearings, stem, handlebars, and brakes must be installed and torqued to manufacturer specifications. Front wheel installation requires proper seating in the dropout counter bores and tightening the quick release. Tire clearance must be checked by compressing the fork completely to ensure a minimum of 1/4” (6.4mm) clearance between the tire and the crown.
- Break-in Period: New forks are designed to break in during the first approximately 20 hours of riding. Initially, the fork may feel tight and sluggish, but it will become smoother and more responsive to bumps after the break-in period.
- 20mm Front Hub Installation: Instructions are provided for installing a 20mm front hub, including sliding the hub into the legs, applying grease or anti-seize to the axle, sliding the axle into the fork/hub from the disc side, gently turning the axle clockwise to connect to threads, tightening the axle to 12-15Nm, screwing in the lock bolt, and fully tightening it. Disc brake operation must be checked.
- 20mm Thru Axle Disassembly: To disassemble a 20mm thru axle, an 8mm Allen key is used to loosen the bolt in the right leg and then the 20mm thru axle itself.
- QR Type Front Hub Installation: This involves identifying the adaptor and parts, carefully installing grub-screws (3 turns), removing them, lightly greasing the adaptors, installing the right-hand adaptor with "location dimples" aligned with the grub screw hole, installing and gently tightening the grub screw until it contacts the adaptor, backing out the grub screw 2 full turns, and gently turning the adaptor to ensure proper seating. The grub screw is then fully tightened to 3Nm. This process is repeated for the left-hand adaptor.
- 15QR (15mm Aluminum Quickly Release) Axle Installation: Instructions include sliding the hub into the legs, applying grease or anti-seize to the axle, sliding the axle into the fork/hub from the disc side, gently turning the axle clockwise to connect to threads, turning the 15QR axle to the fixed position, tightening it to 15Nm by pressing the lever. If lever position adjustment is needed, the lever is pulled open, the grub screw removed, and the lock bolt adjusted with the 15QR axle to the proper position. The grub screw is then reinstalled into the "location dimples" of the lock bolt, and the 15QR axle tightened to 15Nm. Disc brake operation must be checked.
- Measuring and Setting SAG: SAG is the amount of suspension fork travel when the rider sits on the bicycle without applying force. It helps maintain contact and traction. The zip-tie method involves placing a zip tie against the wiper seal, sitting on the bike in a normal riding position, stepping off, and measuring the distance between the zip tie and wiper seal. RST recommends a SAG value between 15% and 25% of maximum travel. If SAG is shorter than 15%, the fork is too stiff (decrease air pressure); if longer than 25%, the fork is too soft (increase air pressure).
- Increasing Air Pressure: To adjust air pressure, unscrew the valve cap on the left leg. The air fitting is a Schrader valve type. Use an RST air pump to pressurize the fork to the desired level. When removing the pump, some air loss is normal as it escapes from the pump, not the fork. To decrease pressure, use the RST air pump for better control. Air pressure should only be adjusted with the fork in an upright position, as all air chambers contain a small amount of oil. If the Schrader valve is manually depressed, a small amount of oil mist may appear, so a shop towel should be used to cover the valve.
- Safety Warnings: The manual includes several critical safety warnings. Never remove the steerer tube or stanchions from the crown, as they are press-fit and cannot be removed or changed without permanently damaging the crown and rendering it unsafe. Do not attempt to thread a thread-less steerer tube, as it will weaken it and create an unsafe condition. Any alteration or modification to the fork is unsafe and voids the warranty. Do not use an RST fork if any parts are broken, bent, cracked, or suspected of damage. Always inspect the fork before every ride for wear and damage, paying particular attention to the crown, stanchions, sliders, dropouts, and brace for any signs of cracks, bending, or damage. Changing suspension settings can alter handling and braking characteristics, so adjustments should be made cautiously, followed by a test ride in a safe environment.
Maintenance Features
Proper care and maintenance are crucial for the longevity and optimum performance of RST products. Failing to perform routine maintenance can lead to decreased performance, premature deterioration, product failure, and void the warranty.
- Scheduled Maintenance:
- Before Every Ride: Ensure quick release skewers and thru axles are properly adjusted and tight. Wipe stanchions and outer legs clean, and check the entire fork for obvious damage. Check headset for proper adjustment. Ensure front brake cable is properly routed and check brake adjustment. Check top caps, brake posts, and shaft bolt for proper torque. Pay attention to ensure steerer and stanchion tubes remain parallel.
- Service Intervals: Whenever fork performance diminishes or a service interval is reached, perform maintenance procedures.
- Performance Maintenance: Disassemble the fork and thoroughly clean grease and residue from all parts. Inspect all parts for damage (cracks, abrasions, wear) and replace any damaged or excessively worn parts immediately. Do not use the product until damaged parts are replaced. Apply a liberal amount of approved grease to the upper and lower bushing, stanchion, valve assembly, and wipers. Fill the wiper pocket with a generous amount of grease. Do not use lithium grease, as it can damage bushing material and seals.
- Normal Wear and Tear Parts and Replacement Intervals:
- Dust seal: Replace every 6 months (normal conditions) or 3 months (severe conditions).
- Air sealing O-ring: Replace every 1 year (normal conditions) or 4 months (severe conditions).
- Rubber moving parts: Replace every 1 year (normal conditions) or 4 months (severe conditions).
- Rear shock mounting hardware and main seal: Replace every 1 year (normal conditions) or 4 months (severe conditions).
- Remote lockout cable: Replace every 1 year (normal conditions) or 3 months (severe conditions).
- Bushing: Replace every 1 year (normal conditions) or 4 months (severe conditions).
- Stanchion (upper tube): Identified as a wear part.
- Pivot: Identified as a wear part.
- Stripped threads/bolt: Identified as a wear part.
- Lubricant-grease: Replace every 6 months (normal conditions) or 3 months (severe conditions).
- Bushing Replacement: If excessive play is found between the stanchion and outer leg, bushings need replacement. This requires special tools and should be done by a qualified mechanic, as improper installation is dangerous.
- Annual Inspection: All forks that have been in service for 5 years or more should be inspected and serviced annually if they are to remain in use.
- Lubrication: Regular lubrication with a suspension-approved grease is recommended for optimum performance. Maintenance manual information is available on the RST website.
- Warranty: RST products are warranted against defects in materials and workmanship for two years from the date of original purchase. The warranty does not cover modifications, improper installation, abuse, misuse, neglect, stunt riding, ramp jumping, or normal wear and tear. Warranty claims must be made through an authorized RST dealer or service center. RST reserves the right to repair or replace defective products.