EasyManua.ls Logo

RTA Techni Mobili RTA-3806 User Manual

RTA Techni Mobili RTA-3806
14 pages
To Next Page IconTo Next Page
Page #1 background imageLoading...
Page #1 background image
MODEL RTA - 3806MODEL RTA - 3806
IMPORTANT: Surfaces must be cleaned with a
solution of a smooth soap and water, then cleared
with a dry towel. Do not use solvents over surfaces
or structural tubes.
IMPORTANT: Surfaces must be cleaned with a
solution of a smooth soap and water, then cleared
with a dry towel. Do not use solvents over surfaces
or structural tubes.
ASSEMBLY INSTRUCTIONASSEMBLY INSTRUCTION
MULTI-FUNCTIONAL COMPUTER TABLEMULTI-FUNCTIONAL COMPUTER TABLE
Thanks for purchasing one of our products, please read carefully the assembly
instructions before the installation (Attention: Do not tighten the screws before
all screws are in place).
Thanks for purchasing one of our products, please read carefully the assembly
instructions before the installation (Attention: Do not tighten the screws before
all screws are in place).
EnglishEnglish
MODEL RTA-3806MODEL RTA-3806
A05 100705
Question and Answer IconNeed help?

Do you have a question about the RTA Techni Mobili RTA-3806 and is the answer not in the manual?

RTA Techni Mobili RTA-3806 Specifications

General IconGeneral
Product NameRTA Techni Mobili RTA-3806
CategoryIndoor Furnishing
TypeComputer Desk
StyleModern
ShapeRectangular
MaterialEngineered Wood
ColorEspresso
Assembly RequiredYes
Featurescable management

Summary

Assembly Instructions Introduction

Important Cleaning and Safety Notes

Guidance on cleaning surfaces and avoiding solvents for safe assembly.

Product Specifications and Capacities

Detailed Product Dimensions

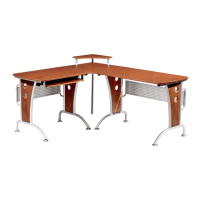
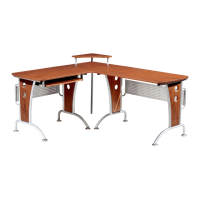
Provides the exact width, depth, and height measurements of the computer table.

Weight Load Limits

Specifies the maximum weight each surface of the table can safely support.

Parts and Hardware Identification

List of All Components

Visual and textual identification of all parts and hardware required for assembly.

Base Structure Assembly

Connecting Main Structures and Side Panels

Assembling the primary leg frames using screws and studs.

Attaching Horizontal and Back Panels

Connecting horizontal tubes and back panels to the base structure.

Installing Sliders and Intermediate Panels

Attaching Connectors and Slider's Bases

Fixing connectors to main structures and attaching slider bases.

Fixing Short Tabletop and Keyboard Panel

Securing the short tabletop and installing the keyboard panel using sliders.

Mid-Section and Upper Tabletop Assembly

Connecting Long Horizontal Tube and Back Panel

Attaching the long horizontal tube and long back panel to the structure.

Connecting Connectors and Long Tabletop

Fixing additional connectors and attaching the long tabletop.

Accessory Integration

Attaching Supporting Tubes and Auxiliary Panel

Fixing supporting tubes to the auxiliary panel and corner tabletop.

CPU Area Assembly

Assembling CPU side panels, CPU panel, and CPU protector.

Final Assembly and Touches

Installing Casters and Tightening Screws

Attaching casters to the CPU panel and performing final screw tightening.

Related product manuals