REHEATING TOAST
Note: You must only reheat plain, “unbuttered” toast.
• Place the bread into the slot, lower the bread carriage lever, then press the Reheat
button
• The light will come on and the toasting time will be altered automatically to give a short burst
of heat to reheat the toast.
WARMING RACK
Note: Don’t use the warming rack to warm frozen, buttered, coated, iced or filled buns.
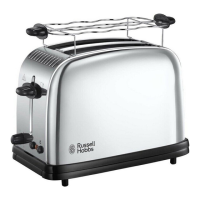
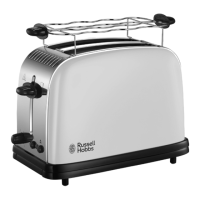
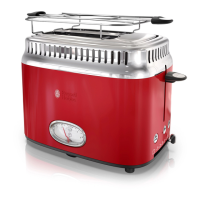
• Place the warming rack on top of the toaster, with the feet inside the slots.
• Place the buns on top of the warming rack.
• Operate the toaster by pressing the bread carriage lever down until it locks into place.
• Set the browning level to 2.
• When the lever pops up, remove the warmed buns.
• Don’t touch the warming rack wires – this will be hot.
• Remove the warming rack before using the toaster normally.
HINTS AND TIPS
• When toasting more than one slice of bread, use slices of similar size, thickness and
freshness.
• Old or thin bread will cook faster than fresh or thick bread, so use a lower setting.
• Do not use torn, curled up, or misshapen slices of bread, as these may jam the ejection
mechanism and could catch re.
• Sweet bread products (fruit loaf, etc.) brown much quicker than ordinary bread, so they
should be toasted on a lighter setting.
• Should the bread carriage become jammed during the toasting cycle, do not attempt
to release it. Unplug the toaster and allow it to cool down before carefully removing the
bread.
• Do not use a knife, fork or similar sharp instrument as these may damage the elements and
present a danger of electric shock.
CRUMBS
Crumbs will collect in the base of the toaster. Letting them build up can cause a fire hazard
so it is important to remove them frequently.
• Switch off the power and remove the plug from the wall power outlet.
• Push in the crumb tray to release and empty out the crumbs.
• Wipe the trays clean with a damp cloth.
• Dry thoroughly before sliding back into the base of the toaster.
CARE AND MAINTENANCE
• Switch the power off and remove the plug from the wall power outlet.
• Let the toaster cool down fully before attempting any cleaning operation or storing away.
• Wipe the outer surfaces with a soft damp cloth. If necessary, use a little dish washing
detergent.
• Do not allow cleaning utensils, liquid or any foreign objects to enter the toasting slots, as this
may damage the elements and present a danger of electric shock.
• Remove, empty, clean and ret the crumb trays.
• Do not use harsh or abrasive cleaning agents or solvents.
• Do not use alkaline cleaning agents when cleaning this appliance.
• Do not immerse the toaster in water or any other liquid.
 Loading...
