24 - English
Fig. 32
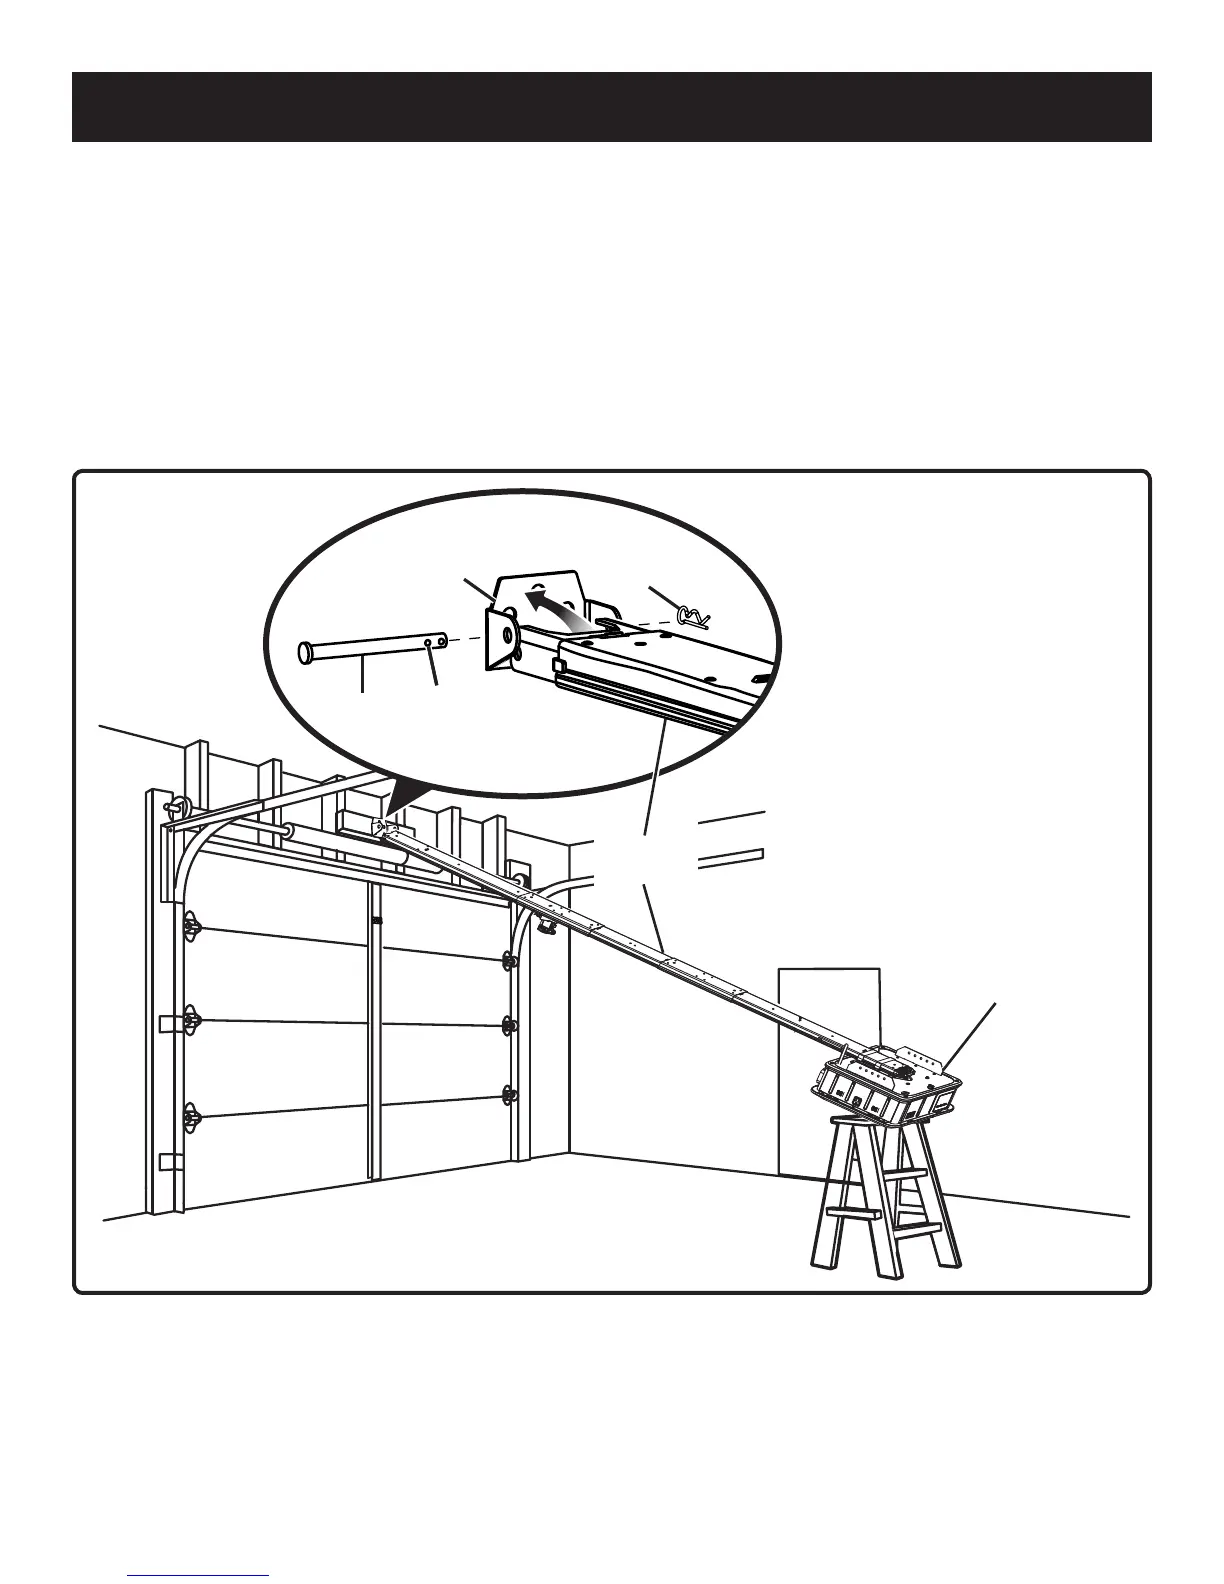
ATTACHING RAIL ASSEMBLY TO HEADER
BRACKET
See Figure 32.
Locate the following items:
Large Clevis Pin
Hitch Pin
Place the power head on top of a prop or on the ground
with a towel or packaging material beneath it.
Power
Head
Clevis
Pin
First
Hole
Header
Bracket
Hitch
Pin
Rail
Assembly
Angle the rail assembly so that it rests against the header
bracket.
NOTE: If a door spring or other obstruction is in the way,
have someone hold the garage door opener or help to
balance it on a raised support while you position the rail
assembly.
Align the holes in the bracket with the holes in the rail
assembly as shown.
Insert large clevis pin and secure with hitch pin.
NOTE: The hitch pin should be installed into the first hole
closest to the head of the pin.
INSTALLATION