Do you have a question about the Ryobi P201 and is the answer not in the manual?
Keep work area clean and well-lit, avoid hazards, and keep bystanders away.
Ensure correct electrical connections, keep tools dry, and protect cords from damage.
Stay alert, wear protective gear, dress appropriately, and maintain proper balance.
Use correct tool, maintain it, disconnect power before adjustments, and store properly.
Handle battery packs carefully, charge properly, and store away from metal objects.
Use qualified service and identical replacement parts for maintenance and repairs.
Wear safety glasses, dust masks, and hearing protection as needed.
Avoid heat, damage, improper charging, and external exposure.
Read instructions, avoid wet conditions, use approved attachments, and protect the cord.
Use correct gauge and wired extension cords if necessary.
Do not operate damaged chargers, avoid disassembly, and unplug before cleaning.
Avoid contact with chemicals that damage plastic parts.
Explains electrical, operational, and speed indicator symbols.
Explains symbols for hand safety, hot surfaces, and general hazard alerts.
Defines DANGER, WARNING, and CAUTION signal words and their meanings.
Emphasizes qualified service and reading the manual before operation.
Lists motor, switch, speed, charger input, charge rate, and torque specifications.
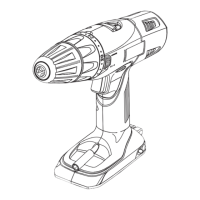
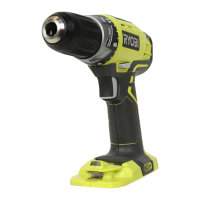
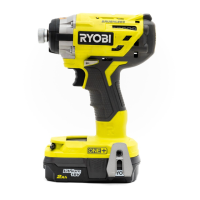
Labeled diagram of the drill-driver with key components like chuck, trigger, selectors.
Highlights Mag Tray, Keyless Chuck, Torque Adjustment Ring, Two Speed Gear Train, Quick Mode Selector.
Encourages familiarity with features and safety rules before operation.
Describes storage areas for bits and the magnetic bit holder.
Explains rotation selector, keyless chuck, and variable speed control.
Instructions for carefully removing and inspecting the tool and accessories.
Lists included items and provides crucial warnings about assembly.
Warning about familiarity causing carelessness and eye protection.
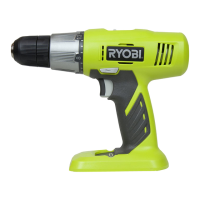
Lists various uses like drilling wood, metal, and mixing paint.
Explains the meaning of different LED lights on the charger.
Step-by-step guide for charging a battery pack at normal temperatures.
Procedure for cooling and charging a hot battery pack.
Instructions for inserting and detaching the battery pack from the tool.
How to operate the ON/OFF switch, variable speed, and change rotation direction.
How to tighten and loosen the drill bits using the keyless chuck.
How to select speeds and insert drill bits into the chuck.
Details the use of the magnetic bit holder and the spindle lock function.
How to remove drill bits from the chuck.
Instructions for attaching and detaching the magnetic bit holder.
How to switch between drill and drive modes.
Chart to choose the correct speed and mode for applications.
How to adjust torque settings for different screws and materials.
Describes the Mag Tray for storage and bit storage areas.
Step-by-step guide for drilling, including securing material and bit breakthrough warnings.
Warnings and advice on cleaning plastic parts with cloths and avoiding solvents.
How to care for battery packs and prepare them for recycling.
Steps to remove and install the drill chuck.
Procedure to fix a wobbly or binding chuck.
Information on contacting service and ordering replacement parts with model/serial numbers.
| Type | Cordless Drill |
|---|---|
| Voltage | 18V |
| Chuck Size | 1/2 inch |
| Speed Settings | 2 |
| Battery | Not included |
| Battery Type | Lithium-Ion |
| No Load Speed | 0-400/0-1600 RPM |
| Speed | 0-400/0-1600 RPM |