EasyManua.ls Logo

Ryobi PCL220 - User Manual

Ryobi PCL220
28 pages
Print Icon
To Next Page IconTo Next Page
Loading...
OPERATOR’S MANUAL
MANUEL D’UTILISATION
MANUAL DEL OPERADOR
18 VOLT 1/2 in.
HAMMER DRILL
MANUEL D’UTILISATION/PERCEUSE À
PERCUSSION 18 V de 13 mm (1/2 po)
MANUAL DEL OPERADOR/TALADRO DE
PERCUSIÓN de 18 V 13 mm (1/2 pulg.)
PCL220
WARNING: To reduce the
risk of injury, the user must read and
understand the operator’s manual
before using this product.
SAVE THIS MANUAL FOR
FUTURE REFERENCE
ADVERTENCIA: Para reducir
el riesgo de lesiones, el usuario debe
leer y comprender el manual del
operador antes de usar este producto.
AVERTISSEMENT :
Pour réduire les risques de blessures,
l’utilisateur doit lire et veiller à bien
comprendre le manuel d’utilisation avant
d’employer ce produit.
GUARDE ESTE MANUAL
PARA FUTURAS CONSULTAS
CONSERVER CE MANUEL
POUR FUTURE RÉFÉRENCE
TABLE OF CONTENTS
****************
General Power Tool
Safety Warnings .............................. 2-3
Drill-Driver Safety Warnings ................4
Symbols ..............................................5
Features ..............................................6
Assembly ............................................6
Operation ........................................ 6-8
Maintenance .......................................9
Troubleshooting ..................................9
Illustrations ........................................ 10
Parts Ordering
and Service ......................... Back page
TABLE DES MATIÈRES
****************
Avertissements de sécurité générales
relatives aux outils électriques ........ 2-3
Avertissements de sécurité relatifs
perceuse-tournevis .............................4
Symboles ............................................5
Caractéristiques ..................................6
Assemblage ........................................6
Utilisation ....................................... 6-8
Entretien ..............................................9
Dépannage .......................................... 9
Illustrations ........................................ 10
Commande de pièces
et dépannage .................... Page arrière
ÍNDICE DE CONTENIDO
****************
Advertencias de seguridad para
herramientas eléctrica .................... 2-3
Advertencias de seguridad de
taladro-destornillador .........................4
Símbolos ............................................. 5
Características ....................................6
 Armado ...............................................6
Funcionamiento .............................. 6-8
Mantenimiento .................................... 9
Corrección de problemas ...................9
Illustraciones ..................................... 10
 Pedidos de piezas
y servicio ........................ Pág. posterior
Question and Answer IconNeed help?

Do you have a question about the Ryobi PCL220 and is the answer not in the manual?

Overview

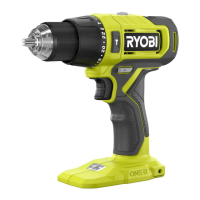
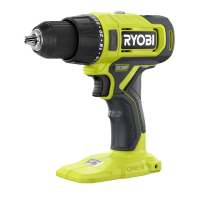
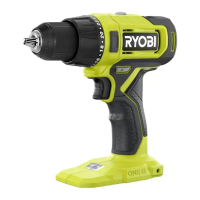
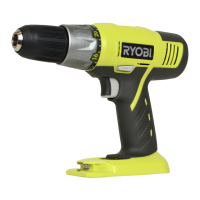
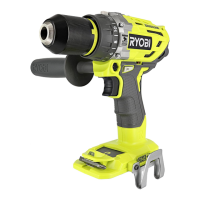
This document describes the RYOBI 18V 1/2 in. Hammer Drill, model PCL220. It is a versatile power tool designed for various drilling and driving applications.

Function Description

The RYOBI 18V 1/2 in. Hammer Drill is primarily used for hammer drilling in concrete, brick, and other masonry. It can also be used for drilling in all types of wood products (lumber, plywood, paneling, composition board, and hardboard), ceramics, plastics, fiberglass, laminates, and metals. Additionally, it is capable of driving screws into wood and drywall with screwdriver bits.

The drill features a variable speed switch trigger, allowing for precise control over the drilling speed. Higher trigger pressure results in higher speed, while decreased pressure reduces the speed. A direction of rotation selector (forward/reverse/center lock) enables users to switch between forward drilling, reverse driving, and a center-lock position that locks the switch trigger to prevent accidental starting.

A two-speed gear train provides flexibility for different tasks: low speed (1) for applications requiring higher power and torque (e.g., driving screws, drilling in metal), and high speed (2) for fast drilling or driving applications (e.g., drilling in wood or masonry). The drill also includes an adjustable clutch torque and mode selector ring, which allows users to set the appropriate torque for various driving applications, preventing damage to screw heads, threads, or the workpiece. The hammer drill function is specifically engaged for drilling into masonry and concrete.

Important Technical Specifications

  • No Load Speed: 0-450/0-1,750 RPM (revolutions per minute)
  • Torque: 515 in-lbs.
  • Clutch: 24-Position
  • Hammer Speed: 0-7,200/0-28,000 BPM (blows per minute)
  • Battery Type: Lithium-ion (Li-ion) (requires compatible RYOBI 18V ONE+ batteries and chargers, listed in correlation supplement 987000-432)
  • Chuck Type: Keyless chuck, 1/2 inch
  • LED Light: Integrated LED light for illuminating the work area.

Usage Features

Assembly and Installation:

The drill must be completely assembled before use, and any missing or damaged parts should be reported. Users are warned against modifying the product or creating unrecommended accessories, as this can lead to serious injury. Battery packs are installed by locking the switch trigger, inserting the pack until the latches snap into place, and ensuring it is secured. To remove, the latches are depressed. Bits are installed by locking the switch trigger, opening the keyless chuck jaws, inserting the bit straight into the jaws, and rotating the chuck sleeve to tighten. It is crucial not to hold the chuck sleeve with one hand and use the drill's power to tighten it, as this can cause injury.

Operation:

  • Variable Speed Switch Trigger: Depress to turn ON, release to turn OFF. Running at low speeds for extended periods can cause overheating; cool the drill by running it without a load at full speed.
  • Direction of Rotation Selector: Position left for forward, right for reverse, and center for OFF/lock. Always allow the chuck to stop completely before changing the direction of rotation to prevent gear damage.
  • Two-Speed Gear Train: Select low speed (1) for high torque/power tasks and high speed (2) for faster drilling. Never change speeds while the tool is running.
  • Adjusting Torque: Rotate the clutch torque and mode selector ring to match the screw size and material. Lower settings are for small screws and soft materials, while higher settings are for large screws, hard materials, and heavy drilling. The "H" setting is for hammer drilling in masonry and concrete.
  • Drilling/Driving Screws: Ensure the rotation selector is in the correct position. Use low speed for high torque and high speed for fast drilling. Secure the workpiece and hold the drill firmly. Start drilling at a low speed with the bit tip in contact with the workpiece to prevent bending. Apply direct pressure, avoiding excessive side pressure. Be prepared for the drill to bind or kick back, especially when breaking through material. For smooth surfaces, use a center punch to mark the drilling location.
  • Wood and Metal Drilling: Use high-speed steel bits. Start at a very low speed to prevent the bit from slipping.
  • Hammer Drilling in Masonry: Use carbide-tipped masonry impact bits. Apply light to medium pressure for best results. Start at a very low speed.
  • Safety Precautions: Always wear ear protection when impact drilling, eye protection with side shields (ANSI Z87.1 compliant), and a face or dust mask if the operation is dusty. Hold the tool by insulated gripping surfaces when working near hidden wiring. Never operate at higher speeds than the drill bit's maximum rating. Do not use battery tools or their batteries near fire or heat. Do not crush, drop, or damage battery packs. Do not charge battery tools in damp or wet locations or outside the specified temperature range (50°F to 100°F). In case of battery leakage, wash skin with soap and water; if liquid gets into eyes, flush with clean water for at least 10 minutes and seek medical attention.

Maintenance Features

General Maintenance:

  • Cleaning: Use only identical replacement parts when servicing. Avoid using solvents when cleaning plastic parts, as most plastics are susceptible to damage from various types of commercial solvents. Use clean cloths to remove dirt, dust, oil, grease, etc.
  • Tool Condition: Regularly check for misalignment or binding of moving parts, breakage of parts, and any other condition that may affect the tool's operation. If damaged, have the tool repaired before use.
  • Sharpness: Keep cutting tools sharp and clean. Properly maintained tools with sharp cutting edges are less likely to bind and are easier to control.
  • Cord Care (for corded tools, not applicable to this cordless model but mentioned in general safety): Do not abuse the cord; keep it away from heat, oil, sharp edges, and moving parts.
  • Battery Pack Maintenance: Never repair damaged battery packs; only the manufacturer or authorized service providers should perform repairs.

Troubleshooting (LED Light Functions):

The drill features an LED light that indicates the tool's status and helps in troubleshooting:

  • Normal: Solid Light (No Flashes) - No action needed.
  • Low Battery: 3 Flashes - Replace battery.
  • Excessive Force: 6 Flashes - Wait 5 seconds.
  • Over Temperature: 9 Flashes - Let tool cool off.
  • More than 9 flashes indicate a need to remove the battery and reinsert it a few minutes later.

This manual emphasizes the importance of reading and understanding all safety warnings and instructions to prevent electric shock, fire, serious injury, and property damage. It also highlights the use of a Ground Fault Circuit Interrupter (GFCI) protected supply when operating in damp locations.

Ryobi PCL220 Specifications

General IconGeneral
BrandRyobi
ModelPCL220
CategoryDrill
LanguageEnglish

Related product manuals