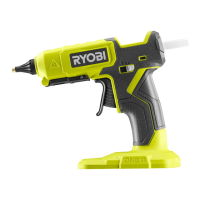
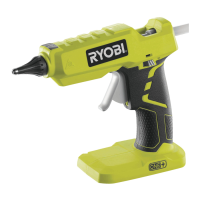
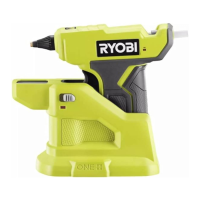
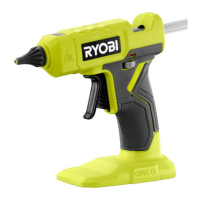
The RYOBI RGL18 is a cordless glue gun designed for applying hot glue adhesives. It is part of the RYOBI 18V ONE+ system, utilizing compatible 18V lithium-ion battery packs (not included). The device prioritizes safety, performance, and dependability in its design.
Function Description:
The primary function of the RGL18 glue gun is to heat and dispense hot glue for various bonding applications. It is intended for use with 11-12 mm diameter glue sticks. The gun features two temperature modes: a high-temperature mode for general-purpose gluing and a low-temperature mode for more delicate materials or specific adhesive types. An LED indicator provides visual feedback on the device's status, indicating when it is warming up or ready for use. The trigger mechanism controls the dispensing of glue, and a drip tray is included to catch any excess glue and maintain a clean workspace. The tool is designed for portability and ease of use, being powered by a removable battery pack.
Important Technical Specifications:
- Model: RGL18
- Voltage: 18 V
- Nozzle hole diameter: 3.0 mm
- Long Reach Nozzle Hole diameter: 2.5 mm
- Glue stick diameter: 11-12 mm
- Approximate heat up time: 3 minutes
- High Temperature Mode: 200 °C
- Low Temperature Mode: 130 °C
- Weight (excluding battery pack): 0.4 kg
Compatible Battery Packs (not included):
RB18L13, RB18L15, RB18L15A, RB18L15B, RB18L20, RB18L20A, RB18L25, RB18L25A, RB18L40, RB18L40A, RB18L50, RB18L50A, RB18L60A, RB18L90A, RB1815C, RB1820C, RB1825C, RB1840C, RB1840X, RB1850C, RB1850X, RB1860X.
Usage Features:
- Glue Stick Loading: Glue sticks (11-12 mm diameter) are inserted into the glue stick chamber at the rear of the gun.
- Battery Installation: The 18V battery pack slides into the battery port at the base of the handle until it clicks into place.
- Mode Selection: A mode selector allows the user to choose between high (200 °C) and low (130 °C) temperature settings, indicated by corresponding icons (flame for high, thermometer for low).
- LED Indicator: The LED indicator illuminates red during the warming-up phase and turns green when the glue gun is ready for use. The approximate heat-up time is 3 minutes.
- Glue Dispensing: Once ready, squeezing the trigger dispenses the heated glue through the nozzle.
- Nozzle Replacement: The glue gun features a replaceable nozzle, which can be changed using the provided wrench. This allows for different nozzle types or replacement if damaged.
- Drip Tray: A removable drip tray is integrated into the design to collect any dripping glue, helping to keep the work area clean.
- Storage: For storage, the battery should be removed from the tool. The glue gun should be stored in a dry, secure place, away from children.
Maintenance Features:
- General Cleaning: Avoid using solvents when cleaning plastic parts, as most plastics are susceptible to damage from commercial solvents. Instead, use clean cloths to remove dirt and carbon dust. Never allow brake fluids, gasoline, petroleum-based products, penetrating oils, or bleach to come into contact with plastic parts, as these chemicals can damage or destroy the plastic, potentially leading to serious personal injury.
- Accessory and Spare Parts: Use only original accessories and spare parts. For components not described in the manual or for any repairs, contact an authorized service center. All repairs should be performed by an authorized service center to ensure the continued safety and functionality of the device.
- Battery Care: If the product is to be stored unused for a long period, the batteries should be removed. Ensure the supply terminals are not short-circuited. To reduce the risk of fire, personal injury, and product damage due to a short circuit, never immerse the tool, battery pack, or charger in fluid or allow fluid to flow inside them. Corrosive or conductive fluids such as seawater, certain industrial chemicals, and bleach can cause a short circuit.
- Lithium Battery Transport: When transporting lithium batteries, follow local and national provisions and regulations. Ensure no batteries come into contact with other batteries or conductive materials by protecting exposed connectors with insulating, non-conductive caps or tape. Do not transport cracked or leaking batteries. Consult the forwarding company for further advice.
- Disposal: Do not dispose of waste batteries, waste electrical, and electronic equipment as unsorted municipal waste. These items must be collected separately. Waste batteries, accumulators, and light sources must be removed from the equipment. Check with local authorities or retailers for recycling advice and collection points. Retailers may have an obligation to take back waste batteries and waste electrical and electronic equipment free of charge. Proper disposal contributes to the reuse and recycling of materials and reduces demand for raw materials. Waste batteries (especially lithium) and electronic equipment contain valuable and recyclable materials, which can adversely impact the environment and human health if not disposed of properly. Delete personal data from waste equipment, if any.