EasyManua.ls Logo

Ryobi RY15523A - User Manual

Ryobi RY15523A
30 pages
Print Icon
To Next Page IconTo Next Page
Loading...
OPERATOR’S MANUAL
MANUEL D’UTILISATION
MANUAL DEL OPERADOR
STRAIGHT SHAFT
TRIMMER ATTACHMENT
ARBRE DROIT ACCESSOIRE
TAILLE-BORDURES
ACCESORIO PARA RECORTAR
DE EJE RECTO
RY15523A
RY15523AVNM
WARNING: To reduce the
risk of injury, the user must read and
understand the operator’s manual
before using this product.
TABLE OF CONTENTS
General Safety Rules ..........................2
Specific Safety Rules ..........................2
Grass Trimmer Safety Warnings .........3
Symbols ..............................................4
Features ..............................................5
Assembly ........................................ 5-6
Operation ........................................ 6-7
Maintenance ................................... 8-9
Troubleshooting ..................................9
Parts Ordering/Service ........ Back Page
AVERTISSEMENT : Pour
réduire les risques de blessures,
l’utilisateur doit lire et veiller à bien
comprendre le manuel d’utilisation
avant d’employer ce produit.
TABLE DES MATIÈRES
Règles de sécurité générales .............. 2
Règles de sécurité particulières .......... 2
Avertissements de sécurité pour
coupe-herbe .......................................3
Symboles ............................................4
Caractéristiques ..................................5
Assemblage .................................... 5-6
Utilisation ........................................ 6-7
Entretien .......................................... 8-9
Dépannage .......................................... 9
Commande de pièces/
réparation
.......................... Páge arrière
ADVERTENCIA: Para reducir
el riesgo de lesiones, el usuario debe
leer y comprender el manual del
operador antes de usar este producto.
ÍNDICE DE CONTENIDO
Reglas de seguridad generales ..........2
Reglas de seguridad específicas ........2
Advertencias de seguridad de la
recortadora de césped .......................3
Símbolos .............................................4
Características ....................................5
Armado ........................................... 5-6
Funcionamiento .............................. 6-7
Mantenimiento ................................ 8-9
Corrección de problemas ...................9
Pedidos de piezas/
servicio ........................... Pág. posterior
SAVE THIS MANUAL FOR
FUTURE REFERENCE
CONSERVER CE MANUEL
POUR FUTURE RÉFÉRENCE
GUARDE ESTE MANUAL
PARA FUTURAS CONSULTAS
Question and Answer IconNeed help?

Do you have a question about the Ryobi RY15523A and is the answer not in the manual?

Overview

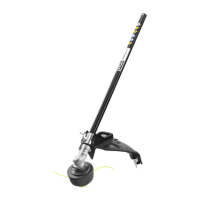
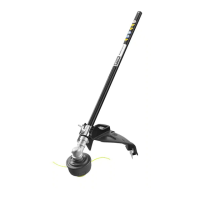
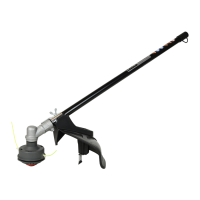
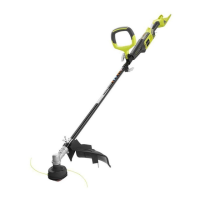
The RYOBI EXPAND-IT Straight Shaft Trimmer Attachment (models RY15523A and RY15523AVNM) is a versatile accessory designed for use with various power heads, including gas, cordless, and electric models. This attachment is primarily used for trimming grass and weeds around porches, fences, and terraces, offering an efficient solution for lawn maintenance.

Function Description

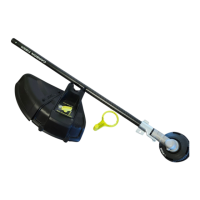
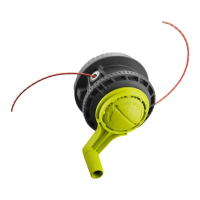
The trimmer attachment is designed to connect to a compatible power head, transforming it into a straight shaft string trimmer. Its main function is to cut grass and light vegetation using a flexible, non-metallic line. The straight shaft design allows for extended reach and easier trimming in hard-to-reach areas. The unit includes a grass deflector that helps protect the operator from flying debris during operation.

Important Technical Specifications

  • Line Cutting Width: The cutting diameter is adjustable from 13 inches (330 mm) to 15 inches (381 mm). This adjustment is made by rotating the line cut-off blade on the grass deflector.
  • Line Diameter:
    • For Gas Power Heads: 0.080 in. to 0.095 in. max.
    • For Cordless Power Heads: 0.080 in. max. round or twisted.
    • For Electric Power Heads: 0.080 in. max. round or 0.080 in. to 0.095 in. max. twisted.
  • Replacement Line: The recommended replacement line is 0.080 in. twisted line, available in bulk (AC04138) or pre-cut (AC04139).
  • Assembly: The product requires assembly, including attaching the grass deflector and connecting the attachment to the power head.

Usage Features

  • Adjustable Cutting Diameter: The cutting diameter can be adjusted between 13 inches and 15 inches by rotating the line cut-off blade. This allows users to customize the trimmer's performance based on their specific needs.
  • Grass Deflector: A built-in grass deflector enhances safety by protecting the operator from debris thrown during trimming.
  • Line Advance System: The trimmer features a bump-feed line advance system. To advance the line, the operator taps the string head on the ground while the power head is running at full throttle. The line advances each time the bump knob is tapped. Manual line advance is also possible by depressing the bump knob and pulling the line(s) out.
  • Proper Operating Position: For optimal control and safety, the trimmer should be held with both hands, with the right hand on the rear handle and the left hand on the front handle. The rear handle should be approximately waist height. The string head should be kept below waist level, and cutting should not occur more than 30 inches above the ground.
  • Cutting Techniques:
    • For maximum efficiency, the trimmer should be tilted towards the cutting area.
    • When trimming with a straight shaft trimmer, a left-to-right sweeping motion is recommended to direct debris away from the operator.
    • Avoid cutting in the "dangerous area" as illustrated in the manual.
    • Use the tip of the line for cutting; do not force the string head into uncut grass.
    • Exercise caution around fences, stone walls, brick walls, curbs, wood, trees, and shrubs, as these can cause accelerated line wear or damage to the line and the objects themselves.
  • Spring Back Awareness: When cutting brush or saplings under tension, be alert for spring back, which can cause the brush or sapling to strike the operator or throw the machine out of control.
  • Safe Operation: Always ensure the cutting line or blade is not contacting anything before starting the machine. Do not operate the machine above waist height to prevent unintended contact and maintain better control.

Maintenance Features

  • Line Replacement:
    1. Stop the power head and disconnect it from its power source (spark plug wire for gas, battery pack for cordless, or power plug for electric).
    2. Rotate the bump knob clockwise to align the arrows on the bump knob with the arrows on the string head housing.
    3. Cut a 10 ft. piece of trimmer line.
    4. Insert the line into an eyelet on the string head housing and push it through until an equal amount of line appears on both sides.
    5. Rotate the bump knob clockwise (either by hand or using the SPEED WINDER) to wind the line onto the spool until approximately 6 inches of line are showing on each side. For best results, pull both line ends taut after every five to seven revolutions of the SPEED WINDER to prevent tangling.
  • Clearing Line Jams and/or Replacing Bump Knob:
    1. Stop the power head and disconnect it from its power source.
    2. Depress the tabs on the side of the string head housing to remove the lower string head housing. The housing is spring-loaded and will self-eject.
    3. Push the spool and bump knob through the string head housing and remove the string from the spool.
    4. If replacing the bump knob, remove the old knob, align the new knob's ribs with the spool slots, and place the new bump knob onto the spool.
    5. Insert the bump knob and spool assembly back through the opening in the string head housing.
    6. Align the slots on the lower string head housing with the tabs on the upper string head housing.
    7. Push the housing together until the tabs snap into place. Hold the spool by the knob during installation.
    8. Install new line as described in "Line Replacement."
  • General Maintenance:
    • Periodically inspect the entire product for damaged, missing, or loose parts (screws, nuts, bolts, caps). Tighten all fasteners and replace any missing or damaged parts before use.
    • Avoid using solvents to clean plastic parts, as they can cause damage. Use clean cloths to remove dirt, dust, oil, and grease.
    • Do not allow brake fluids, gasoline, petroleum-based products, or penetrating oils to contact plastic parts, as these chemicals can damage or destroy the plastic.
  • Storage:
    • Store the attachment in a well-ventilated area, inaccessible to children.
    • Keep away from corrosive agents such as garden chemicals and deicing salts.
    • The attachment can be hung for storage using the hanger cap (by pushing in the button and placing the cap over the end of the shaft until it locks) or by utilizing the secondary hole in the attachment shaft.

Safety Information

The manual emphasizes the importance of reading and understanding all instructions and safety warnings before using the product. Key safety precautions include wearing eye and hearing protection, heavy long pants, boots, and gloves; securing long hair; keeping bystanders at least 50 ft. away; and inspecting the unit for damage before each use. It also warns against using non-recommended attachments or accessories, which could lead to serious injury or void the warranty.

Ryobi RY15523A Specifications

General IconGeneral
BrandRyobi
ModelRY15523A
CategoryGarden Machinery Accessories
LanguageEnglish

Related product manuals