WARNING
Do not allow familiarity with products to
make you careless. Remember that a
FDUHOHVVIUDFWLRQRIDVHFRQGLVVXI¿FLHQWWR
LQÀLFWVHULRXVLQMXU\
WARNING
Always wear eye protection with side shields.
)DLOXUHWRGRVRFRXOGUHVXOWLQREMHFWVEHLQJ
thrown into your eyes resulting in possible
VHULRXVLQMXU\
WARNING
Turn off the product, engage the parking
brake, and remove the start key. Make
sure that all moving parts have come to a
complete stop before assembling parts,
PDNLQJDGMXVWPHQWVFOHDQLQJ WKH SURGXFW
or leaving the product unattended. This will
prevent accidental starting that could cause
VHULRXVSHUVRQDOLQMXU\
WARNING
Always inspect the product for missing or
damaged parts. Always check the blades for
damage or uneven or excessive wear prior
to use. Using the product with damaged or
missing parts may result in serious personal
LQMXU\
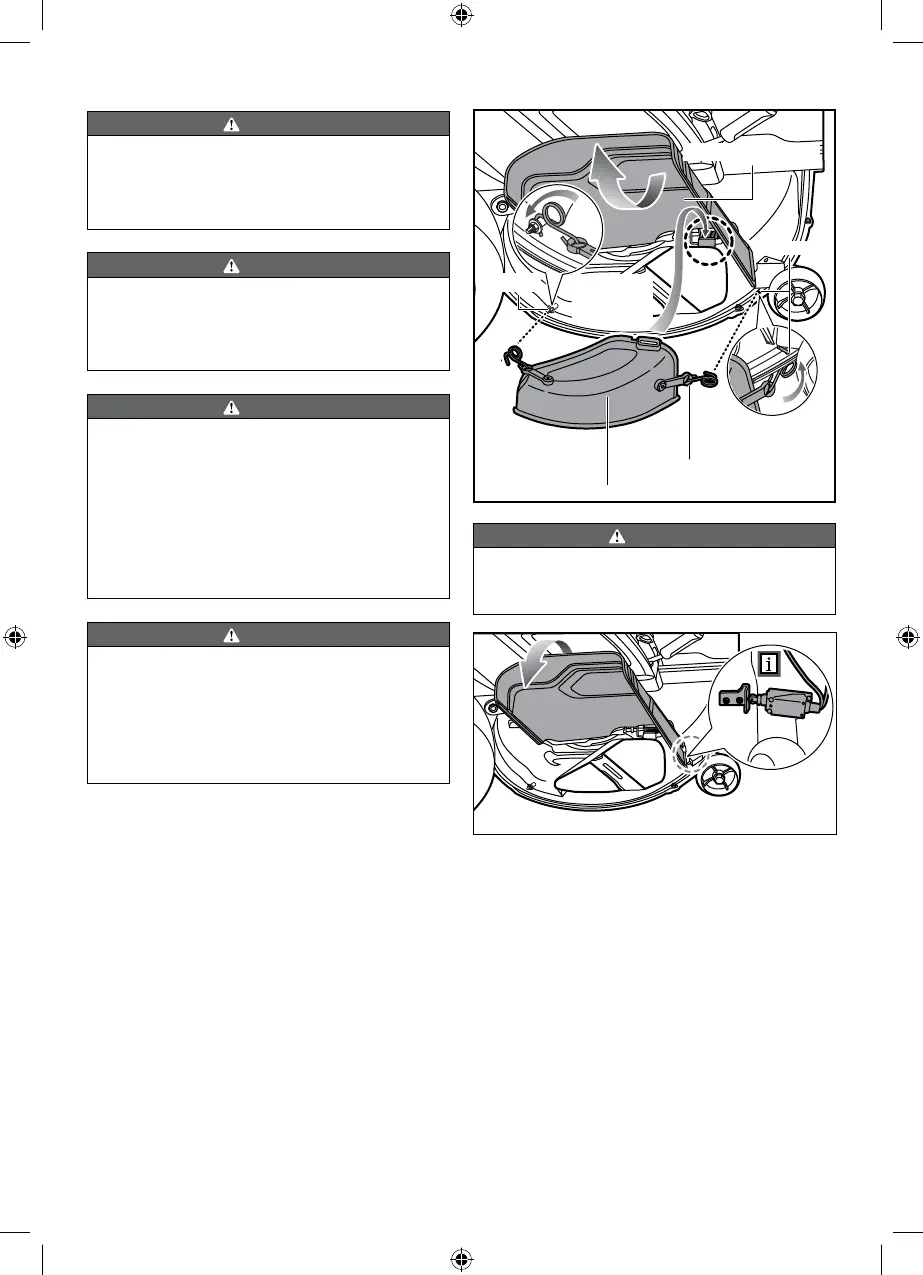
INSTALLING THE MULCH COVER
See fig. 11.
7KHSURGXFW LV FRQ¿JXUHG IRU VLGHGLVFKDUJH
when shipped. If mulching is preferred:
1. Lift the side discharge chute.
2. Place the mulch cover on the tab on the
mower housing.
3. Connect the mulch cover latches to the
two side mounting points on the mower
deck housing.
4. Release the side discharge chute.
Fig 11
Side
discharge
opening
Latches
Stud
Mulch cover
Side discharge chute
+ROH
WARNING
Ensure that the side discharge chute fully
FORVHVZKHQ¿QLVKHG)DLOXUHWRGRVRPD\
FDXVHVHULRXVSHUVRQDOLQMXU\
ENGAGING THE PARKING BRAKE
See fig. 12.
To engage the parking brake:
1. Set the drive levers in the open position.
2. Step on and hold the brake pedal.
3. Use your toes to engage the parking
brake.
4. Release the brake pedal.
To disengage the parking brake:
Ŷ Step on and release the brake pedal.
22
| English
 Loading...