700-3002-BC 10.18.2017
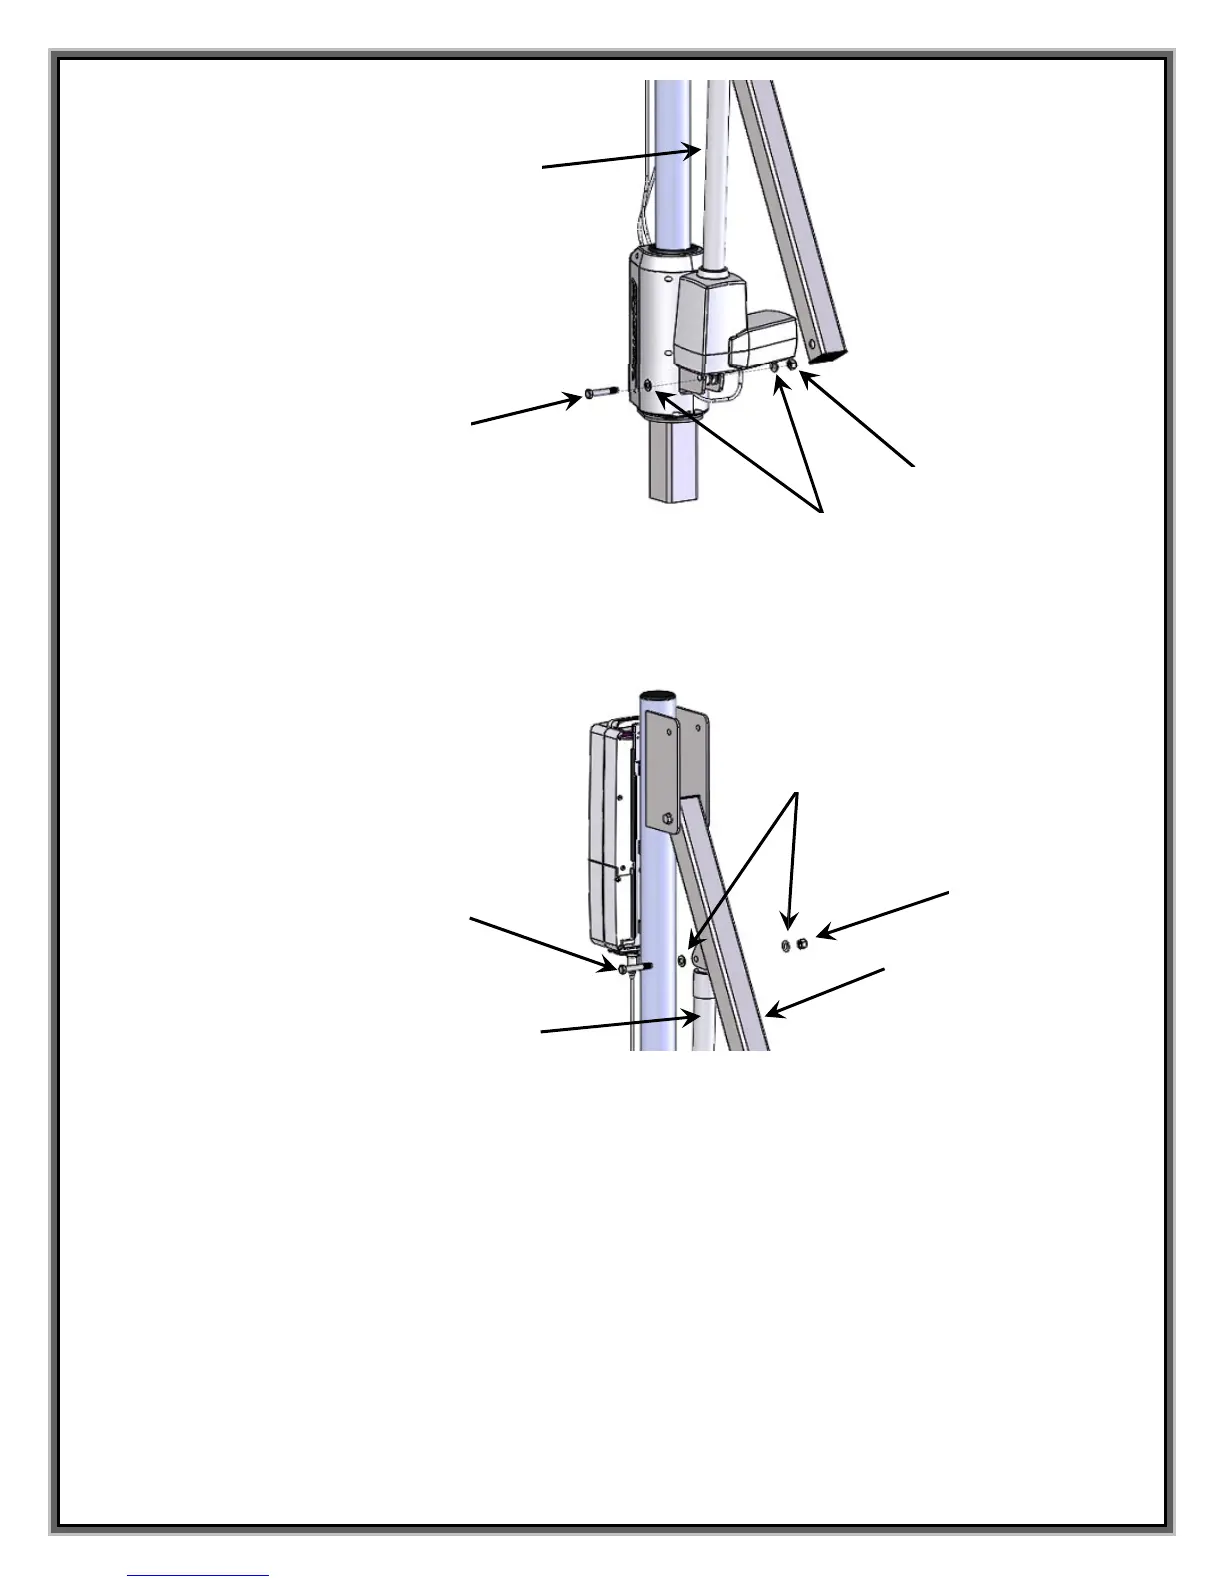
12. Attach the opposite end of the Actuator (#1) to the Actuator Arm Assembly (#12) using (1) Bolt
(#23), (2) Washers (#16) and (1) Nut (#22) through the holes in the flanges of the Actuator Arm
(see image below).
13. Attach the Support Arm Assembly (#13) to the upper holes in the Mast flanges by installing (2)
Bushings (#21) into the holes in one end of the Support Arm, then insert the Arm with Bushings
between the flanges of the Mast and align to the upper holes in the Mast flanges.
14. Using (1) Hex Head Bolt (#17), (2) Washers (#16) and (1) Nyloc Nut (#22), attach the Support
Arm Assembly to the Mast flanges. Tighten Nut and Bolt using (2) 9/16” wrenches.
#23
#16
#22
#1
#12
#1
#23
#16
#22


 To Next Page