- 6 -
b. MOUNTING INSTRUCTIONS
• Remove the mounting plate from the back of detector (slide to the unlock
position to remove).
• Select the proper detector location as described in section 3.
• Connect the Quick Connector for power and relay as described in the WIRING
REQUIREMENTS.
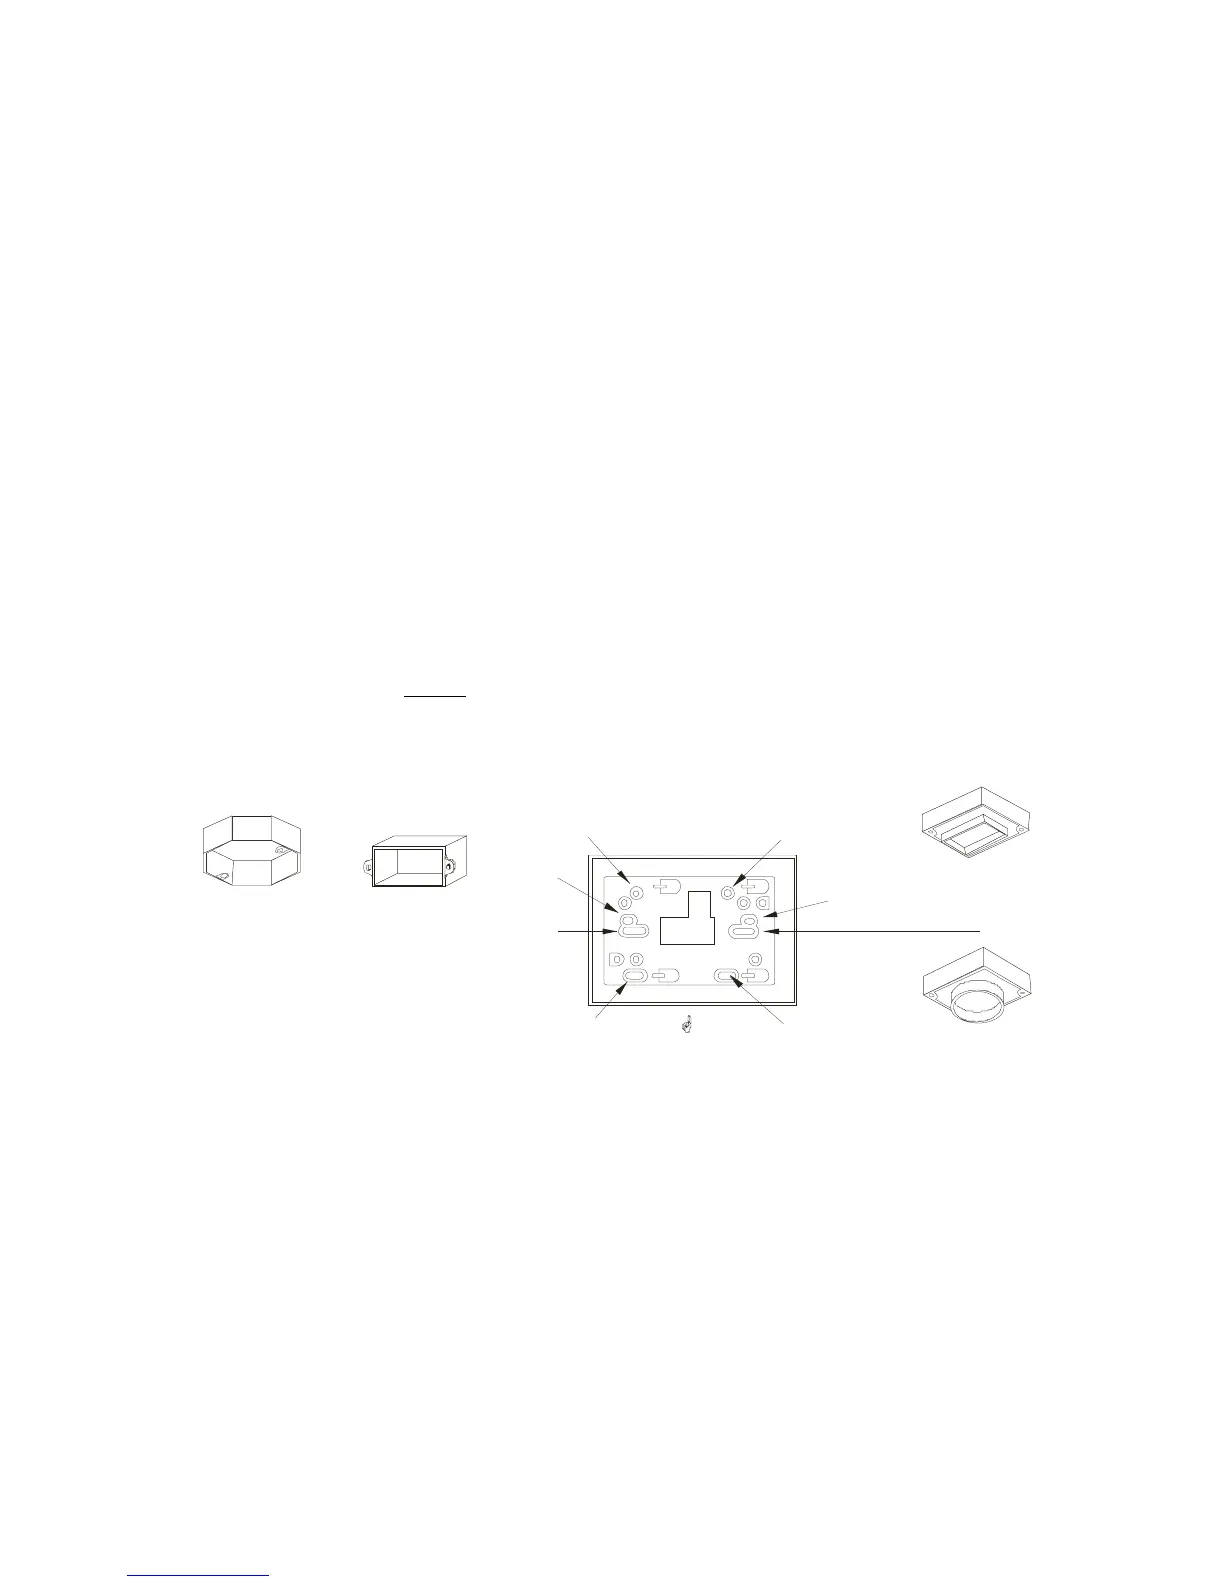
• For models STCH-1000HW and STCH-1000HWR, secure the mounting plate
to the electrical box using the appropriate holes (see Figure 4). For model
PSM-011, which is designed to be wall mounted, use the enclosed screws and
anchors to fasten the mounting plate on the wall 5 to 6 feet above the floor.
• Pull the Quick Connector through the center hole in the mounting plate.
• Plug the mating halves of Quick Connector with the same color of wires
together.
• Slide the detector on the mounting plate to the lock position.
• Turn on the power and the green POWER ON indicator should be lit for
receiving power.
After installation, TEST your detector by pressing and holding the
TEST/RESET
button for several seconds. Complete instructions regarding testing are outlined
in section 7.
FIGURE 4: ELECTRCAL BOXES AND MOUNTING PLATE
MOUNTING PLATE ORIENTATION
FOR W ALL MOUNTING
“B”
“A”
“C”
“B”
“C”
“A”
Octagonal
Electrical Box
(Use diagonal
holes: Set “A”
or Set “B”)
Rectangular
Electrical Box
(Use holes
Set “C”)
Rectangular
plaster ring
Circular
plaster ring
UP