Do you have a question about the SainSmart Genmitsu LE5040 and is the answer not in the manual?
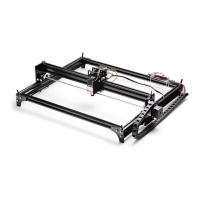
Assemble the base frame using aluminum profiles and bolts.
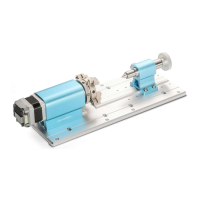
Install Y-axis stepper motor and coupling on the right bracket.
Assemble the left bracket with V-groove bearings and hex nuts.
Mount the laser module onto the acrylic sheet using bolts.
Integrate the laser module assembly with linear axes and aluminum profiles.
Insert the assembled gantry bracket into the main base frame.
Attach four acrylic base brackets to the frame using T-slot nuts and bolts.
Mount the control board on an acrylic sheet using copper columns and bolts.
Install timing belts for Y-axis and X-axis movement.
Route stepper motor and laser head cables through the tank drag chain.
Connect laser module and stepper motors to the control board.
Install the USB serial driver for machine communication.
Find the machine's COM port using Device Manager for software connection.
Open the LaserGRBL application to control the engraver.
Establish USB connection and select the correct COM port in LaserGRBL.
Verify successful connection via console output and command availability.
Turn on the laser at low power using the M3 S50 command.
Adjust the lens to achieve the minimum spot size for optimal focus.
Turn off the laser using the M5 command in the software console.
Load GCODE or image files into LaserGRBL via the File menu.
Accept default import parameters and proceed to the next step.
Set engraving speed and S-value parameters for desired output.
Define the work zero point and initiate the engraving process.
Save the generated GCODE file from the LaserGRBL software.
| Type | Laser Engraver |
|---|---|
| Laser Power | 5.5W |
| Frame Material | Aluminum |
| Wavelength | 450 nm |
| Connectivity | USB |
| Software | LaserGRBL, LightBurn |
| Focus Mode | Manual |
| Cooling System | Air Cooling |
| Compatibility | Windows |
| Input Power | AC 100V-240V |
| Supported Materials | Wood, Acrylic, Leather, Plastic |
| Control Software | LaserGRBL |