24855 7/17 | 85-000256_INST_C
ALTERNATOR REAR RACK INSTRUCTIONS
3
For additional product and safety information go to salsacycles.com/safety
Installation
1. Select Lower Mount Hardware
Before the lower legs for the rack can be attached to the
frame, the correct length mounting bolts and spacers must
be selected from the lower mounting hardware kit (Fig. B).
Selection is based on the frame’s material. Bolt length and
spacer configuration is independent of the frame model, rear
spacing width, or the version of the Alternator rack being
installed. Locate the frame’s material in Table 1 or 2 and
select the lower mounting hardware as indicated in that row,
cross-referencing Figure B from page 2. Please note that if you
are installing an Alternator rack on a frame which is using
Boost-148 Reduction plates between the frame plates and
swing plates, the bolt length and spacer configuration is
different. Make your hardware selection based on the info
in the lower portion of the table labeled for “With Boost
Reduction Plates”. Once hardware is selected, set the
remaining unused lower mounting hardware aside to avoid
incorrect installation and for safe keeping should the rack
be moved to a different frame in the future.
2. Attach the lower legs.
Depending on your frame, the lower legs of the rack may
need to be spread or pinched up to 10 mm. This is normal.
If the rack must be spread or pinched more than this, it is
likely that the wrong rack was selected for your frame.
Stop installation and consult your local Salsa dealer
or Salsa customer service.
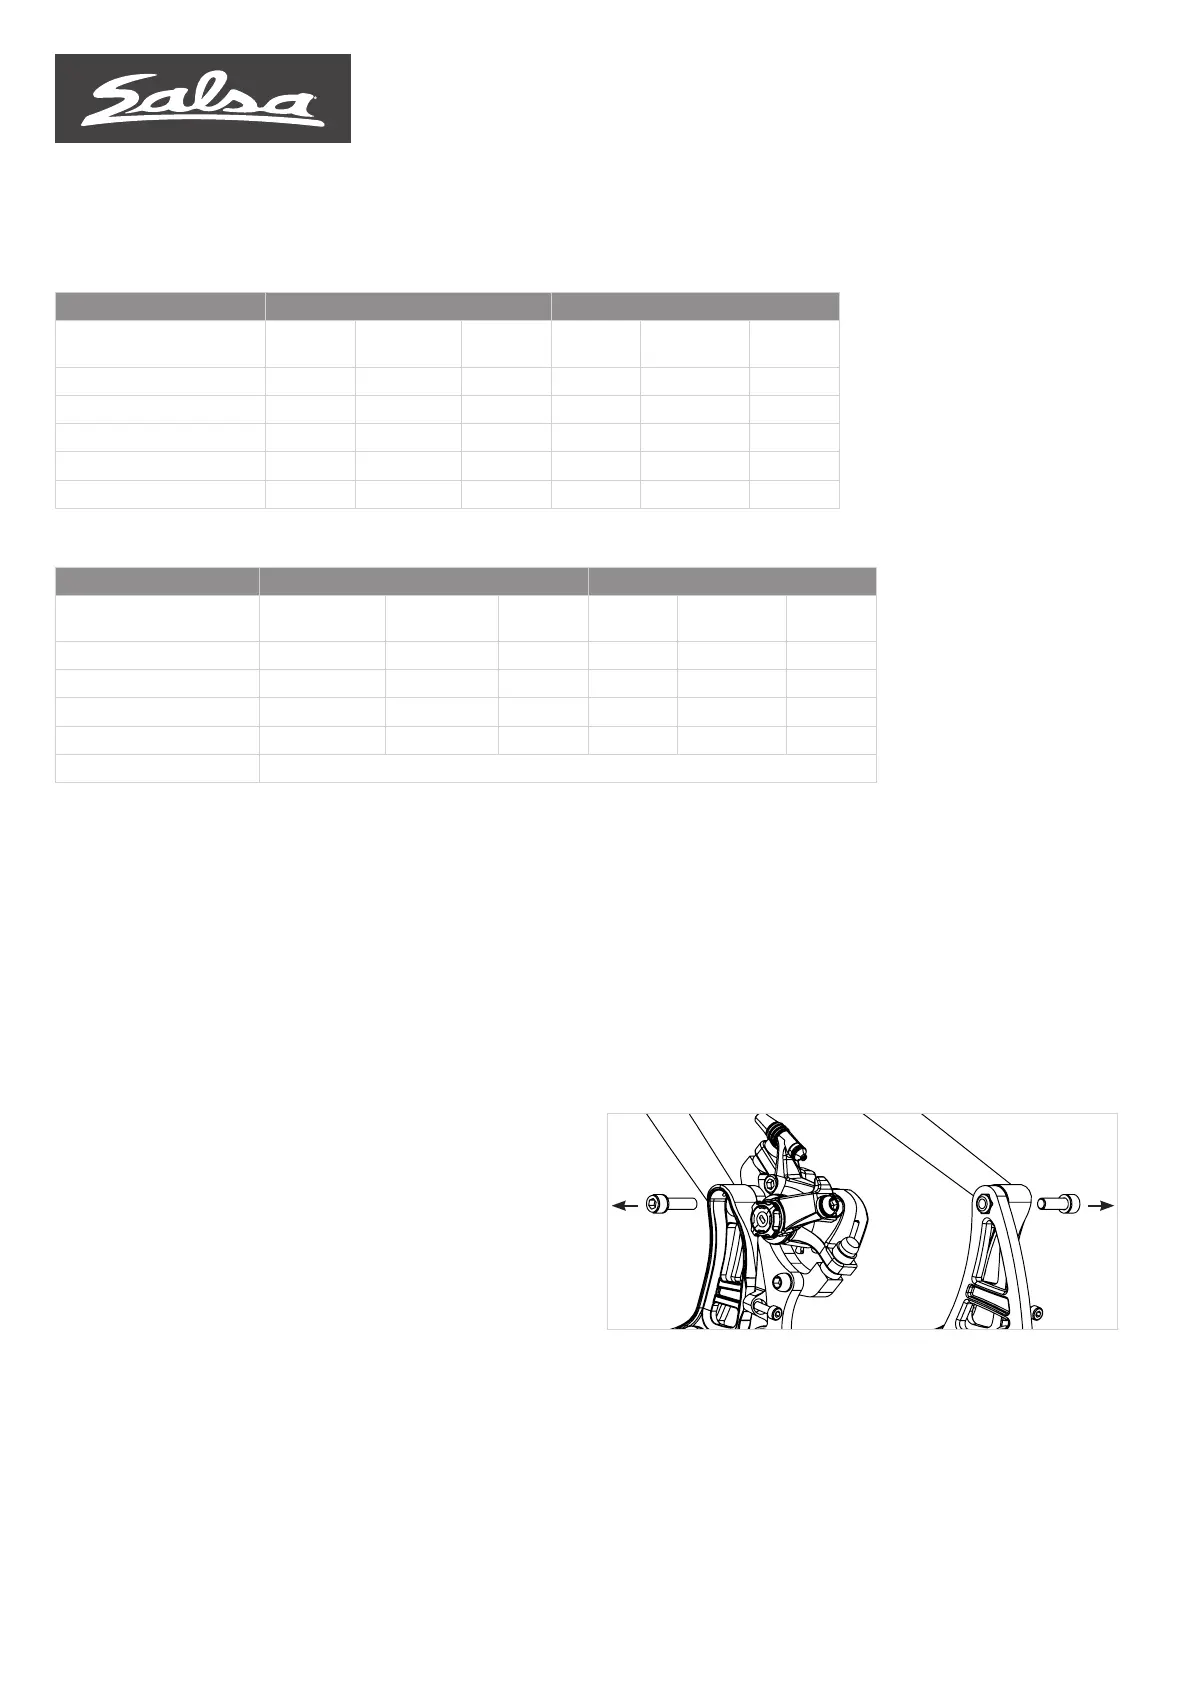
• Using a 5 mm hex wrench, remove the upper pivot bolt
from both the right and left Alternator dropouts of the
frame (Fig. 1). Store these bolts aside in a safe place to use
again, should you choose to use the frame without the
rack installed
Figure 1
Table 1 – Lower Mount Hardware Selection Chart
FRAME MATERIAL/STYLE NONDRIVESIDE DRIVESIDE
Bolt Under-head
Washer(s)
Standoff
Spacers
Bolt Under-head
Washer(s)
Standoff
Spacers
Steel w/ standard DS plate 2C 2F 2G 2A 2F 2G
Steel w/ split DS plate 2D 2F 2G + 2H 2B 2F 2G+2H
Aluminum 2D 2F 2G + 2J 2B 2F 2G+2J
Titanium 2D 2F 2G + 2H 2B 2F 2G+2H
Carbon w/ Alternator 2.0 2E 2F 2K 2C 2F 2K
Table 2 – Lower Mount Hardware Selection Chart for Frames w/ Boost Reduction Plates
FRAME MATERIAL/STYLE NONDRIVESIDE DRIVESIDE
Bolt Under-head
Washer(s)
Standoff
Spacers
Bolt Under-head
Washer(s)
Standoff
Spacers
Steel w/ standard DS plate 2D 2F 2G 2B 2F 2G
Steel w/ split DS plate 2E 2F+2J+2J+2J 2G+2H 2C 2F+2J 2G+2H
Aluminum 2E 2F+2J+2J 2G+2H 2C 2F 2G+2H
Titanium 2E 2F+2J+2J+2J 2G+2H 2C 2F+2J 2G+2H
Carbon Boost reduction plates not supported on Salsa carbon frames
 Loading...