3
Plumbing
Attaching Disposer to CONE BOWL or SINK COLLAR
DRAIN PIPING
1. Before installing the Salvajor disposer, the waste line should
be properly cleaned out to the connecting main sewer.
2. Use as few elbows, tees and bends as possible when mak-
ing connections.
3. All horizontal drain lines should have a minimum slope of
1/4” per linear foot.
4. A 3” diameter pipe is recommended for Salvajor disposers
models 300 thru 500. A 2” adapter is supplied for existing 2”
drains. Models 100 thru 200 require a 2” drain.
IMPORTANT!
It is imperative to have a proper downward pitch from the disposer
outlet to the main sewer line to assure proper gravity flow. Im-
proper drain line installation can result in drain backups.
5. Do not connect into a grease trap, interceptor or drum trap.
NOTE: Pressure regulators should be installed in areas where pressure
exceeds the recommended maximum of 80 psi.
WATER SUPPLY
6. Connect COLD WATER ONLY to disposer.
Water volume can be controlled by a properly rated flow control
valve or hand operated valve.
(
Nos. 7-9 below for NEW INSTALLATIONS ONLY!
)
7. Plumb 3/4” IPS line and reduce to 1/2” at the hand valve.
Install the factory-supplied solenoid valve with built-in flow control.
8. From the solenoid, plumb 1/2” IPS line above the flood plane of
the table and install the factory supplied vacuum breaker to local
code.
9. Plumb 1/2” IPS line from the vacuum breaker to either cone
bowl, sink or top housing inlet on the disposer. If connecting to
cone or sink, use 1⁄2” water inlet supplied by the factory.
NOTE: CONNECT COLD WATER ONLY TO DISPOSER.
Tempered water from pre-rinse or Salvajor scrapping system is
acceptable, but only in conjunction with an independent, continuous cold
water supply.
TYPICAL CONE LAYOUT
TYPICAL SINK LAYOUT
MAKE ALL PLUMBING CONNECTIONS
IN ACCORDANCE WITH LOCAL AND
NATIONAL PLUMBING CODES.
Recommended Cold Water Supply
Models 100, 2005GPM
Models 300, 5008GPM
STOP! If you have any questions about this installation
call 1
-
888
-
SALVAJOR for installation advice.
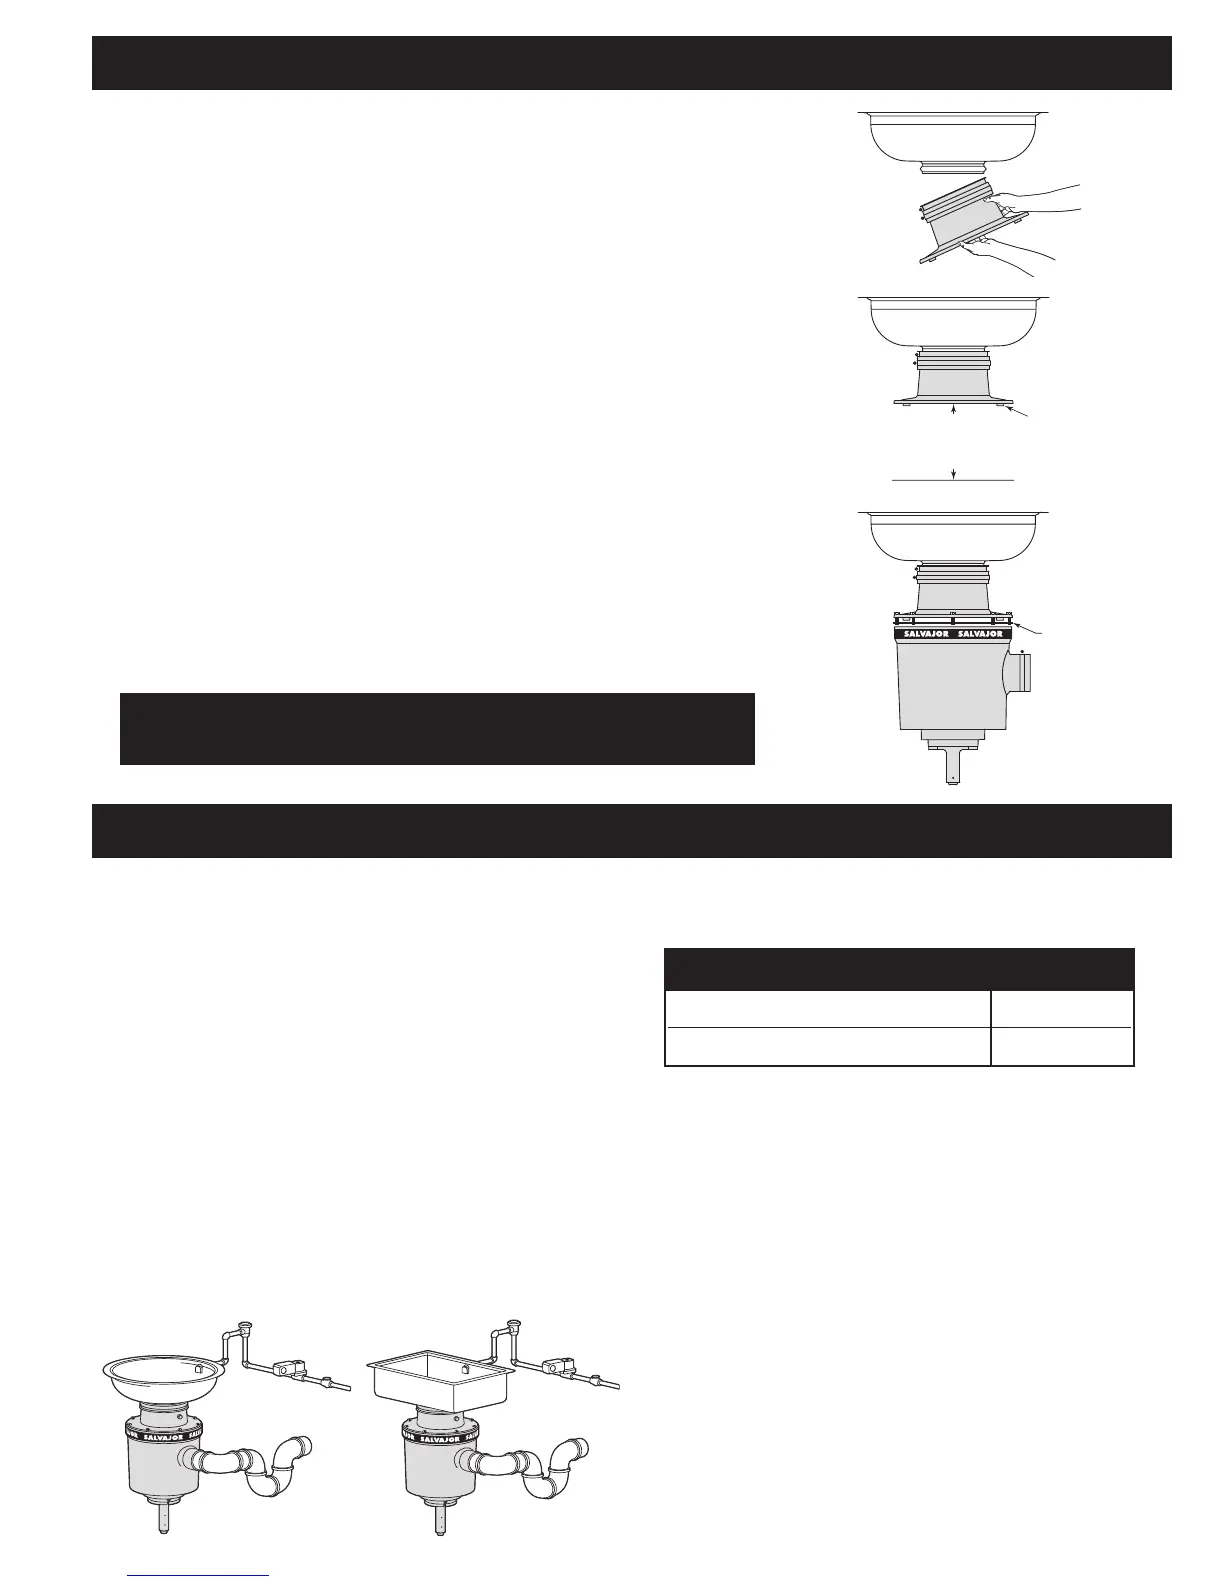
1. Carefully remove the top housing assembly by removing the eight bolts
making sure not to damage the center gasket.
2. Apply lubricant to the rubber collar on top housing and the beaded collar on
cone or sink.
3. Slip the top housing assembly up onto the beaded collar and tighten the clamp
so the top housing assembly can not be pulled down over the bead. If attaching
disposer to Salvajor ScrapMaster or TroughVeyor, use short top housing and cut
out rubber baffles on hycar adaptor to reduce bridging of food waste.
4. Measure distance from the bottom of the top housing to floor.
5. Turn the disposer on its side and install the leg support (optional on Models
100-200, standard on Models 300-500) on the bottom of the disposer and adjust
the leg extension so the disposer will stand approximately 1/2” below the bottom
of the top housing.
6. Carefully balancing the disposer on the leg support, walk it under the top hous-
ing, aligning the ears on the shredder ring with the locking tabs of the top housing.
7. Slide the center gasket into place. Insert the top housing bolts through holes in
the top housing and into the disposer body housing. As you the tighten bolts, the
disposer will pull up securely to the top housing.
8. Extend the leg extension securely on the floor, and tighten set screws.
NOTE: It is important that the leg fit tightly between the disposer and the floor.
LOCKING
TABS
Measure distance
between floor and
bottom of top
housing
GASKET
 Loading...