8
Installation Procedure
English
Installation Procedure
Spacing requirements
AC052/071RNCDKG
Ceiling installation
AC100/120/140RNCDKG
Ceiling installation
300 mm or more 300 mm or more
Ceiling
Wall
Ceiling
50 mm
50 mm
300 mm
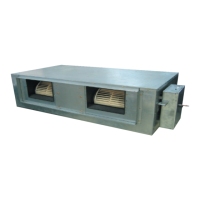
Step 3 Installing the indoor unit
Ceiling installation
1 Select pipe directions.
When the directions are selected, drill 3-1/8''-(100mm,
for pipe and cables) and 1-3/4''-(40mm, for drain hose)
diameter holes on the wall so that it slants slightly
downwards toward the outdoor for smooth water flow.
NOTE
• Use the pattern sheet to select pipe directions.
2 Drill holes for anchor bolts according to the distance and
mount them.
NOTE
• Use the pattern sheet.
3 Install the unit onto the ceiling. Be sure to arrange the
drain hose so that it is leveled lower than the drain hose
connecting port of the indoor unit.
NOTE
• For proper drainage of condensate, give a 2° (The gap
between the lower end of the indoor unit and the ceiling
should be 23 mm or more.) slant to the side of the unit
which will be connected with the drain hose as shown in
the figure.
Connection pipe
2°
Drain hose
Connection pipe
Drain hose
CAUTION
• Ensure that the ceiling is strong enough to support the
weight of the indoor unit.
• Before hanging the unit, test the strength of each
attached suspension bolt.
• Install the drain hose from the rear of the unit.
NOTE
• AC052/071RNCDKG:The gap between the lower end of
the indoor unit and the ceiling should be 1˚ or 16mm.
• AC100/120/140RNCDKG:The gap between the lower end
of the indoor unit and the ceiling should be 1˚ or 28mm.
 Loading...