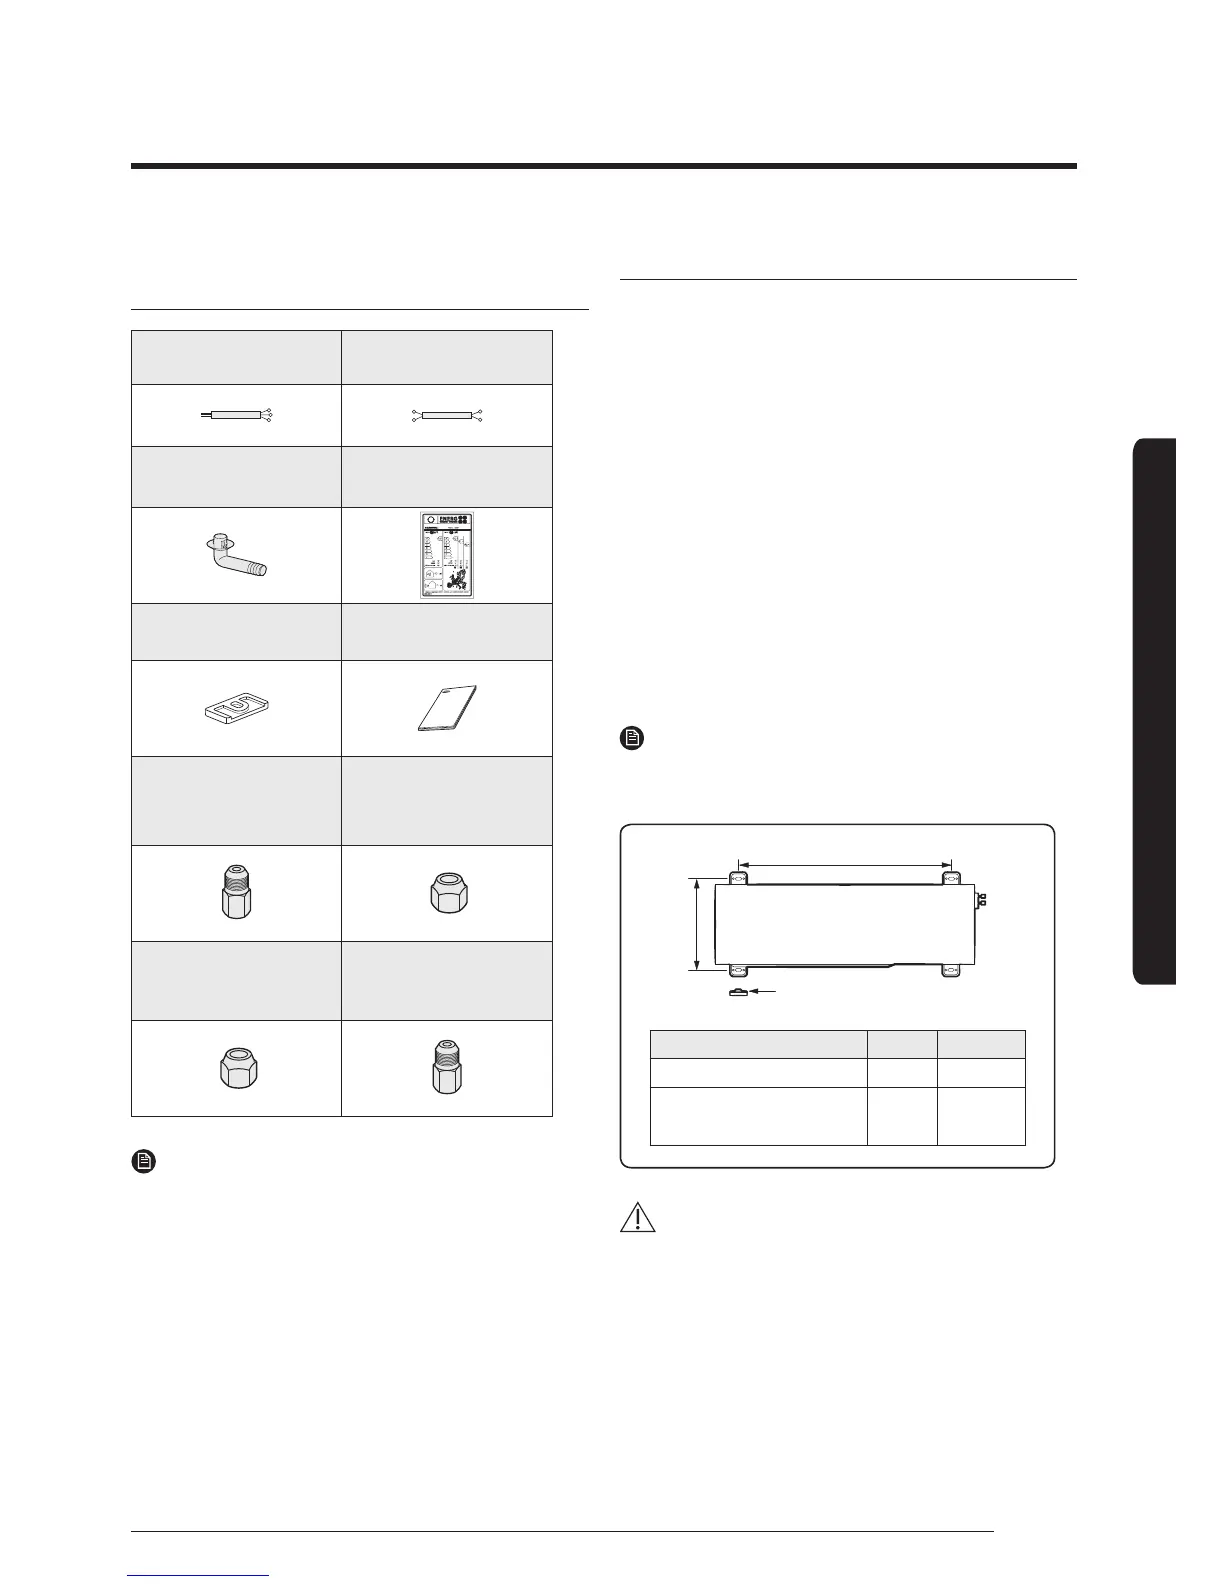
Installation Procedure
Step 2 Checking and preparing
accessories and tools
3-wire
Power Cable (option)
2-wire
Assembly Cable (option)
Drain Plug Energy Label
Rubber Leg Installation Manual
Flare Bolt
(Nut 12.70mm;Bolt
9.52mm)
(except AJ040MCJ2EH)
Flare Nuts, 9.52mm
outer pipe diameter
(except AJ040MCJ2EH)
Flare Nuts, 15.88mm
outer pipe diameter
(AJ080MCJ4EH)
Flare Bolt
(Nut 12.70mm; Bolt
15.88mm)(AJ080MCJ4EH)
NOTE
• Attach Energy Label to the outdoor unit properly when
installing.
• Wire assembly cables are optional. If they are not
supplied, use standard cables.
• The drain plug and the rubber legs are included only
when the air conditioner is supplied without assembly
pipes.
• If these accessories are supplied, they are in the
accessory package or outdoor unit package.
Step 3 Fixing the outdoor unit in place
Install the outdoor unit on a rigid and stable base to
prevent disturbance from any noise caused by vibration.
When installing the unit at a height or in a location
exposed to strong winds, fix the unit securely to a support
(i.e., a wall or a ground).
1 Position the outdoor unit so that the air flow is directed
towards the outside, as indicated by the arrows on the
top of the unit.
2 Attach the outdoor unit to the appropriate support
using anchor bolts.
• The earthing wire for the telephone line cannot be
used to earth the air conditioner.
3 DIf the outdoor unit is exposed to strong winds, install
shield plates around the outdoor unit, so that the fan
can operate correctly.
NOTE
• Certainly fix up its rubber leg in order to prevent its
vibration and noise.
(Unit : mm)
Model X Y
AJ040/050MCJ2EH 612 317
AJ052/068MCJ3EH
AJ070/080MCJ4EH
660 340
CAUTION
• Install a drain outlet at the lowest end around the base
for outdoor unit drainage
• When installing the outdoor unit on the roof,
waterproof the unit and check the ceiling strength.
Rubber leg
 Loading...