What to do if my Samsung AJ100TXJ5KG Air Conditioner displays error E237?
- JJulia DaySep 1, 2025
If your Samsung Air Conditioner displays the error code E237, it is recommended to contact an authorized service center for assistance.
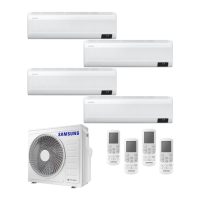
What to do if my Samsung AJ100TXJ5KG Air Conditioner displays error E237?
If your Samsung Air Conditioner displays the error code E237, it is recommended to contact an authorized service center for assistance.
What to do if my Samsung Air Conditioner displays error E221?
If your Samsung Air Conditioner displays the error code E221, it is recommended to contact an authorized service center for assistance.
What to do if my Samsung AJ100TXJ5KG Air Conditioner displays error E203?
If your Samsung Air Conditioner displays the error code E203, it is recommended to contact an authorized service center for assistance.
What to do if my Samsung AJ100TXJ5KG Air Conditioner displays error E202?
If your Samsung Air Conditioner displays the error code E202, it is recommended to contact an authorized service center for assistance.
What to do if my Samsung AJ100TXJ5KG Air Conditioner displays error E201?
If your Samsung Air Conditioner displays the error code E201, it is recommended to contact an authorized service center for assistance.
What to do if my Samsung AJ100TXJ5KG displays error E199?
If your Samsung Air Conditioner displays the error code E199, it is recommended to contact an authorized service center for assistance.
What to do if my Samsung AJ100TXJ5KG displays error E190?
If your Samsung Air Conditioner displays the error code E190, it is recommended to contact an authorized service center for assistance.
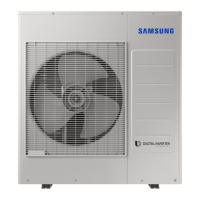
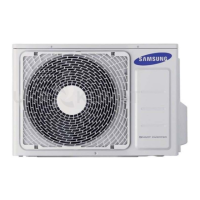
| Type | Air conditioner outdoor unit |
|---|---|
| Multi-split | - |
| Product color | White |
| Gas hose diameter | 9.52 mm |
| Inverter technology | Yes |
| Liquid hose diameter | 6.35 mm |
| Refrigerating medium | R32 |
| Cooling capacity (nominal) | 34100 BTU/h |
| Heating capacity (nominal) | 40900 BTU/h |
| Refrigerating medium weight | 2700 g |
| Cooling capacity in watts (nominal) | 10000 W |
| Operating temperature (cooling) (T-T) | -10 - 46 °C |
| Operating temperature (heating) (T-T) | -15 - 24 °C |
| Seasonal efficiency rating (cooling) (SEER) | 3.64 |
| Seasonal efficiency rating (heating) (SCOP) | 4.26 |
| Heating capacity in watts (nominal) (Warmer heating season) | 12000 W |
| Heating capacity in watts (nominal) (Average heating season) | - W |
| Wi-Fi | No |
| Current (cooling) | 12.2 A |
| Current (heating) | 12.8 A |
| Design load (cooling) | 10 kW |
| Energy efficiency class (cooling) | A++ |
| Annual energy consumption (cooling) | - kWh |
| Hourly energy consumption (cooling) | 8 kWh |
| Hourly energy consumption (heating) | 4.32 kWh |
| Design load (heating) (Warmer heating season) | 12 kW |
| Design load (heating) (Average heating season) | - kW |
| Energy efficiency class (heating) (Warmer heating season) | A+ |
| Indoor unit noise level (high speed) | - dB |
| Outdoor unit depth | 330 mm |
| Outdoor unit width | 940 mm |
| Outdoor unit height | 998 mm |
| Outdoor unit weight | 76500 g |
| Outdoor units quantity | 1 |
| Outdoor unit noise level | 54 dB |
| Outdoor unit package depth | 1096 mm |
| Outdoor unit package width | 995 mm |
| Outdoor unit package height | 426 mm |
| Outdoor unit package weight | 82000 g |
| Fan motor type (outdoor unit) | AC |
| Outdoor unit sound power level | 70 dB |
Describes warning symbols, cautions, and supplementary information used throughout the manual.
Highlights the necessity for installation and testing to be performed by a qualified technician.
Provides general safety information, warnings, and precautions for installation and operation.
Details safe installation practices, environmental considerations, and unit accessibility requirements.
Covers precautions regarding ignition sources and requirements for area ventilation during installation.
Specifies the requirement for having appropriate fire extinguishing equipment available.
Details methods for detecting refrigerant leaks and procedures for refrigerant recovery.
Outlines the requirements for labelling parts that have been decommissioned and emptied of refrigerant.
Specifies requirements and precautions for the power supply line, fuses, and circuit breakers.
Provides requirements and considerations for selecting the optimal installation location for the unit.
Details specific location requirements, obstructions, neighbour considerations, and associated cautions.
Illustrates minimum clearances for single and multiple outdoor units and provides related cautions.
Lists the necessary accessories and tools required for checking and preparing the installation.
Provides instructions for securely fixing the outdoor unit in place, considering vibration and wind.
Describes an optional method for mounting the outdoor unit to a wall using a rack.
Details the procedure for connecting the main power, indoor-outdoor power, and communication cables.
Illustrates the wiring diagram for connecting various cables to the outdoor unit for different configurations.
Provides specifications for circuit breakers, power supply cords, and input current ratings.
Details cable terminal board connections and the optional transmitter installation procedure.
Covers specifications for outdoor-to-indoor power terminals and associated connection cautions.
Details specifications for indoor/outdoor power and communication cables, including special types.
Provides instructions and tools required for optionally extending the power cable.
Details the step-by-step procedure for extending power cables, including cautions and warnings.
Guides on connecting refrigerant pipes, including pipe diameter, length, and height limitations.
Includes notes on minimum pipe length, tightening torques, and essential installation requirements.
Details the process for cutting pipes and flaring them correctly, including required tools and cautions.
Provides cautions and visual examples of correct and incorrect pipe flaring techniques.
Instructs on connecting the circuit and removing air using a vacuum pump to prevent malfunction.
Highlights warnings about refrigerant leakage, air in the circuit, and the environmental impact of R-32.
Advises on system standby mode for vacuum operation and cautions regarding electrical connections.
Details the procedure for checking for gas leaks on the outdoor and indoor units after installation.
Covers leak testing with nitrogen and R-32, and introduces the procedure for adding refrigerant.
Explains regulations regarding fluorinated greenhouse gases and precautions for handling R-32 refrigerant.
Guides on filling refrigerant charge labels and calculating the quantity of refrigerant to add.
Summarizes refrigerant charge limits for products and provides important cautions regarding overcharging.
Details the procedure for connecting the drain hose to the outdoor unit for condensation draining.
Provides instructions for checking and ensuring a proper earthing connection for the unit.
Guides on manually setting indoor unit addresses and installation options, including key functions.
Explains manual address setting, key operations, and display indications for the outdoor unit.
Details how to set outdoor unit options using keys, including saving edited values and associated cautions.
Provides an overview of entering the setting option mode using different remote controller models.
Details the procedure for setting options via remote controller, including segment settings and cautions.
Outlines the operations and corresponding indications for setting various modes and options.
Continues detailing operations and indications for setting modes and options via remote controller.
Explains automatic addressing, notes for best results, and cautions regarding temperature ranges.
Covers initial system startup, self-test procedures, and manual indoor unit address assignment.
Details option numbers for addressing, tables for settings, and important cautions for address configuration.
Guides on setting indoor unit installation options based on location, including central control and master/slave settings.
Details how to test the Cool and Heat modes, including temperature differences and try-run functions.
Explains how to enable specific modes (Cool or Heat only) for indoor units via main PCB settings.
Guides on enabling or disabling the power improvement mode for reduced power consumption.
Details the procedure for pumping down refrigerant before disconnecting pipes, including essential warnings.
Provides steps for relocating units, including refrigerant recovery, disconnection, and important notes.
Explains how to open and close stop valves, including tightening torques, cautions, and relevant notes.
Lists self-diagnostic error codes displayed on the outdoor unit PCB and their corresponding explanations.
Continues the list of self-diagnostic error codes and their explanations for system troubleshooting.
