brn
|
--
\ t
=nzl i
7-41iil
6t 1
:8lq Ui I
i'
tl.Z
J_
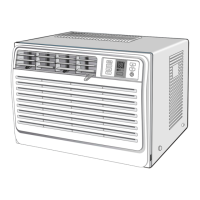
AW089CB/AWI 09CB/AW1
29CB/AW08ECB7/AW1
0ECB7
I AW
1 2ECB7
Installation
The
illustrations shown in this section
may
not
exacuy
match
your
air
conditioner
\
--"'1aa-i
I
,@gl
i
S€Rl/
i
1 Open the ftont
grille
depending
on the model. lf necessau
refer to
your
owner's instruclions.
2 Remove the
screw located at the lower section of the front
grille.
It
is secured
in the <--,".""--r section depending
on the model.
3 Remove
the front
panel.
3-1 Press
both sides of the
cabinet in
the
direction of the anow
as shown
in
the fgure.
3-2 Pull
the lower
part
of the
front
panel
slightly
forward.
(no
more than
7.6cm/3 inches)
3-3 Lift
the
front
panel
upward.
34 Disconnect
a
connector of
the front
panel
.
-
Applying excessive
for@ to
remove
the
front
panel
may
cause
damage
to the tab; be sure not lo use excesive
force-
4
Remove two
or four screws on
the lower
right and left
sides of the unit.
The following
a@e$ories
may be not supplied depending on
the model
Typ€ A(Oty-B
)
Type
B(Qty-18
or 19)
Type
C(Oty-2)
.qns0
@
Top Suppdt
Channel
T-\
Top support
\
channel seal strip
W
ml
Type D(aty-2)
4"
<;i'
Security bracket
t-t
I
Window sash seal
.-----4
#/
Window
gasket
ffi3
Bottom
gasket
F====--
I
i,Wl
"i
 Loading...