Do you have a question about the Samsung C34H892W Series and is the answer not in the manual?
Ensure adequate space around the monitor for ventilation and heat dissipation.
Important warnings and cautions for safe operation and handling of the product.
Guidelines for storing the monitor to prevent damage or surface issues.
Instructions for safely cleaning the monitor's panel and exterior surfaces.
Critical safety guidelines regarding power connections and electrical hazards.
Warnings and precautions for installing the monitor safely and correctly.
Safety warnings and guidelines for operating the monitor and handling potential issues.
Identifies the main components and parts of the monitor.
Details the buttons and controls on the monitor for operation.
Explains the meaning of various icons used in the manual and on the product.
Explains the shortcut button functions for quick access to features.
Describes how to use the Function Key Guide to navigate menus and options.
How to adjust picture settings like brightness, contrast, and eye saver mode.
Instructions for adjusting the audio volume level on the monitor.
Details the different types of ports available for connecting external devices.
Guides on how to adjust the monitor's angle and vertical position.
Instructions for using an anti-theft lock to secure the monitor.
Safety advice on how to move the monitor without causing damage.
Important notes and specifications regarding wall mounting and screw usage.
Step-by-step guide on how to assemble and attach the monitor stand.
Instructions for safely detaching the monitor stand from the display.
Preliminary steps and checks before connecting the monitor to a source device.
Guidance on connecting the monitor to a personal computer.
Detailed steps for connecting the monitor via an HDMI cable.
Instructions for connecting the monitor using a USB Type-C cable.
Detailed steps for connecting the monitor via a DisplayPort cable.
How to connect audio output devices like headphones to the monitor.
How to use the monitor as a USB hub for connecting multiple devices.
Explains the benefits and usage of the monitor's USB hub functionality.
Steps for connecting the monitor to a power source for operation.
Instructions for organizing and managing cables connected to the monitor.
Explains the MAGIC Bright feature for optimizing picture quality based on environment.
Picture settings available when connected to a PC.
Picture settings available when connected to an AV device.
How to adjust the general brightness level of the picture.
How to adjust the contrast between objects and background.
How to adjust the clarity and definition of lines and edges.
Options for adjusting color tint, saturation, and tone.
Feature to enhance picture details and vividness, especially for low-res images.
Settings to reduce blue light and improve eye comfort during use.
Adjustments for image quality issues over HDMI, like contrast or black level.
Settings optimized for gaming experiences on PCs or consoles.
How to adjust panel response rate for smoother video and gaming.
Options for changing the aspect ratio and display size of the picture.
Tools for fine-tuning the picture's horizontal and vertical position.
Detailed guide for adjusting horizontal and vertical screen alignment.
Enables Picture-in-Picture or Picture-by-Picture display modes.
Selects the size and aspect ratio for sub-screens in PIP/PBP mode.
Choose which screen's audio output to hear in PIP/PBP mode.
Adjusts the placement of the sub-screen within the main display.
Selects the input source for the main and sub-screens in PIP/PBP.
Adjusts image size for sub-screens in PIP/PBP mode for PC or AV inputs.
Sets picture size for divided screens in Picture-by-Picture mode.
Adjusts contrast level for sub-screens in PIP/PBP mode.
Adjusts contrast level for the sub-screen in Picture-in-Picture mode.
Adjusts the transparency level of the on-screen display menu.
Allows adjustment of the on-screen display menu's position.
Sets the display language for the on-screen menus.
Configures how long the on-screen display menu remains visible.
Selects the DisplayPort version for optimal connectivity and performance.
Selects the HDMI mode for compatible device and resolution settings.
Technology to eliminate screen tearing and lag for smoother gaming.
Lists compatible AMD graphics cards for FreeSync functionality.
Step-by-step guide to activating FreeSync in monitor and graphics settings.
Feature to reduce energy consumption while maintaining picture quality.
Allows setting an automatic power-off timer for the monitor.
Configures the monitor for PC or AV input for optimal picture display.
Automatically detects and switches to the active input signal.
Automatically displays the new connected source when activated.
Controls the response rate of button presses for menu navigation.
Configures the behavior and visibility of the power indicator LED.
Resets all monitor settings to their original factory defaults.
Displays current input source, frequency, and resolution information.
Software for partitioning monitor sections and enhancing usability.
Lists the OS and hardware requirements for installing Easy Setting Box.
Potential issues and factors affecting Easy Setting Box installation.
Steps to perform before contacting support for issues.
Procedures to test the monitor's functionality and self-diagnose issues.
How to verify and adjust screen resolution and refresh rate for compatibility.
Troubleshooting steps for installation problems when connected to a PC.
Solutions for common screen display problems and power issues.
Explains the 'Not Optimum Mode' message and how to resolve it.
Troubleshooting steps for distorted or unclear screen images.
Solutions for screen instability, flickering, or ghosting effects.
How to adjust brightness and contrast for optimal screen visibility.
Troubleshooting steps for uneven or inaccurate color reproduction.
Adjustments for achieving accurate white balance on the screen.
Diagnosing issues when the screen is blank and the power LED blinks.
Steps to fix blurry text display, often related to ClearType settings.
Troubleshooting for choppy video playback, possibly due to player or resource issues.
Solutions for problems related to audio output, including no sound or low volume.
Addressing issues related to sound from the source device, like beeping sounds.
Guide to changing the monitor's refresh rate via graphics card settings.
Instructions for adjusting screen resolution across different Windows versions.
Steps to enable power-saving modes on the monitor and PC.
Provides general technical specifications for the monitor model.
Information on the monitor's Plug-and-Play compatibility and installation.
Explains potential pixel variations on the LCD panel.
Outlines conditions under which service charges may apply.
Lists situations considered non-defects for which service might be charged.
Describes product damage resulting from user mishandling or improper use.
Covers other scenarios where service may be charged, like natural disasters.
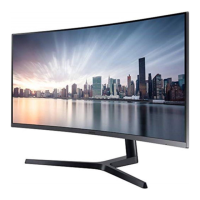
| Screen Size | 34 inches |
|---|---|
| Resolution | 3440 x 1440 |
| Panel Type | VA |
| Refresh Rate | 100 Hz |
| Aspect Ratio | 21:9 |
| Brightness | 300 cd/m² |
| Contrast Ratio | 3000:1 |
| Response Time | 4 ms |
| Curvature | 1800R |
| Built-in Speakers | Yes |
| AMD FreeSync | Yes |
| Connectivity | HDMI, DisplayPort, USB-C |