Home
Samsung
All in One Printer
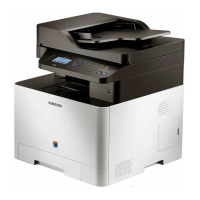
CLX-4195N
Page 82
Samsung CLX-4195N - Page 82
147 pages
Manual
To Next Page
To Next Page
To Previous Page
To Previous Page
Loading...
4.
Alignment
and
Troubleshooting
Original
paper
jam
inside
of
scanner
1)
Open
the
document
feeder
cover
.
2)
Gently
remove
the
jammed
paper
from
the
document
feeder
.
3)
Close
the
document
feeder
cover
.
4-6
Copyright©
1995-2012
SAMSUNG.
All
rights
reserved.
81
83
Table of Contents
Main Page
Table of Contents
2
Precautions
5
Safety Warning
5
Caution for Safety
6
Electric Shock and Fire Safety Precautions
6
Toxic Material
6
Assembly and Disassembly Precautions
7
Handling Precautions
7
Disregarding this Warning May Cause Bodily Injury
8
ESD Precautions
9
Product Specification and Description
10
Product Specification
10
Product Overview
10
Copy
11
General Print Engine
11
Specifications
11
Scan
13
Fax
14
Controller and Software
16
Paper Handling
19
Environment
21
Reliability and Service
21
Consumables
22
Maintenance Parts
22
Option
23
Model Comparison Table
24
System Overview
25
Front View
25
Rear View
26
Paper Path
27
System Layout
28
Feeding Section
29
Drive Unit
30
Transfer Roller
30
Fuser Unit
31
LSU (Laser Scanner Unit)
32
Toner Cartridge
33
Hardware Configuration
34
Main Board
36
Line OPE Controller (CLX-4195N_4195FN)
38
GUI OPE Controller (CLX-4195FW)
40
Fax Board
42
Wireless LAN Board (CLX-4195FW Only)
43
SMPS Board
44
HVPS Board
46
Hub Pba
47
Itb Eeprom Pba
47
Electrical Parts Location
48
Engine F/W Control Algorithm
50
Feeding
50
Fusing
50
Transfer
50
Lsu
51
Software Descriptions
52
Architecture
52
Software System Overview
52
Data and Control Flow
53
Disassembly and Reassembly
55
Precautions When Replacing Parts
55
Precautions When Assembling and Disassembling
55
Precautions When Handling PBA
55
Releasing Plastic Latches
56
Screws Used in the Printer
57
Replacing the Maintenance Parts
59
Toner Cartridge
59
Waste Toner Container
60
ITB Unit
61
Fuser Unit
63
Transfer Roller Assy
64
Pick Up_Forward_Reverse Roller
64
Replacing the Main SVC Parts
65
Cover
65
ADF Unit
66
OPE Unit
67
Platen Unit
68
Middle Cover
69
Fax Board
70
HVPS Board
71
Outer Temperature Sensor
71
Lsu
72
Waste Toner Container Sensor
72
Main Board
73
SMPS Board
73
Feed Drive Unit
74
Frame-Retard
75
Main Drive Unit
76
Alignment and Troubleshooting
77
Alignment and Adjustments
77
Control Panel
77
Understanding the Status LED
80
Clearing Original Document Jams
81
JAM Removal
81
Clearing Paper Jams
84
Inside the Machine
86
Useful Menu Item for Service
88
Periodic Defective Image
90
Useful Management Tools
91
Using Samsung Easy Printer Manager (Windows and Macintosh Only)
91
Advanced Settings User Interface Overview
92
Using Samsung Printer Status (Windows Only)
93
Using Syncthru Web Service (SWS)
94
Update the Firmware by Using the USB Port
96
Updating Firmware
96
Update the Firmware by Using the Network
97
Tech Mode (CLX-4195N_4195FN)
99
Tech Mode (Diagnostic Mode)
99
Tech Mode (CLX-4195FW)
104
Troubleshooting
109
Procedure of Checking the Symptoms
109
Basic Check List
110
4.2.2. Error Code and Troubleshooting
111
Error Code and Troubleshooting
111
Actuator Motor Failure : #A1-1210. Call for Service if the Problem Persists
114
Error Code
114
Error Message
114
Actuator Motor Failure : #A1-2112. Call for Service if the Problem Persists
115
Actuator Motor Failure : #A1-3612. Call for Service if the Problem Persists
115
Actuator Motor Failure : #A1-4111. Call for Service if the Problem Persists
116
Actuator Motor Failure : #A1-4310. Call for Service if the Problem Persists
116
Actuator Fan Failure : #A2-1210. Call for Service if the Problem Persists
117
Actuator Fan Failure : #A2-2110. Call for Service if the Problem Persists
117
Actuator Sensor Failure #A3-3211: Call for Service if the Problem Persists
117
Actuator Sensor Failure #A3-3212: Call for Service if the Problem Persists
117
Actuator Sensor Failure #A3-3311: Call for Service if the Problem Persists
118
Actuator Sensor Failure #A3-3312: Call for Service if the Problem Persists
118
Not Proper Room Temperature. Change Room Temperature
118
Prepare New Yellow Toner Cartridge
119
Replace with New Yellow Toner Cartridge
119
Cyan Toner Failure: #C2-4320. Install Cyan Toner Cartridge Again
120
Install Cyan Toner Cartridge
120
Black Toner Failure: #C2-5320. Install Black Toner Cartridge Again
120
Install Black Toner Cartridge
120
Black Toner Cartridge Is Not Compatible. Check User's Guide
121
Prepare New Transfer Belt Unit
121
Replace New Transfer Belt Unit
121
Install Image Transfer Belt Unit
121
Image Transfer Belt Unit Is Not Compatible. Check Users Guide
122
Install Magenta Toner Cartridge
120
Install Yellow Toner Cartridge
120
Magenta Toner Failure: #C2-3320. Install Magenta Toner Cartridge Again
120
Yellow Toner Failure: #C2-2320. Install Yellow Toner Cartridge Again
120
Sensor Failure: #C5-1710. Turn off then on
122
Prepare New Fuser Unit
122
Replace with New Fuser Unit
122
Waste Toner Container Is Almost Full. Order New One
122
Replace with New Tray1 Pickup Roller
123
End of Life, Replace with New Tray1 Retard Roller
123
Paper Jam in Tray 1
124
Waste Toner Containrt Is Not Installed. Install It
123
Paper Is Empty in Tray 1. Load Paper
124
Paper Jam Inside of Machine
125
Paper Jam or Empty in Tray
125
Paper Jam in Exit Area
126
Too Much Paper in Output bin Tray. Remove Printed Paper
127
Door Is Open. Close It
128
Fax Memory Is Almost Full. Print or Remove Received Fax Job
129
Fax Memory Is Full. Print or Remove Received Fax Job
129
Fax System Failure: #S4-3111. Install Fax Modem Card Again
129
UI System Failure: #S5-3110. Call for Service
129
This IP Address Conflicts with that of Other System. Check It
130
Authentication Failed. Please Contact the System Administrator
130
Fuser Unit Failure #U1-2132: Turn off then on
130
Fuser Unit Failure #U1-2320: Turn off then on
130
Fuser Unit Failure #U1-2330: Turn off then on
130
Fuser Unit Failure: #U1-2315.Turn off then on
130
Fuser Unit Failure: #U1-2334. Turn off then
130
Fuser Unit Failure #U1-2340: Turn off then on
130
LSU Failure: #U2-6122. Please Turn off then on
131
LSU Failure: #U2-6142. Please Turn off then on
131
Original Paper Jam in Front of Scanner
132
Image Quality Problems
133
Other Errors
137
System Diagram
138
Block Diagram
138
Connection Diagram
139
Reference Information
140
Tool for Troubleshooting
140
Glossary
141
Related product manuals
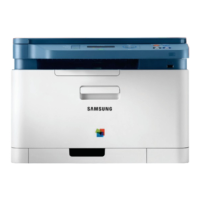
Samsung CLX-3185
151 pages
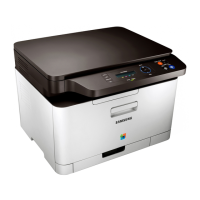
Samsung CLX-3305
2 pages
Samsung CLX-3175
220 pages
Samsung CLX-3170
143 pages
Samsung CLX-3300
2 pages
Samsung CLX-3305W
341 pages
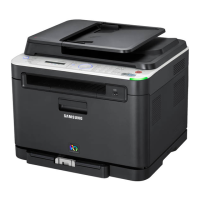
Samsung CLX-3185FN
149 pages
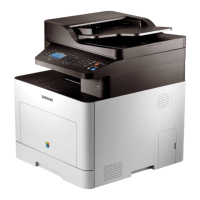
Samsung CLX-6260FD
159 pages
Samsung CLX-6220FX
168 pages
Samsung CLX-3175FW
220 pages
Samsung CLX-6260FW
159 pages
Samsung CLX-9350ND
549 pages