Do you have a question about the Samsung LE23R81B and is the answer not in the manual?
Details of items included with the LCD TV.
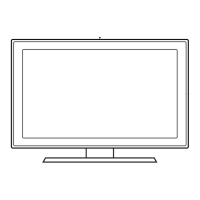
Step-by-step guide for attaching the TV stand.
Instructions for mounting the TV using a separate wall mount kit.
Explains the function of each button on the TV's front panel.
Guide for connecting common external video devices to the TV.
Connects RCA audio cables to external audio systems like amplifiers.
Supports HDMI connections for high-definition video and multi-channel audio.
Connecting the TV to broadcast signals via aerial or cable.
Connects external devices like VCRs or DVDs using RCA or S-VIDEO.
Connects a PC to the TV for display via D-Sub and audio cables.
Connects component video/audio cables for DTV or DVD devices.
Device to physically fix the system in public places.
Detailed explanation of buttons and functions on the TV remote control.
Explains how to use teletext features via the remote control.
Steps to install batteries in the remote control for operation.
Instructions for powering the TV on and off using the set or remote.
How to put the TV into standby mode to reduce power consumption.
Choosing the display language and region for TV settings.
Automatically scans and stores available TV channels.
Setting the current time for the TV clock.
Automatically scans and stores available channels based on region.
Manually storing channels with program number and color/sound system.
Reordering channels for easier access or memorization.
Customizing channel names for easier identification.
Adding, deleting, or locking specific channels in the list.
Prevents unauthorized viewing of specific channels using parental controls.
Manually adjusting channel reception for optimal picture quality.
Selecting preset picture modes like Dynamic, Standard, or Movie.
Detailed adjustments for contrast, brightness, sharpness, and color.
Selecting color temperature presets like Cool, Normal, or Warm.
Accessing and adjusting detailed picture parameters like Black Adjust and Gamma.
Adjusting color temperature using Red, Green, and Blue offsets/gains.
Adjusting the LCD backlight brightness level (0-10).
Selecting picture aspect ratios like 16:9, Wide Zoom, or 4:3.
Setting screen mode for 4:3 WSS images or other aspect ratio options.
Restoring all picture settings to their original factory default values.
Using features to reduce noise, enhance colors, and improve overall picture detail.
Instructions on activating and configuring the PIP feature.
Table showing PIP compatibility for different input sources.
Adjusting the black level for HDMI input to improve screen depth.
Selecting sound modes like Standard, Music, Movie, Speech, or Custom.
Customizing sound parameters like equalizer settings.
Enabling SRS technology for virtual surround sound from two speakers.
Connecting headphones for private listening without disturbing others.
Setting the audio mode using the DUAL button for different broadcast types.
Automatically adjusts volume based on signal strength to maintain consistent output.
Disabling internal speakers to use external audio outputs.
Selecting whether to listen to the main or sub picture's audio in PIP mode.
Restoring all sound settings to their original factory default values.
Setting the TV clock for time display and automatic timers.
Selecting a time period for the TV to automatically switch to standby.
Programming specific times for the TV to turn on or off.
Selecting the display language for menus and indications.
Optimizing TV settings for a realistic gaming experience.
Managing blue screen display and melody sounds for power-on/off.
Configuring detailed screen settings for PC mode or Home Theater PC function.
Turning the front blue LED on/off for power saving or comfort.
Adjusting TV brightness to reduce power consumption.
Choosing among connected external devices like TV, VCR, or PC.
Customizing names for connected devices for easier selection.
Explains the structure and categories of teletext pages.
Instructions on how to activate and view teletext content.
Entering page numbers directly or using linked pages to navigate teletext.
Selecting teletext topics by pressing colored buttons corresponding to status line information.
Steps to configure PC display settings for optimal TV output.
Recommended resolutions and sync polarities for D-Sub and HDMI/DVI inputs.
Adjusting frequency and fine-tuning to remove picture noise.
Adjusting the PC screen's vertical and horizontal position.
Self-adjusting PC screen for optimal video signal reception.
Resetting all image settings to factory default values.
Instructions for installing and using the Kensington lock device.
Common problems and solutions for sound, picture, and remote control issues.
Technical details like screen size, power consumption, and resolution for different models.
Operating and storage conditions for temperature and humidity.
| Screen Size | 23 inches |
|---|---|
| Display Technology | LCD |
| Resolution | 1366 x 768 |
| Aspect Ratio | 16:9 |
| Contrast Ratio | 3000:1 |
| Response Time | 8 ms |
| HDMI Ports | 2 |
| Brightness | 500 cd/m² |
| Viewing Angle | 178° |
| Input Ports | Component, Composite, PC input |