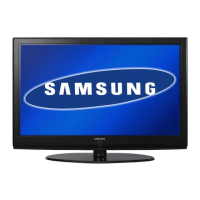
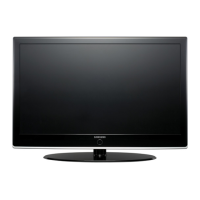
Do you have a question about the Samsung LE37M8 and is the answer not in the manual?
Provides worldwide contact information for Samsung customer care centers.
Advises users to read the manual thoroughly before operating the unit and keep for future reference.
Lists all items included with the LCD TV, such as remote control, power cord, and cleaning cloth.
Explains how to mount the TV on the wall using optional wall mount items and warns about installation safety.
Describes the optional Kensington lock for physically securing the system in public places.
Describes the process for automatically scanning and storing available TV channels.
Explains how to prevent unauthorized viewing by locking specific channels or the entire system.
Describes how to change automatically assigned channel names to custom names.
Details how to fine-tune individual picture quality parameters such as contrast, brightness, sharpness, and color.
Explains how to adjust the screen brightness by modifying the LCD backlight level.
Details how to choose different screen modes like 16:9, Wide Zoom, and 4:3 to adjust the picture aspect ratio.
Guides on restoring all picture settings to their original factory default values.
Guides on selecting different sound modes to enhance the audio experience based on the content.
Explains how to personalize sound preferences by adjusting equalizer settings and other audio parameters.
Explains how to use the DUAL button to select different sound modes for FM and NICAM stereo.
Describes how to enable automatic volume adjustment to compensate for varying broadcast signal levels.
Details how to select the sound output from the sub picture when the PIP feature is activated.
Explains how to set the TV's clock and display the current time using the INFO button.
Allows selection of a time period (30-180 minutes) after which the TV automatically switches to standby mode.
Instructs on selecting the preferred language for menus and indications when using the TV for the first time.
Explains how to configure PC mode settings for higher quality pictures, especially when connected to a Home Theatre PC.
Describes how to adjust TV brightness to save power and reduce eye strain, especially at night.
Allows users to rename connected devices for clearer identification in the source list.
Guides on manually specifying channels for faster searching and updating the channel list.
Explains how to view additional information about the current program by pressing the INFO button.
Allows users to preset the default guide style (Now/Next or Full Guide) for convenient viewing.
Details the process of setting a 4-digit PIN to prevent viewing of unsuitable programs based on age ratings.
Explains how to set the subtitle mode to 'Normal' or 'Hard of hearing' for accessibility.
Describes how to choose audio output formats (PCM or Dolby Digital) for connecting external audio receivers.
Explains how to keep the TV software up-to-date by automatically detecting and installing broadcast upgrades.
Guides on accessing and navigating the CI menu to manage CAM-provided services and settings.
Allows users to change default language settings for subtitles, audio streams, and teletext.
Describes the organization and content of teletext pages, including categories like Part and Contents.
Explains how to enter specific teletext page numbers directly using the remote control's numeric buttons.
Details how to program the remote control to operate different AV devices such as VCR, Cable, DVD, and STB.
Details recommended screen resolutions and frequencies for both D-Sub and HDMI/DVI PC inputs.
Explains how to automatically adjust PC screen position, fine, and coarse settings for optimal display.
Guides on restoring all PC image settings to their original factory default values.
Details the operations of remote control buttons for adjusting wall-mount angle and remembering positions.
Provides instructions on how to connect Anynet+ compatible devices to the TV and home theater system.
Explains how to scan for and switch control between connected Anynet+ devices.
Instructs on how to initiate recording of TV programs using the REC button or Anynet+ menu.
Provides solutions for common problems encountered with the Anynet+ system, such as devices not working or not being displayed.
Offers solutions for various TV problems, including no sound/picture, remote control issues, and signal errors.
| Screen Size | 37 inches |
|---|---|
| Resolution | 1366 x 768 |
| Display Type | LCD |
| Response Time | 8 ms |
| Composite Video Inputs | 1 |
| Audio Output | 2 x 10W |
| Viewing Angle | 178/178 degrees |



 Loading...