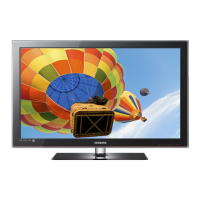
Do you have a question about the Samsung LN37C530 and is the answer not in the manual?
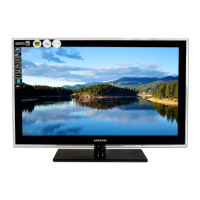
This document serves as a Quick Setup Guide for Samsung Series 5 LCD TVs, specifically models LN530 and LN540. It provides instructions for initial setup, connecting external devices, basic functions, and remote control operation.
The initial setup process, referred to as "Plug & Play," guides users through essential configurations when the TV is first turned on. This includes selecting the On Screen Display (OSD) language, setting the clock mode, and initiating the channel memorization process.
To begin, users must power on the TV using the POWER button on either the remote or the TV itself. The first step in Plug & Play is to select the desired OSD language from options like English, Español, and Français. Once selected, pressing the ENTER button proceeds to the Home Use screen.
On the Home Use screen, users should select "Home Use." It's important to note that selecting "Store Demo" will reset picture and audio settings every 30 minutes, which is not ideal for home use. After confirming "Home Use," the Antenna Source screen appears.
The Antenna Source screen requires users to specify their TV's connection type. If the TV is connected solely to an antenna, "Air" should be selected. If connected only to cable without a cable box, "Cable" should be chosen. If connected to both an antenna and cable without a cable box, "Auto" is the appropriate selection. For users with a cable or satellite box, steps 3 through 5 of the Plug & Play process should be skipped, and the TV should be set to Channel 3 or 4 according to the provider's instructions after Plug & Play is complete.
For users without a cable box but connected to a cable system, the cable system type must be selected. This includes choosing between "Analog" and "Digital" cable types. Most cable systems are "Standard (STD)"; if unsure, users should contact their cable provider.
After selecting the cable system type, "Start" is selected, and the TV begins memorizing available channels. This process can take up to 45 minutes. Once complete, the Clock Mode screen appears.
On the Clock Mode screen, users choose between "Auto" (for digital channels in their area) and "Manual" (for no digital channels or if using a cable/satellite box). If "Manual" is selected, a clock setting screen will appear.
Next, the Daylight Savings setting is configured, with options for "Off," "On," or "Auto." This is followed by a time zone selection.
Finally, the TV displays connection methods for optimal HD screen quality. Users can navigate through these screens using the Right arrow button on the remote or skip them using the Blue button. The process concludes with the "Enjoy your TV" screen, confirmed by pressing ENTER.
The guide emphasizes the importance of using HD signal sources and HDMI cables for the best picture quality. It provides specific connection diagrams for different models: LN32C530/LN37C530/LN40C530/LN46C530 and LN40C540/LN46C540.
For both sets of models, the diagrams illustrate connections for HDMI, USB (HDD), AV IN (Video and Audio L/R), PC/DVI AUDIO IN, PC IN, and COMPONENT IN (Y/Pb/Pr and Audio L/R).
This section details how to connect an AV device using an Audio/Video Cable for 480i resolution, which is described as the "Lowest Quality Connection."
The guide instructs users to connect the ANT IN port on the TV to either a wall cable jack, a VHF/UHF antenna, or a cable/satellite box's antenna or cable out port. A 75 ohm (round) cable is required for this connection.
Users must ensure the AC power cord is securely plugged into the TV's power input and a wall outlet.
To view content from an external device (e.g., Blu-ray player, cable/satellite box), users must select the correct source. The SOURCE button on the remote control cycles through available inputs such as HDMI, DVI, Component, Composite, or D-sub. Each press of the SOURCE button switches to the next available input.
The remote control provided is designed with visually impaired persons in mind, featuring Braille points on the Power, Channel, and Volume buttons.
The guide provides a three-step process for installing the TV stand:
Installing batteries in the remote control involves three steps:
This comprehensive guide ensures users can set up their Samsung Series 5 LCD TV, connect essential devices, and understand basic operations and remote control functions for an optimal viewing experience.
| Game mode | Yes |
|---|---|
| HDMI ports quantity | 3 |
| SCART ports quantity | 0 |
| Common interface (CI) | No |
| USB 2.0 ports quantity | USB 2.0 ports have a data transmission speed of 480 Mbps, and are backwards compatible with USB 1.1 ports. You can connect all kinds of peripheral devices to them. |
| Digital audio optical out | 1 |
| Component video (YPbPr/YCbCr) in | 2 |
| Response time | 6 ms |
| Display diagonal | 37 \ |
| Display technology | LCD |
| Native aspect ratio | 16:9 |
| Contrast ratio (dynamic) | 80000:1 |
| Product color | Black |
| AC input voltage | 100 - 240 V |
| Power consumption (standby) | 0.3 W |
| RMS rated power | 20 W |
| Depth (without stand) | 170 mm |
|---|---|
| Width (without stand) | 1150 mm |
| Height (without stand) | 735 mm |
| Weight (without stand) | 17900 g |