22
Wiring
Setting MCU address and port
J When counting the quantity of MCUs while outdoor unit installation, one MCU is one.
However, in the case of MCU-S12NEK1N and MCU-S8NEK1N, one MCU must be counted as two MCUs.
Process
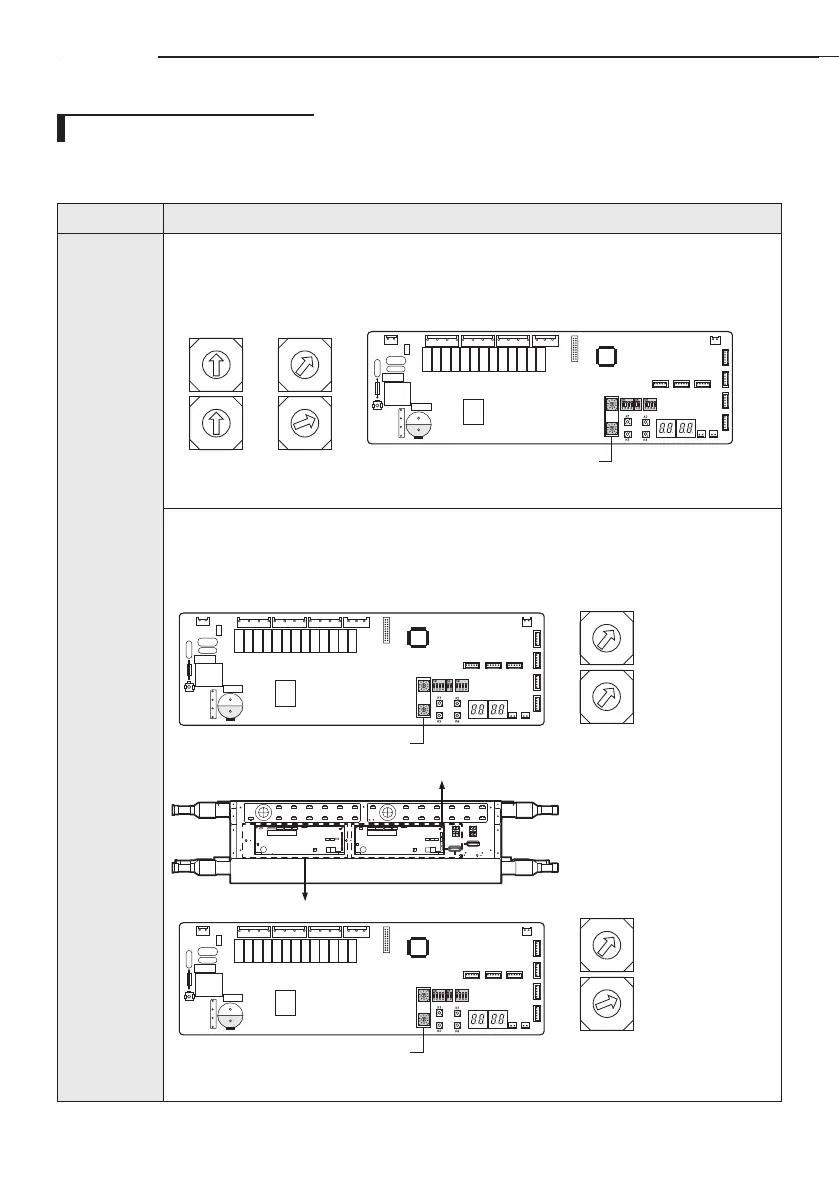
1. MCU
address
setting
Set MCU address by rotary switch.
Example> If you want to set MCU address to 12, set upper rotary switch to 1 and set bottom rotary switch
to 2
0
1
2
3
4
5
6
7
8
9
0
1
2
3
4
5
6
7
8
9
MCU Address
Setting MCU
adress to 12
Default
MCU Address
0
1
2
3
4
5
6
7
8
9
0
1
2
3
4
5
6
7
8
9
Rotary switch for MCU ADDRESS
J MCU-S12NEK1N & MCU-S8NEK1N models have two PBAs in the control box.
The MCU addresses of the two PBAs must be set dierently.
Example> If you set MCU addresss of the section #1 PBA to 11, then set the section #2 PBA address to 12.
<Section #1>
<Section #2>
0
1
2
3
4
5
6
7
8
9
0
1
2
3
4
5
6
7
8
9
MCU Address
Setting MCU
adress to 11
0
1
2
3
4
5
6
7
8
9
0
1
2
3
4
5
6
7
8
9
MCU Address
Setting MCU
adress to 12
Rotary switch for MCU ADDRESS
Rotary switch for MCU ADDRESS
ki]_TW]`WZhTW\pttj|GrniluRmyUGGGYY YWYYTXXTYYGGG㝘㤸G_a\`aWW
 Loading...