Do you have a question about the Samsung RS20CC Series and is the answer not in the manual?
Explains symbols indicating potential hazards like injury or material damage.
Explains symbols for mandatory actions like 'Must Follow' or prohibitions like 'Never Do'.
Addresses issues like power connection, temperature settings, or appliance placement.
Covers problems related to temperature control and food placement in cold areas.
Helps diagnose issues from floor stability to internal component sounds.
Provides guidance on proper food wrapping and disposal of spoiled items.
Addresses potential causes like blocked air vents or improper door closure.
Normal operational sound from the compressor, especially during startup.
Indicates refrigerant circulation within the appliance pipes.
Caused by electrical components like the control panel during operation.
Result of the internal fan circulating air for even cooling.
Occurs due to temperature variations causing expansion and contraction.
Place removed shelves and containers in their correct positions.
Clean the interior and accessories with a mild detergent.
Check voltage compatibility and socket capacity before connecting power.
Set to lowest temperature, wait one hour, and check compressor operation.
Wait for the refrigerator to reach the appropriate temperature before storing food.
Circulates cooling air evenly for optimal food preservation.
Maintains high humidity for keeping food, fruits, and vegetables fresh.
Sounds a musical alarm if the door is left open for more than two minutes.
Convenient storage for drinks and food, reducing cold air loss.
Details buttons for Power Freeze, Freeze Temp, Fridge Temp, and Power Cool.
Shows current freeze and fridge temperatures and active modes.
Adjusting front legs higher than rear legs for easier door operation.
Ensuring the appliance is properly earthed to prevent electric shock.
Verify if the refrigerator fits through the entrance door.
Remove foam pads and packing for proper installation.
Allow 10cm clearance on sides and rear for ventilation and power saving.
Wipe the inside and outside with a dry cloth before use.
Wait 2-3 hours after plugging in before storing food items.
Adjust freezer temperature from level 1 (cold) to 9 (colder).
Adjust fridge temperature from level 1 (cold) to 9 (colder).
Factory preset 'NORMAL' (level 5 for Freeze, level 3 for Fridge).
Details components like Light, Food Guard, Ice Tray, Shelf, and Drawer.
Lists components like Dairy Compartment, Egg Tray, Wine Rack, and Drawers.
Use mild detergent and dry thoroughly before reassembly.
Use mild detergent and a cloth; clean exterior once or twice a year.
Use a vacuum cleaner to remove dust from the rear.
Use mild detergent and damp cloth to ensure efficient door closure.
Pull out shelf, lift up, and remove.
Hold guard with both hands and lift up.
Pull out drawer and lift up slightly.
Remove ice tray by pulling it outwards.
Remove only when necessary, by unscrewing.
Pull out shelf, lift up, and remove.
Hold guards with both hands and lift up.
Follow sequence: remove food guard, then counter compartment.
Remove drawer by handle, pull out and lift up.
Follow sequence: remove fruit drawer, then lower shelf.
Pull out ice tray and place it inside.
Pour cool water into tray up to the water level indicator.
Twist the ice tray gently to release individual ice cubes.
Access the counter space for food or drinks.
Put items into the counter space.
Close the door after retrieving items.
For storing small packages of frozen food.
For storing all types of frozen food.
For storing meat and dry goods securely wrapped.
Can be used safely for general storage.
Preserves taste and prolongs freshness for cheese, meat, fish.
Store vegetables and fruits.
Store vegetables and fruits in an airtight environment.
Stores fatty food, like butter and cheese.
Stores small packages of milk and yogurt.
Stores various types of bottles and cans.
Stores eggs in the tray on the tempered glass shelf.
Stores wine for a short time.
Conveniently stores drinks and food.
For ice making; can be placed outside when not in use.
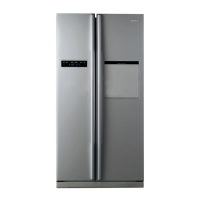
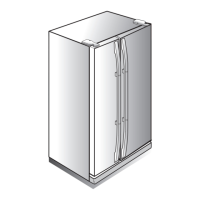
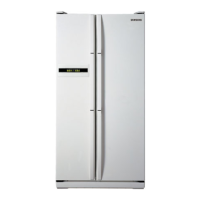
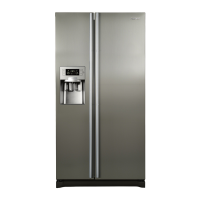
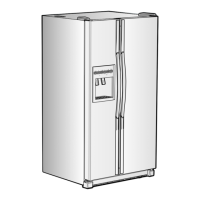
This document describes a Side-by-Side Refrigerator, specifically covering models RS20BR**, RS20CR**, RS20NR**, and RS20CC**. The RS20BR** model is used as the primary example due to the similar construction across all listed models.
This appliance is a Side-by-Side Refrigerator designed for food preservation through refrigeration and freezing. It operates by circulating refrigerant via a compressor to lower the internal temperature, ensuring the freshness and nutritional value of stored food. The refrigerator is a Free Standing Appliance and is designed to operate within specific ambient room temperature limits, ranging from 10°C (50°F) to 43°C (109°F) depending on its temperature class (Subtemperate, Temperate, Subtropical, Tropical).
A key feature is the Multi-flow System, which ensures even distribution of cooling air throughout the refrigerator via multiple vents, maintaining consistent temperatures for prolonged food freshness. For specific items, the refrigerator provides High Humidity for Fresher Food, creating an optimal environment for fruits and vegetables.
The appliance includes a Door Alarm feature that triggers a musical alarm if a refrigerator door is left open for more than two minutes. This helps conserve energy and preserve stored food by preventing cold air loss. Some models also feature a Bar Counter, designed for convenient storage of frequently used drinks and food, further reducing cold air loss when accessing these items.
The refrigerator's internal components include various storage options:
Ice making is a manual process involving filling the ice tray with cool water up to a level indicator, placing it inside the ice tray compartment, and then turning a button to release ice automatically into the storage compartment below.
Preparing the Appliance for Use:
Temperature Control: The refrigerator features a Control Panel (for RS20BR*/RS20CR*/RS20CC* models) or a Digital Panel (for RS20NR** models) to manage temperatures.
For the RS20NR** models, the FRE. TEMP BUTTON and REF. TEMP BUTTON allow setting freeze and refrigerator temperatures from level 1 (cold) to level 9 (colder). LED indicators show the selected level. The factory preset is "NORMAL" (level 5: -20°C for Freeze and 3°C for Fridge). If there's a power outage, users should check the temperature controller status. For freezing large amounts of food, it's recommended to set the freezer temperature to the coldest setting at least 24 hours beforehand.
Installation:
Adjusting Door Clearance: If there are slight differences in door height, open the doors and adjust them:
Food Storage Guidelines:
Cleaning the Accessories:
General Cleaning Warnings:
Removing Accessories for Cleaning or Rearrangement:
Troubleshooting (General Knowledge of Refrigerator Silence): The refrigerator produces various sounds during operation, which are normal and do not affect its function:
Troubleshooting (Malfunctions):
Safety Precautions:
| Climate Class | SN-T |
|---|---|
| Defrost System | Frost Free |
| Ice Maker | Yes |
| Water Dispenser | Yes |
| Type | Side by Side |