Do you have a question about the Samsung S730 and is the answer not in the manual?
Guide to installing camera driver from CD-ROM.
Instructions for capturing images.
Steps to connect camera to PC via USB cable.
Ensuring the camera is powered on.
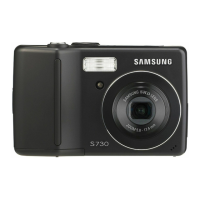
Identifies buttons and features on the front and top of the camera.
Identifies buttons and features on the back and bottom of the camera.
Details the function of the bottom buttons and the 5-function button.
Explains various shooting modes and their corresponding icons.
Information on using batteries and connecting to a power source.
Explanation of the Wise Shot feature for capturing two images simultaneously.
Used for turning the camera's power on or off.
Used for taking images or recording voice.
Controls optical and digital zoom functions.
Adjusts the sharpness effect of the picture.
Adjusts the difference between bright and dark image parts.
Selects the preferred Auto Focus type based on shooting conditions.
Checks shooting information displayed on the LCD monitor.
Sets the volume for sound effects like startup, shutter, and beep.
Selects the sound activated when the camera is turned on.
Selects the sound played when the shutter button is pressed.
Allows selection of the file naming format.
Selects the display language for the LCD monitor.
Changes date, time, and display format for captured images.
Option to include date/time on still images.
Adjusts the brightness level of the LCD screen.
Turns the Auto Focus lamp on or off.
Selects the image displayed when the camera is turned on.
Enables viewing the captured image briefly on the LCD.
Turns off the LCD monitor automatically when idle.
Switches the camera off after a set time to save battery.
Sets the video output signal type (NTSC or PAL).
Deletes all data on the memory card to prepare it for use.
Restores camera settings to their default values.
Optimizes camera performance based on battery type.
Adjusts Red, Green, and Blue values for custom color effects.
Changes the saturation level of the image.
Applies preset focus frames to create depth of field effects.
Techniques for moving and changing focus frames in an image.
Combines multiple shots into a single still image.
Details on selecting and composing multiple shots into one image.
Modifying parts of a composite shot before finalizing.
Applies decorative photo frames to images.
Uses the +/- button for various shooting settings and photo frames.
Selects the image resolution appropriate for your application.
How to play back recorded movie clips.
Captures still images from a movie clip.
How to play back recorded voice files.
Views multiple pictures, enlarges selected ones, and crops images.
Details on viewing and checking enlarged images.
Extracts and saves a part of an image separately.
Adds voice memos to still images and manages recording.
Adjusts Red, Green, and Blue values for custom color effects.
Uses color mask to create black & white effects on parts of an image.
Changes the brightness level of the image.
Changes the contrast level of the image.
Changes the saturation level of the image.
Adds noise to the image to give an old-photo look.
Adds text boxes (cartoons) to images.
Modifies cartoon images before saving.
Applies preset focus frames to create depth of field effects.
Moves and changes the focus frame position on an image.
Combines multiple shots into a single still image.
Selects and composes multiple shots into one image.
Applies decorative photo frames to images.
Adds various stickers to images.
Deletes single or multiple images from the camera.
Deletes the currently displayed image.
Selects and deletes multiple images.
Deletes images selected in the thumbnail view.
Applies unique screen effects for slideshows.
Sets background music for the slideshow.
Protects specific images from accidental erasure (Lock).
Procedures for deleting selected or all images.
Embeds print information on memory cards for DPOF printing.
Transfers images, movie clips, and voice files from internal memory to the card.
Steps to connect the camera and printer using a USB cable.
Prints images directly from playback mode using default settings.
Chooses specific images and quantity for printing.
Configures paper size, format, type, quality, and date print options.
Restores PictBridge settings to default configurations.
Configures camera settings for PC connection.
Establishes connection between camera and computer via USB.
Transfers images from the camera to a PC's hard disk.
Guides the process of downloading images using the software.
Allows viewing of stored images within the software.
Provides tools to edit still images.
Combines images, clips, narration, and music into a movie.
| Resolution | 7.2 Megapixels |
|---|---|
| Optical Zoom | 3x |
| Digital Zoom | 5x |
| Display Size | 2.5 inches |
| Image Sensor Type | CCD |
| ISO Sensitivity | Auto, 80, 100, 200, 400, 800, 1600 |
| Storage Media | SD, MMC |
| Battery Type | AA |
| Type | Compact |