EasyManua.ls Logo

San Jamar OCEANS S890TBK - User Manual

San Jamar OCEANS S890TBK
2 pages
Print Icon
To Next Page IconTo Next Page
Loading...
S890TBK, TBL, WS
OCEANS® SOAP/HAND SANITIZER DISPENSING SYSTEM
Mounting Instructions
1. Use TAPE on mirrors, glazed tile, painted metal or unpainted metal walls. Tape will not perform satisfactorily
if wall surface is porous like brick or wood.
2. Use SCREWS on all other walls as they provide the most positive long-lasting installation.
3. Thoroughly clean wall surface and let dry. For silicone build-up, use a pumice-type cleaner or grout cleaner to clean
the surface.
IMPORTANT: After firmly placing backplate to wall surface, allow 24 hours
curing time for proper adhesion before use.
4. Open cover by inserting key and push down on key.
IMPORTANT: When dispensing soap, locate dispenser above a sink or counter.
We recommend to never locate where spillage can fall on floor
creating a hazardous condition.
NOTE: When dispensing hand sanitizer, it is recommended to affix the enclosed
hand sanitizer label on the unit’s paddle.
CAUTION:
When installing backplate with tape, allow 24 hours before using the dispenser.
NOTE:
When using viscous liquids, hold finger over dispenser opening and pump 3-5 times to prime on bulk
dispenser. It is recommended to prime valve with a small amount of water prior to adding viscous liquids.
MAINTENANCE
1. Using warm water mixed with soap from the dispenser is the best cleaning solution for all soap dispenser
parts. Pump warm water through valve periodically to flush out any contaminants or dried soap residue.
NEVER USE ABRASIVE CLEANERS.
2. Periodically give the dispenser an overall cleaning.
3. Do not disassemble the bulk soap bottle.
1-2-3 TAPE METHOD
A-B-C SCREW METHOD
1. Clean the surface and let dry. 2. Remove release paper. 3. Using the top as level,
press firmly to wall/glass for
30 seconds. Allow 24-hour
curing time before using.
A. Open cover, exposing
keyhole slots.
B. Locate and mark 3
keyholes on mounting
surface.
C. Drill holes for #6 screws
and anchors appropriate for
wall type.
Question and Answer IconNeed help?

Do you have a question about the San Jamar OCEANS S890TBK and is the answer not in the manual?

Summary

Mounting Instructions

1-2-3 Tape Method

Step-by-step instructions for mounting using adhesive tape.

A-B-C Screw Method

Step-by-step instructions for mounting using screws and anchors.

Maintenance

Capacity Specifications

Tube and Valve Assembly Styles

Details and diagrams of different tube and valve assembly styles for dispensers.

Overview

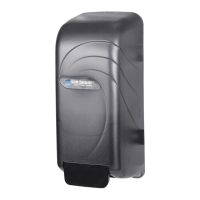
The Oceans® Soap/Hand Sanitizer Dispensing System is a versatile wall-mounted dispenser designed for both soap and hand sanitizer, offering multiple installation methods and packaging options.

Function Description:

The primary function of this device is to dispense soap or hand sanitizer. It is designed for use in various environments, including those with mirrors, glazed tile, painted metal, unpainted metal walls, and other wall types. The system supports different types of liquid refills, including refillable bottles, bag-in-box cartridges of various capacities (500ml, 800ml, and 1000ml), and is adaptable to different tube and valve assembly styles.

Important Technical Specifications:

Capacity:

  • Refillable Bottle: Included with the dispenser.
  • Bag-in-Box Cartridges:
    • 800ml and 500ml capacity, compatible with tube & valve assembly.
    • 1000ml capacity, compatible with tube & valve assembly.
    • Note: For bag-in-box cartridges, the bag must be removed from its box and placed directly into the dispenser.

Tube and Valve Assembly Styles:

The manual illustrates two styles, Style A and Style B, primarily differing in the diameter of the lower part of the tube.

  • Style A:
    • Tube Diameter (upper part): 17/32" (0.531") [13.5 mm]
    • Tube Diameter (lower part): 15/32" (0.469") [11.9 mm]
  • Style B:
    • Tube Diameter (upper part): 17/32" (0.531") [13.5 mm]
    • Tube Diameter (lower part): 13/32" (0.469") [10.3 mm]

Usage Features:

Installation Methods:

The dispenser offers two primary installation methods:

  1. 1-2-3 Tape Method (for non-porous surfaces):

    • Applicable Surfaces: Mirrors, glazed tile, painted metal, or unpainted metal walls.
    • Not Recommended For: Porous wall surfaces like brick or wood, as tape will not perform satisfactorily.
    • Procedure:
      1. Thoroughly clean the wall surface and let it dry. For silicone build-up, use a pumice-type or grout cleaner.
      2. Remove the release paper from the tape on the backplate.
      3. Using the top of the dispenser as a level, press the backplate firmly to the wall/glass for 30 seconds.
      4. Important: After firmly placing the backplate, allow 24 hours of curing time for proper adhesion before use.
      5. Caution: When installing with tape, allow 24 hours before using the dispenser.
  2. A-B-C Screw Method (for all other walls):

    • Applicable Surfaces: All other walls, as screws provide the most positive long-lasting installation.
    • Procedure:
      1. Open the cover of the dispenser by inserting the key and pushing down on it, exposing the keyhole slots on the backplate.
      2. Locate and mark the three keyholes on the mounting surface.
      3. Drill holes for #6 screws and anchors appropriate for the specific wall type.
      4. Secure the backplate to the wall using the screws and anchors.

Dispenser Operation:

  • To open the cover, insert the provided key and push down on it.
  • Important Dispenser Placement: When dispensing soap, locate the dispenser above a sink or counter. It is recommended to never locate it where spillage can fall on the floor, as this could create a hazardous condition.
  • Hand Sanitizer Label: When dispensing hand sanitizer, it is recommended to affix the enclosed hand sanitizer label on the unit's paddle.
  • Priming (for viscous liquids): When using viscous liquids, hold a finger over the dispenser opening and pump 3-5 times to prime the bulk dispenser. It is also recommended to prime the valve with a small amount of water prior to adding viscous liquids.

Maintenance Features:

Cleaning:

  • Best Cleaning Solution: Warm water mixed with soap from the dispenser itself is the best cleaning solution for all soap dispenser parts.
  • Valve Maintenance: Pump warm water through the valve periodically to flush out any contaminants or dried soap residue.
  • Overall Cleaning: Periodically give the dispenser an overall cleaning.
  • Prohibited Cleaners: NEVER USE ABRASIVE CLEANERS, as they can damage the dispenser.

Component Handling:

  • Bulk Soap Bottle: Do not disassemble the bulk soap bottle.

The Oceans® Soap/Hand Sanitizer Dispensing System is designed for ease of installation, reliable dispensing, and straightforward maintenance, making it a practical choice for various commercial and public environments.

San Jamar OCEANS S890TBK Specifications

General IconGeneral
BrandSan Jamar
ModelOCEANS S890TBK
CategoryAccessories
LanguageEnglish