12 S&C Instruction Sheet 695-505
Installation
Vault-Mounted Style
Switchgear Placement
STEP 1. At the installation site, remove all separately
packaged components (if any) shipped with the
switchgear assembly and set them aside.
STEP 2. Remove switchgear assembly from its crate and
lift it into place, observing the precautions
given under the “Handling” section on page 10.
See Figure 7.
N OTICE
For vault-style switchgear assemblies
mounted in the horizontal orientation
(catalog number suffix “-V3”), the clearance
between the back of the bus work and the
floor of the vault is approximately ½-inch
(13 mm). Be sure the floor beneath the
switchgear assembly is clean and level.
Failure to follow this precaution may
result in damage to the switchgear from
contact with the floor or from contact
with foreign objects lying on the floor.
STEP 3. Secure the switchgear assembly in place using
½-inch fasteners (supplied by user).
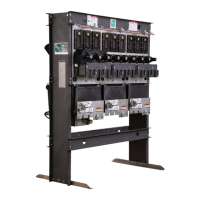
Figure 7. Single-way vault-mounted style switchgear assembly
shown in shipping crate. Shipping crates for multi-way
switchgear assemblies are similar.