6
Installing/Positioning the Ozonizer
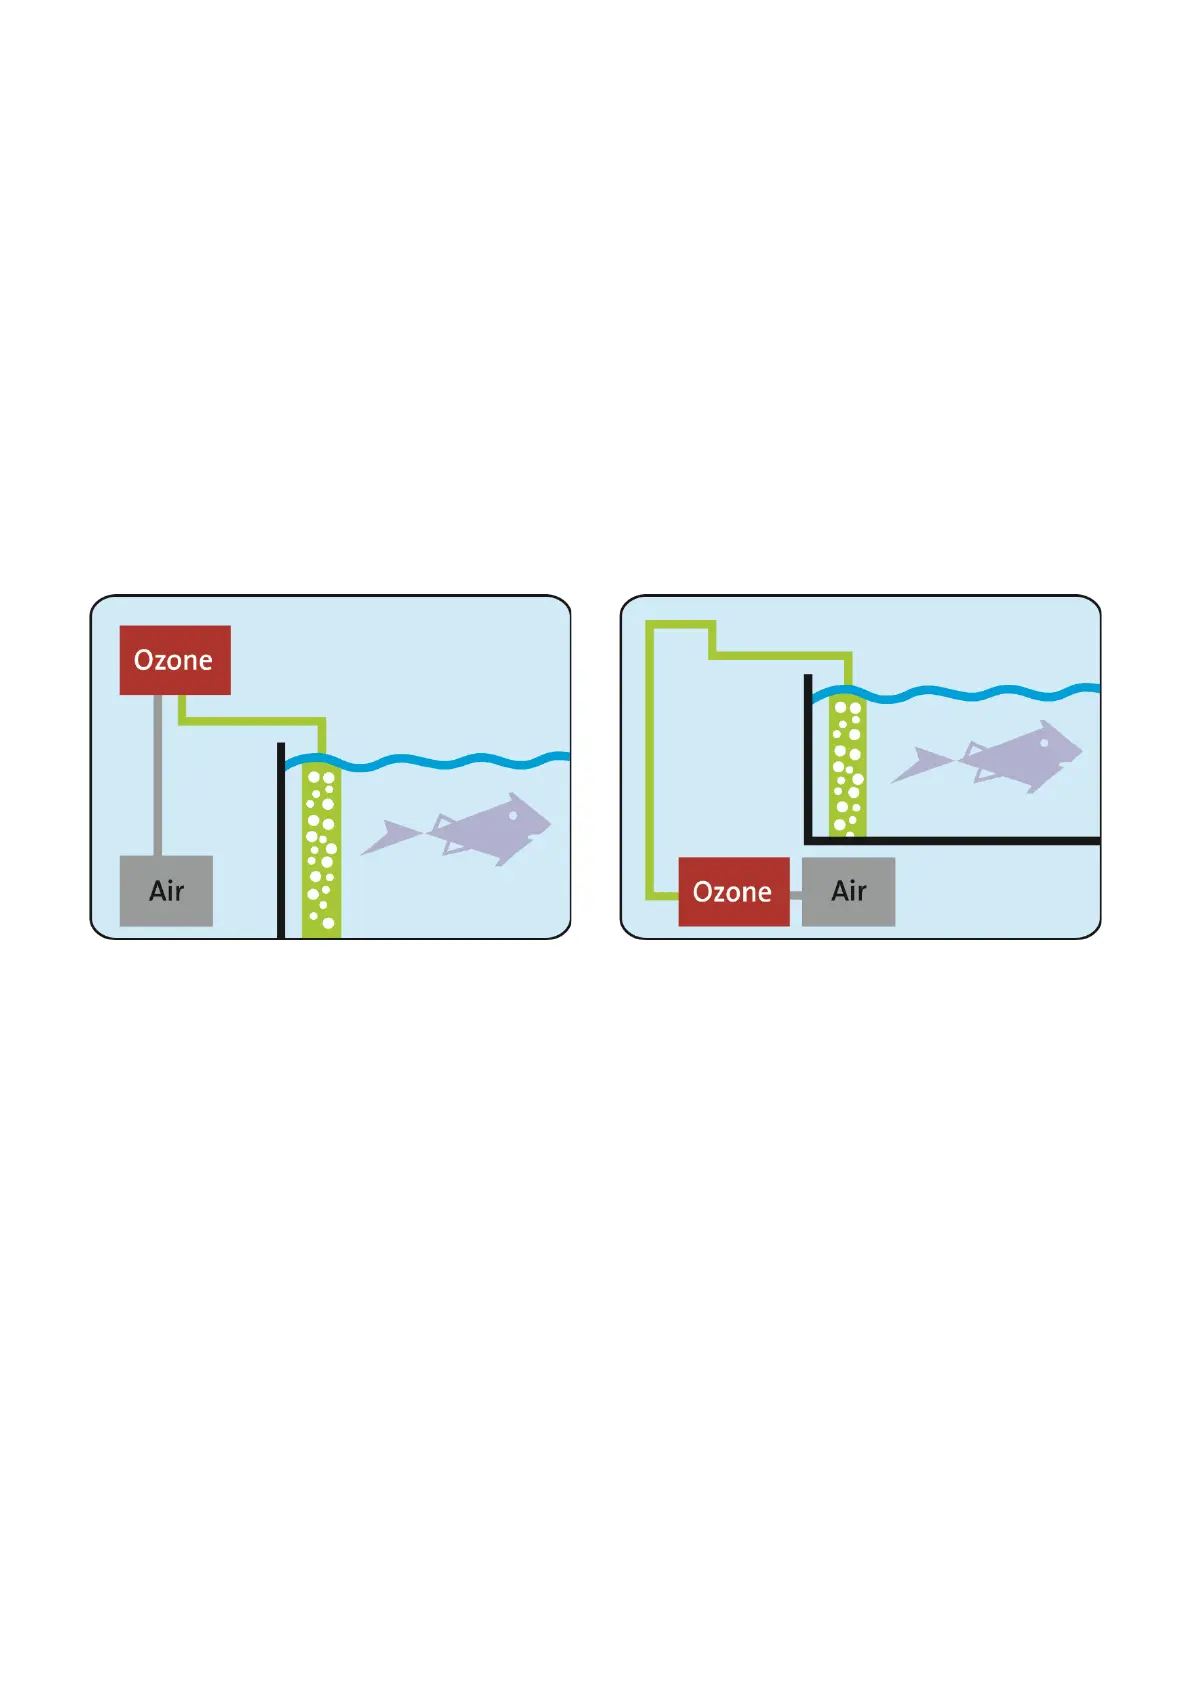
Proposal A: Wall mounting
On the rear of the ozonizer is a suspension hole for mounting the ozonizer on a wall. If possible, the
device should be installed at a level higher than the surface of the water (e.g. to prevent water from
flowing back into the device in the event of a power outage).
Proposal B: Cabinet installation
The ozonizer can also be installed in the cabinet under the aquarium (ensure adequate ventilation). In
this case, however, a tube that extends at least 0.66 ft. above the surface of the water should be fitted
to prevent water from flowing back into the ozonizer.
Proposal A Proposal B
Connecting the Ozonizer with Skimmer / Ozone Reactor Operation with Airstones
The ozonizer has two tube connections. The first (3) is connected to an air tube leading to an air pump.
The second (4) on the connection plate for the ozone element is connected to the airstones via the
skimmer.
If ozone production is deactivated while the ozonizer is still connected to the skimmer, the air supply
must remain switched on. This stops water from entering the ozone generator.
Alternative: Connecting the Ozonizer with Skimmer with Injector
Connect the injector to the ozone connector (4). Air is automatically sucked through the device. The air
connection (3) remains free.
 Loading...