This document is a user manual for a sauna. It provides instructions for installation, operation, and maintenance, along with technical specifications and safety warnings.
Function Description
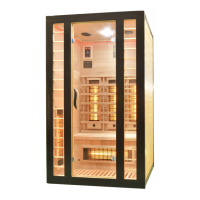
The sauna is designed for personal use, providing the benefits of infrared heat. It is available in various configurations, including 1-person, 2-person, 3-person, and 4-person models, as well as corner models for 2-person and 3-person setups. The sauna uses infrared heaters to generate heat, promoting perspiration and relaxation. It includes a control panel for managing temperature, time, and lighting, and some models feature a radio/MP3 player for entertainment.
Important Technical Specifications
The manual highlights several key technical characteristics:
- Functions: Processed by microprocessors, indicating intelligent control.
- Temperature Adjustable: From 30°C to 65°C (86°F to 149°F), allowing users to customize their sauna experience.
- Adjustable Dwell Time: From 1 to 99 minutes, providing flexibility for session duration.
- Digital Temperature Sensor: For accurate temperature readings.
- Soft Touch Key: For user-friendly control panel operation.
- Long-live Infrared Heater: Ensuring durability and consistent performance of the heating elements.
The warranty information specifies the following durations for different components:
- Heaters: 18 months
- Workmanship: 18 months
- Electrical Components: 18 months
- Radio/CD Player: 12 months
Usage Features
The sauna offers several features to enhance the user experience:
Control Panels (Version 1):
- Temperature Adjustment: Use +/- buttons to set the desired temperature.
- Time Adjustment: Use +/- buttons to set the session duration (1-99 minutes).
- Power On/Off: A dedicated power button to start and stop the sauna.
- Status Indicator: Displays the current status of the sauna.
- Temperature Unit Switch: A °F/°C button allows switching between Centigrade and Fahrenheit displays.
- Reading Light: A LIGHT button to turn the interior light on or off.
- Start-Up: Press the POWER button, then SET. The sauna will automatically start with preset settings (38 minutes and 104°F) or factory default.
- Temperature and Time Setting: Press SET, then use TEMPERATURE+/- or TIME+/- to adjust. Holding down the keys speeds up the rate of change.
- Turn Off: Press POWER again.
Radio Player Instructions (Version 1):
- POWER: Turn the radio on/off.
- MOD: Switch between USB, SD, AUX, or Bluetooth.
- BAND / AMS: Switch between FM and AM, and store radio frequencies.
- MUTE: Mute the radio.
- PLAY / PAUSE: Play/pause music; in radio mode, press for 3 seconds to search and store radio channels automatically.
- NAVIGATION Buttons: Search for stations automatically, adjust frequency manually, or navigate through USB/Bluetooth/SD content.
- VOLUME: Adjust volume (0-40).
- AUX Connector, SD Card Input, USB Input, Bluetooth, Remote Control: Various connectivity options for audio playback.
Control Panels (Version 2):
- Two Display Windows: Left panel for real-time temperature, right panel for time remaining.
- LED Indicators: Power, heating, and °F/°C indicators.
- 7 Keypads:
- POWER: Sauna on/off.
- LIGHT: Turn inside/outside lights on/off.
- COLOR LIGHT: Activate color therapy light (for 2 seconds, the temperature display shows "LX" for 1-9, then press again to change color light and status).
- TEMPERATURE: Increase or decrease temperature by 1 degree at a time.
- TIME: Increase or decrease time by 1 minute at a time.
- MODE: Select radio, Bluetooth, or USB.
- PLAY/PAUSE: In radio mode, press for 3 seconds to search and store channels; press again for next channel. In Bluetooth/USB mode, press for next music.
- MUTE: Mute FM; pause Bluetooth/USB.
Tips for Usage:
- Consult Physician: Review health and safety instructions and consult a physician if in doubt about using the infrared sauna.
- Temperature Setting: Set to a comfortable level, typically 40-50°C.
- Warm-Up Time: Allow 8-15 minutes for the sauna to warm up.
- Session Duration: Perspiration usually starts within 6-15 minutes; sessions should not exceed 30 minutes.
- Temperature Maintenance: Heaters cycle on/off to maintain the set temperature.
- Ventilation: The front door/window or ceiling vent can be opened for fresh air.
- Hydration: Drink water before, during, and after sessions.
- Pre-Sauna Shower: A hot shower can promote perspiration, but dry off thoroughly before entering to prevent wood staining/warping.
- Post-Sauna Shower: A shower after the session is refreshing and removes perspiration.
- Towel Use: Place towels on the bench and floor to absorb perspiration and keep the sauna tidy.
Maintenance Features
The manual outlines essential maintenance procedures:
Cleaning:
- Faceplate: Clean with a wet towel or a small amount of hand-soap mixed with warm water.
- Sauna Room: Clean with a wet cotton towel, then dry with a clean dry towel.
- Prohibited Cleaners: Do not use benzene, alcohol, or strong cleaning chemicals, as they can damage the wood and its protective layer.
Transportation and Storage:
- Protection: Avoid exposure to rain, snow, or strong collisions during transport.
- Environment: Do not store in damp environments.
Troubleshooting (Common Problems and Solutions):
- Control Panels Not Working: Reconnect the cables of control panels in the roof.
- Power Indicator Not On: Check the power plug, current protector, and switch power connections.
- Reading Light Not Working: Check and reconnect the cable of the light bulb, change the light bulb, and ensure the plug is inserted correctly.
- Heater Not Heating:
- Defective Heater: Replace with a new heater.
- Heater Not Connected/Burned Out: Connect tightly.
- Damaged Relay: Replace the relay.
- Damaged Control Panel: Replace the control panel.
- Plug Not Plugged In Correctly: Re-plug into the machine.
- Bench Heater Cable Not Plugged Tightly: Plugged tightly into the outlet on the back panel.
- Change Ceramic Infrared Heater:
- Remove the metal cover.
- Screw the ceramic hat of the tube, take away ceramic protect, screwing the metal screw.
- Dismantle the bottom fixing tube steel wire.
- Assemble the new heater by reversing the process.
- Close the web cover.