WATCH the assembly video at santevia.com
CHECK all parts for missing or damaged pieces.
RINSE your filter by placing it under running
water for 2 minutes, tilt it from side to side, and
then repeat until water runs clear.
ASSEMBLE the pitcher by placing the filter into
its housing at the bottom of the reservoir of the
pitcher. Push the filter to the bottom of the housing
until it is firmly wedged in place. Insert the reservoir
into the pitcher; then place the lid on top of the
pitcher unit.
PREPARE your pitcher by running two upper tanks
of water through the pitcher. Discard this water or
use it for your plants.
WASH the pitcher, reservoir and lid by hand
with a natural detergent and water (do not use
dishwasher). Do not submerge the lid in water as it
could damage the electronic countdown clock.
2
3
4
5
6
1
SANTEVIA.COM
1-866-943-9220 | help@santevia.com
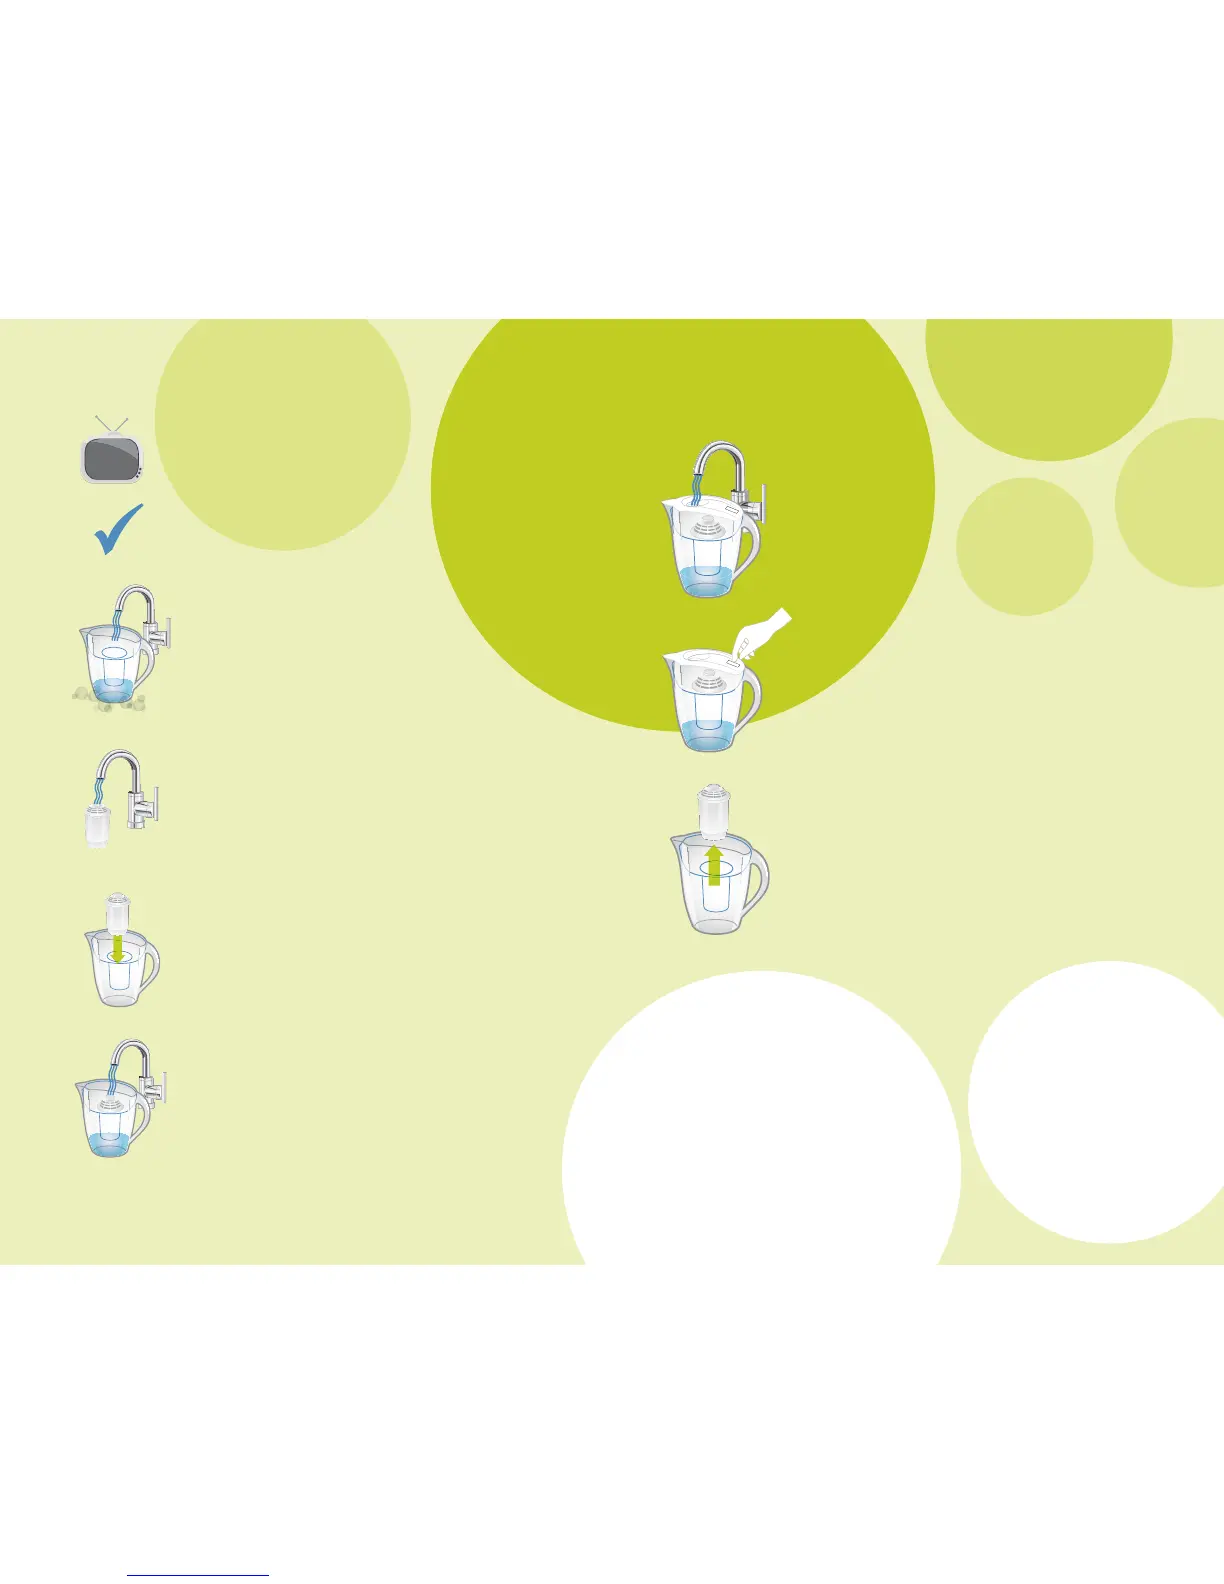
How To Use
FILL your pitcher by placing the water stream over
the covered oval opening and allow water to fill the
reservoir. The easy-fill lid will automatically close
when the reservoir is full.
SET the reminder gauge by holding down the set
button firmly until the clock blinks four times. The
countdown clock begins at 60 days (2 months), and
decreases by one each day. When the clock reaches
0, two months has passed and it’s time to replace
your filter.
REPLACE your filter by pulling upwards on the
filter until it frees from the reservoir. To recycle your
filter, crack open the plastic housing, and discard
the natural contents into your garden or compost.
Recycle the plastic housing in your plastic recycling
bin. Insert a new filter by following the previous
instructions.
Note:
The settling of carbon
charcoal (ne black, silver
or white powder) on the
bottom of the pitcher during
regular use is normal. It is a
natural element and is not
harmful if ingested.
filter
ease:
Sign up for our Filter Ease program to get
notifications when it is time to replace
your filter.
Sign up online at:
santevia.com/filterease
1
2
3
 Loading...