6901-002026 <02>
13
3
3 mm
(1/8 in.)
12 mm
(7/16 in.)
[02]
[01]
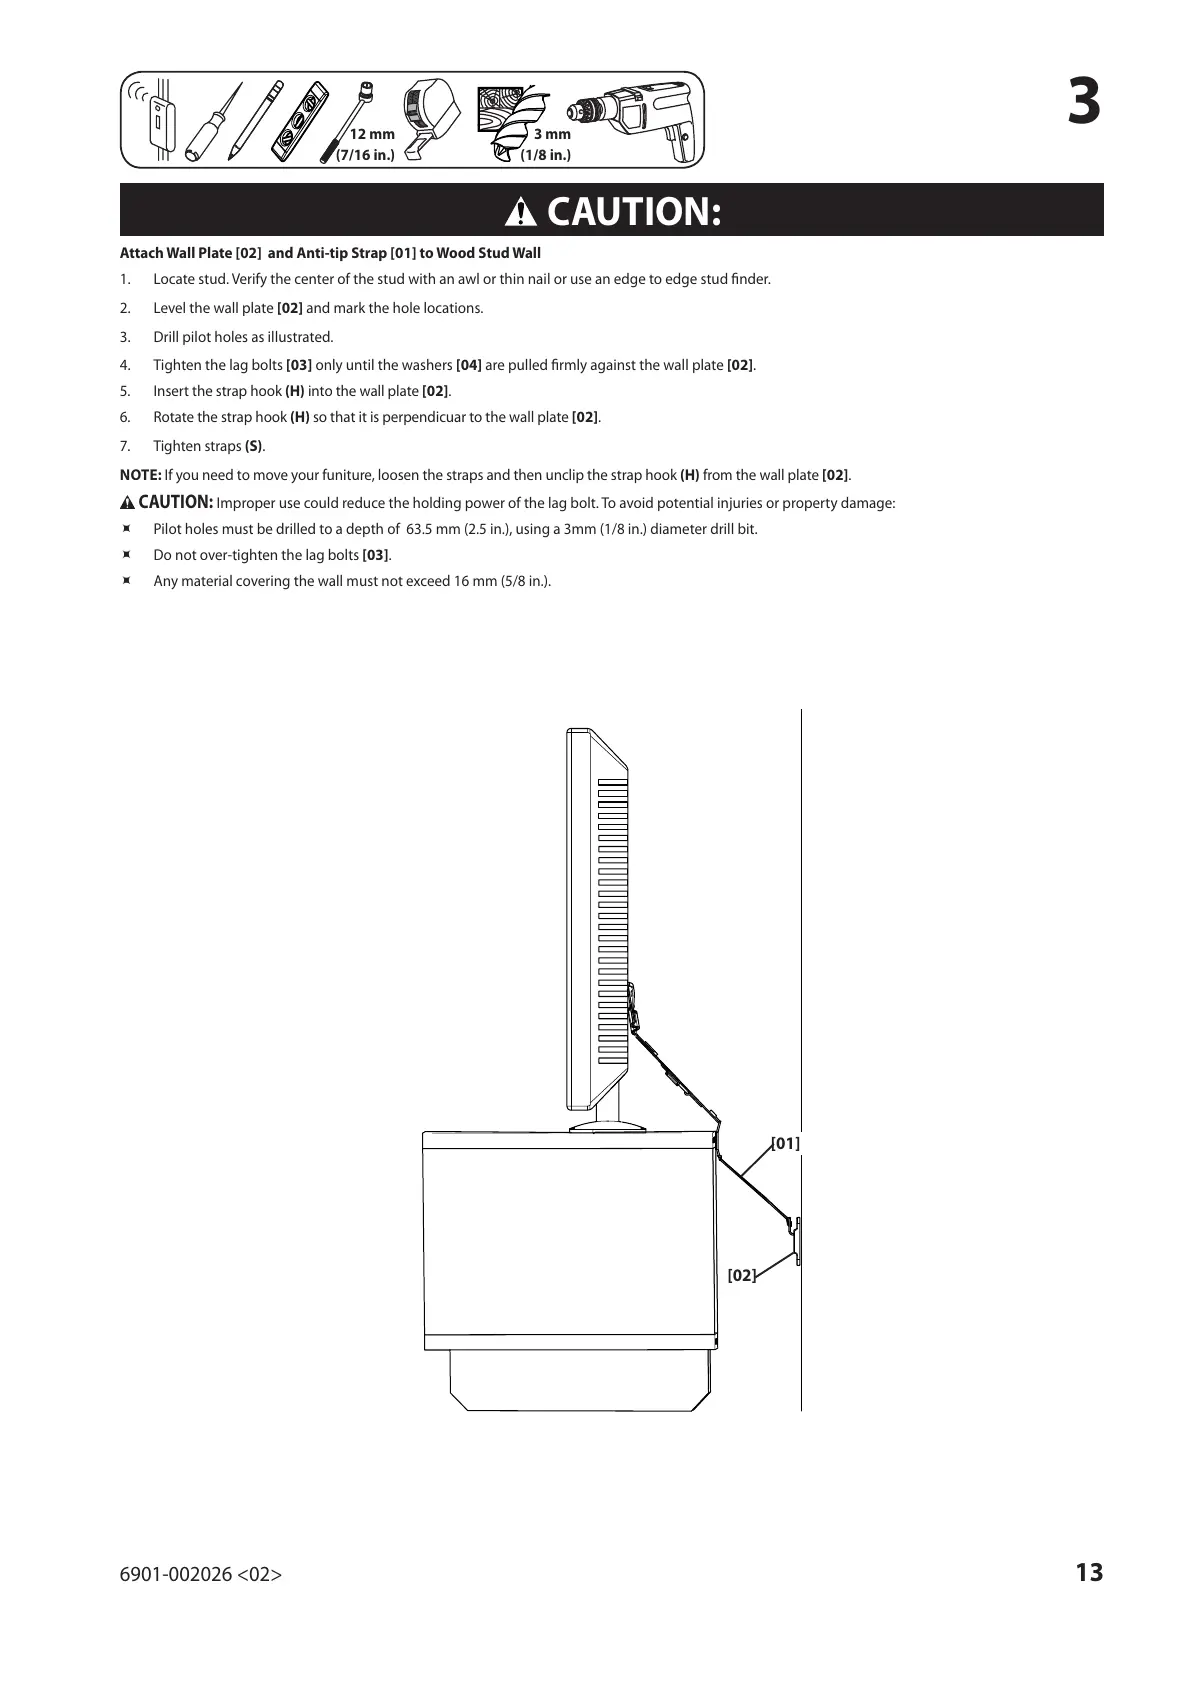
Attach Wall Plate [02] and Anti-tip Strap [01] to Wood Stud Wall
1. Locate stud. Verify the center of the stud with an awl or thin nail or use an edge to edge stud nder.
2. Level the wall plate [02] and mark the hole locations.
3. Drill pilot holes as illustrated.
4. Tighten the lag bolts [03] only until the washers [04] are pulled rmly against the wall plate [02].
5. Insert the strap hook (H) into the wall plate [02].
6. Rotate the strap hook (H) so that it is perpendicuar to the wall plate [02].
7. Tighten straps (S).
NOTE: If you need to move your funiture, loosen the straps and then unclip the strap hook (H) from the wall plate [02].
CAUTION:
Improper use could reduce the holding power of the lag bolt. To avoid potential injuries or property damage:
Ù Pilot holes must be drilled to a depth of 63.5 mm (2.5 in.), using a 3mm (1/8 in.) diameter drill bit.
Ù Do not over-tighten the lag bolts [03].
Ù Any material covering the wall must not exceed 16 mm (5/8 in.).
CAUTION:
 Loading...