Do you have a question about the Sanyo EM-S2298V and is the answer not in the manual?
Do not operate the oven with the door open to prevent harmful microwave energy exposure.
Do not place objects or allow residue on door or sealing surfaces to ensure proper closure.
Avoid operating a damaged oven, especially concerning the door, hinges, latches, or seals.
Only qualified personnel should adjust or repair the oven to avoid hazards.
Ensure the oven is securely plugged into the outlet.
Verify the circuit breaker or fuse is not tripped or blown; test outlet with another appliance.
Confirm the control panel is programmed correctly and the timer is set.
Check that the door engages the safety lock system for microwave energy flow.
Ensure all packing materials are removed from the inside of the oven.
Check for any damage like bent doors, seals, or dents; contact service if found.
Place the oven on a flat, stable surface capable of supporting its weight.
Do not place near heat/moisture sources or combustible materials.
Allow minimum clearances: 20cm above, 10cm at back, 5cm at sides.
Operate only with glass tray, roller support, and shaft in place.
Ensure the power supply cord is undamaged and not routed over hot surfaces.
The power socket must be readily accessible for easy unplugging.
Do not use the microwave oven outdoors.
Appliance must be grounded via a grounding plug into a properly installed receptacle.
Clean the door and sealing surface of the oven.
Reorient or relocate the receiving antenna or microwave oven.
Plug the oven into a different outlet on a separate branch circuit.
Read all instructions before using the appliance.
Use appliance only for its intended purpose; do not use corrosive chemicals.
Never operate the microwave oven when it is empty.
Do not use if cord or plug is damaged; have it replaced by a qualified person.
Allow children to use oven only with adequate instructions and supervision.
Monitor paper/plastic containers for ignition; remove twist-ties from bags.
Do not heat liquids or food in sealed containers to prevent explosion.
Exercise care with beverages due to potential eruptive boiling.
Do not fry food in the oven; hot oil can damage parts and cause burns.
Do not heat eggs in shell or whole hard-boiled eggs due to explosion risk.
Pierce foods with heavy skins (potatoes, apples) before cooking.
Stir/shake contents of baby food and check temperature to avoid burns.
Utensils may get hot; use potholders for handling.
Ensure all utensils used are suitable for microwave oven.
Only trained persons should perform service involving cover removal.
Product is Group 2 Class B ISM equipment for domestic use.
Not for persons with reduced capabilities unless supervised.
Children must be supervised to ensure they do not play with the appliance.
Use materials transparent to microwave energy for heating food.
Metal utensils or those with metallic trim should not be used.
Avoid recycled paper products due to potential metal fragments.
Round/oval dishes are recommended over square/oblong ones.
Use narrow foil strips sparingly to prevent overcooking exposed areas.
Ensure all packing materials are removed from the oven's interior.
Check for damage and ensure the oven is placed on a stable, level surface.
Do not locate near areas generating heat and moisture.
Ensure minimum clearances: 20cm above, 10cm rear, 5cm sides.
Install the microwave oven at a minimum height of 85cm above floor level.
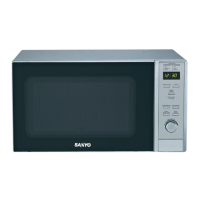
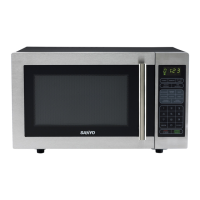
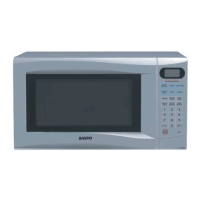
Identifies the door safety lock mechanism.
Identifies the window for viewing the cooking process.
Identifies the roller that supports the turntable.
Identifies the interface for operating the oven.
Identifies the component that directs microwave energy.
Identifies the removable glass tray for cooking.
Displays cooking time, power, action indicators, and clock time.
Set microwave cooking power level by touching the button multiple times.
Touch the clock button to start and end setting the oven clock.
Touch to defrost food by weight.
Touch to select a cooking menu.
Timer functions independently, even during a cooking program.
Use dial to set oven clock time, cooking time, or food weight.
Touch START (WEIGHT/TIME) to begin a cooking program.
Press to cancel settings or temporarily stop/cancel cooking.
Step-by-step guide to setting the digital clock time.
Steps to select power level and set cooking time.
Allows quick start at full power level by setting cooking time.
How to set a countdown timer for reminders.
Defrosting meat, poultry, seafood by weight.
Guide to setting up multi-stage programs with different power levels.
Select food type and weight for automatic cooking.
Prevent unsupervised operation by children using the child lock.
Turn off the oven and unplug before any cleaning.
Wipe interior walls with a damp cloth; use mild detergent if needed.
Clean outside surfaces with a damp cloth, avoiding ventilation openings.
Wipe door, window, seals, and adjacent parts with a damp cloth.
Keep control panel dry; clean with a soft, damp cloth with the door open.
Wipe away steam from door seals with a soft cloth if it accumulates.
Remove and wash the glass tray in warm, sudsy water or dishwasher.
Clean roller ring and oven floor regularly to avoid noise.
Remove odors by microwaving a lemon and water mixture.
Consult a dealer for oven light replacement.
Regular cleaning prevents surface deterioration and potential hazards.
Do not dispose of appliance in domestic rubbish; use designated centers.
| Type | Countertop |
|---|---|
| Capacity | 0.9 cu. ft. |
| Power | 800 Watts |
| Voltage | 120V |
| Color | White |
| Interior Dimensions | 12.4 x 13.66 x 8.7 inches |