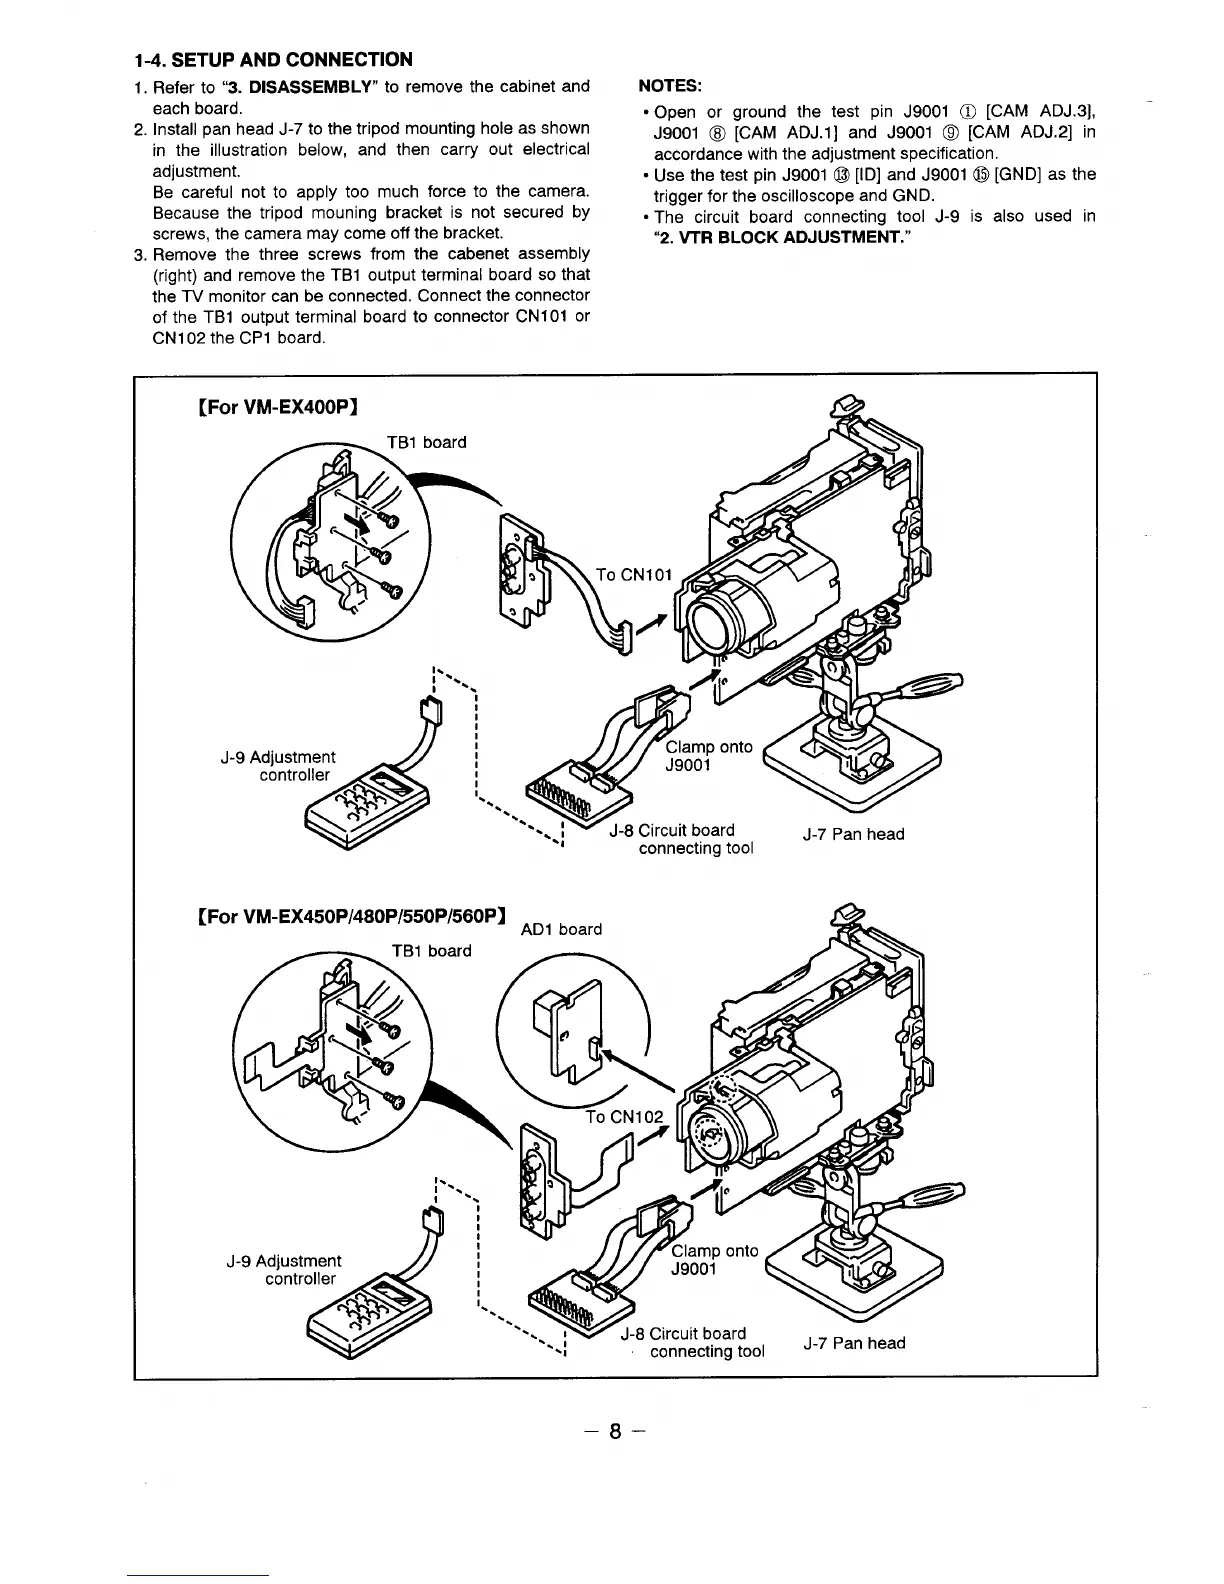
1-4. SETUP AND CONNECTION
1.
Refer to “3. DISASSEMBLY” to remove the cabinet and
NOTES:
each board.
2. Install pan head J-7 to the tripod mounting hole as shown
● Open or ground the test pin J9001 O [CAM ADJ.3],
J9001 @ [CAM ADJ.1 ] and J9001 @ [CAM ADJ.2] in
in the illustration below, and then carry out electrical
accordance with the adjustment specification.
adjustment.
Be careful not to apply too much force to the camera.
= Use the test pin J9001 @ [ID] and J9001 @ [G ND] as the
Because the tripod mouning bracket is not secured by
trigger for the oscilloscope and GND.
● The circuit board connecting tool J-9 is also used in
screws, the camera may come off the bracket.
“2. VTR BLOCK ADJUSTMENT.”
3. Remove the three screws from the cabenet assembly
(right) and remove the TB1 output terminal board so that
the TV monitor can be connected. Connect the connector
of the TBI output terminal board to connector CN101 or
CN102 the CP1 board.
–8–
 Loading...