EasyManua.ls Logo

Sapphire Audio 370 SS - User Manual

Sapphire Audio 370 SS
77 pages
Print Icon
To Next Page IconTo Next Page
Loading...
SAPPHIRE SCIENTIFIC MODEL 370 SS I
Congratulations on your purchase of the
MODEL 370 SS® Truckmount cleaning
unit. This instruction/parts manual is a
guide for operating and servicing your
SAPPHIRE SCIENTIFIC Truckmount
unit.
Proper operation and service are necessary to
ensure the outstanding performance of this unit.
When properly maintained, your Truckmount will
have a long and trouble-free life.
The following service methods outlined in this
manual are detailed in a manner that operation and
servicing may be performed properly and safely.
Because service levels vary due to the skill of the
mechanic, tools and parts availability, ensure that
prior to attempting any repair, you are familiar
with this equipment and have the proper tools.
Any questions regarding the operation, service, or
repair of this unit should be directed to your
nearest SAPPHIRE SCIENTIFIC dealer.
The headings WARNING and CAUTION are
utilized to warn you that steps must be taken to
prevent personal injury or damage to the
equipment. Please make sure that you have read
and understand these instructions entirely before
proceeding with the operation of this unit.
THIS UNIT MUST BE INSTALLED BY THE
DEALER THAT YOU PURCHASED IT
FROM IN ACCORDANCE WITH THE
SAPPHIRE SCIENTIFIC INSTALLATION
PROCEDURES.
BE SURE TO FILL OUT THE WARRANTY
CARD ONLINE AT WWW.SAPPHIRE
SCIENTIFIC.COM
Record your units serial number here for future
reference or if you should need to contact the
factory in the future for any reason.
S/N:
This service and operations manual is written
specifically for SAPPHIRE SCIENTIFIC
MODEL 370 SS® Truckmount Cleaning units
manufactured by:
SAPPHIRE SCIENTIFIC
2604 Liberator
Prescott, AZ 86301
USA
The information contained in this document is
subject to change without notice and does not
represent a commitment on the part of
SAPPHIRE SCIENTIFIC.
All rights reserved. Copyright 2009 by
SAPPHIRE SCIENTIFIC. No part of this work
may be used or reproduced in any form or means
without the express written consent and permission
of SAPPHIRE SCIENTIFIC.
Published by SAPPHIRE SCIENTIFIC.
First printing: May 2009
Printed in USA
MODEL 370 SS® MANUAL
PART# 49-038
October, 2009

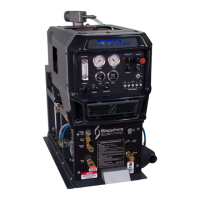
Table of Contents

Other manuals for Sapphire Audio 370 SS

Questions and Answers

  • B
    Becky MorseAug 19, 2025
    Why does my Sapphire Audio Cleaning Equipment engine stop running during normal operation?
    • A
      April StewartAug 19, 2025
      If the engine of your Sapphire Audio Cleaning Equipment stops running during normal operation, first check the fuel tank to ensure it has gasoline. Also, ensure the waste tank isn't full. A tripped main circuit breaker on the control panel could also be the culprit; if tripped, inspect the unit to determine the cause, then press the reset button. Other potential causes include a defective fuel pump or float switch inside the waste tank, which may need replacement. Additionally, the oil pressure switch might have shut down due to insufficient oil pressure, or there could be an engine malfunction; in these cases, refer to the engine Operation and Maintenance Manual, and do not restart the engine until the cause is determined and corrected.
  • S
    Sabrina JosephAug 21, 2025
    How to troubleshoot engine not starting on Sapphire Audio Cleaning Equipment?
    • L
      Lauren HarmonAug 21, 2025
      If your Sapphire Audio Cleaning Equipment engine won't start and the starter doesn't turn over, begin by checking the main circuit breaker on the control panel and press the reset button after inspecting for the cause of the tripped breaker. Inspect the battery connections, ensure they are clean and tight, or replace if corroded. If the battery is dead, recharge or replace it. Test the ignition switch for incoming power; if power isn't coming out, replace the switch. Test the starter motor and replace if defective. For a seized vacuum pump, refer to the vacuum pump manufacturer's service and repair manual.
  • G
    gary74Aug 26, 2025
    Why won't my Sapphire Audio Cleaning Equipment start even though the starter turns over?
    • S
      Stephen NortonAug 26, 2025
      If the starter turns over but your Sapphire Audio Cleaning Equipment engine won't start, first, empty the waste tank. If that's not the issue, the fuel pump may be defective and require replacement. Check for loose or broken wires leading to the waste tank float switch, repairing or replacing any faulty connections. Inspect the float switch inside the waste tank for proper operation and replace if necessary. Test the oil pressure switch and fuel shut-off solenoid, replacing any defective components, and refer to the engine Operation and Maintenance Manual. If the engine is malfunctioning, also refer to the engine Operation and Maintenance Manual.
  • H
    Heather ColemanAug 27, 2025
    How to fix a Sapphire Audio Cleaning Equipment water pump that doesn't engage?
    • J
      Johnathan MercerAug 28, 2025
      If your Sapphire Audio Cleaning Equipment water pump doesn't engage, check the water pump circuit breaker on the control panel and press the reset button. Examine the switch, electrical connections, and wiring for defects, repairing any faulty connections and replacing the switch if necessary. Ensure the water pump switch is turned on. If there's power to the switch but not the clutch, replace the defective wire; if there's power at the clutch, replace the defective switch. Also, tighten or replace loose or broken water pump belts.
  • R
    Richard SinghSep 3, 2025
    What causes chemical flow with valve closed on Sapphire Audio Cleaning Equipment?
    • J
      Jerry RamirezSep 3, 2025
      If your Sapphire Audio Cleaning Equipment's chemical flow meter indicates flow even with the tool valve closed, tighten or replace fittings in the chemical piping, reapplying thread sealant where required. If this doesn't solve the problem, close the chemical valve on the instrument panel; if the flow meter still indicates flow, the chemical pump diaphragm may be ruptured and need replacement. Alternatively, there may be an internal leak in the chemical valve; try tightening the valve packing nut or replace the valve if necessary.
  • W
    Whitney DodsonSep 5, 2025
    Why am I experiencing loss of chemical in my Sapphire Audio Cleaning Equipment?
    • B
      Brian ScottSep 5, 2025
      If your Sapphire Audio Cleaning Equipment experiences a loss of chemical, first, refer to the chemical pump priming instructions to ensure it's properly primed. Check the strainer at the inlet end of the chemical inlet line for clogs and unclog or replace it if damaged. Inspect inlet lines and the flow meter for air leaks or damage. Remove any debris from the chemical check valve(s) and replace the valve(s) or seals if necessary. Replace a defective chemical prime/on-off valve or chemical metering valve. If the chemical pump diaphragm is ruptured, disassemble the pump and replace it. If the pump volume is less than normal, refer to the section on “Loss of Solution Volume”.
  • W
    wfisherSep 7, 2025
    How to decrease excessive vacuum on Sapphire Audio Cleaning Equipment?
    • R
      richard61Sep 7, 2025
      If your Sapphire Audio Cleaning Equipment is experiencing excessive vacuum, readjust the vacuum relief valve to 13” Hg. Also, check and adjust the throttle to set the desired vacuum pressure.
  • D
    David HornSep 9, 2025
    What causes excessive heating in Sapphire Audio Cleaning Equipment?
    • G
      gabriella26Sep 9, 2025
      If your Sapphire Audio Cleaning Equipment is experiencing excessive heating, descale the unit and repair or replace any damaged plumbing components, and install a water softener. Check the jet size of the tool to ensure enough water is flowing during normal operation. Clean any clogged orifices. Remove and replace the thermal relief valve on the water box if it's not opening.
  • A
    annalopezSep 12, 2025
    How to troubleshoot Sapphire Audio Cleaning Equipment waste pump not operating normally?
    • J
      Jack KingSep 12, 2025
      If your Sapphire Audio Cleaning Equipment waste pump is not operating normally, replace the float switch. Replace any broken diaphragms. Charge or replace the battery if weak, and check the charging station. After inspecting the waste pump to determine the cause of the tripped circuit breaker, press the reset button if the pump-out circuit breaker on the control panel has been tripped. Inspect the check valve for debris or damage, clean or replace if necessary, and ensure that check valves are seated correctly.
  • B
    Brandon NicholsonSep 13, 2025
    Why is my Sapphire Audio Cleaning Equipment losing temperature?
    • J
      Joan YoungSep 14, 2025
      If your Sapphire Audio Cleaning Equipment is experiencing a loss of temperature, connect the vacuum hose to the vacuum inlet port. Clean and test the temperature relief valve on the water box, replacing it if necessary. Reset the engine RPM if it is low. Test the temperature gauge and sensor, replacing any failed components. Replace a missing temperature balance orifice. Close the temperature control valve and check for leaks, replacing if leaking.

Summary

SECTION ONE: GENERAL INFORMATION

1. SAFETY

Covers safety precautions and warnings for operating the unit.

2. RECEIVING YOUR TRUCKMOUNT UNIT

Details unit receipt, dealer responsibilities, and equipment inspection.

SPECIFICATIONS

Details technical specifications of the unit.

TORQUE VALUES

Lists torque specifications for components.

JET SIZING

Discusses jet sizing for optimal cleaning performance.

INSTALLATION REQUIREMENTS

Details vehicle and unit installation criteria.

FUEL REQUIREMENTS

Specifies fuel type and usage guidelines.

ENGINE OIL REQUIREMENTS

Outlines oil type, viscosity, and change intervals.

CHEMICAL REQUIREMENTS

Discusses chemical compatibility and usage.

WATER REQUIREMENTS

Details water quality and softener recommendations.

SECTION TWO: INSTALLATION

3. INSTALLATION

Covers the process of installing the unit into a vehicle.

LIFTING THE UNIT INTO THE VEHICLE

Procedures for safely moving the unit.

POSITIONING THE UNIT INTO THE VEHICLE

Guidelines for placing the unit in the vehicle.

FASTENING DOWN THE UNIT AND WASTE TANK

Methods for securing the unit.

DIMENSIONAL DIAGRAM

Visual representation of unit dimensions.

INSTALLATION OF FUEL LINES

Guidance on routing fuel lines safely.

TRAILER FUEL TANK AND FUEL LINE INSTALLATION

Specifics for trailer installations.

BATTERY CONNECTION

Instructions for connecting the battery.

FIRE EXTINGUISHER

Recommendation for fire safety equipment.

CONSOLE TO WASTE TANK CONNECTION

Details for connecting these components.

SECTION THREE: OPERATION

4. SYSTEMS

Describes the unit's functional systems.

WATER;HEATING SYSTEM

Explains how the water and heating systems work.

VACUUM SYSTEM

Details the function of the vacuum system.

CHEMICAL PUMPING SYSTEM

Explains the chemical delivery system.

5. OPERATION

Covers preparation, use, and shutdown.

PREPARATION

Steps to get the unit ready for operation.

STARTING THE UNIT

Step-by-step guide to starting the engine.

PRIMING THE CHEMICAL PUMP

Procedure for priming the chemical pump.

VACUUM HOSE

Instructions for connecting the vacuum hose.

AUTOMATIC WASTE PUMP

Operation of the optional waste pump.

CLEANING

Guidelines for performing cleaning tasks.

UPHOLSTERY CLEANING

Specifics for upholstery cleaning.

STAIR TOOL CLEANING

Guidance for cleaning stairs.

FLOOD RESTORATION;EXTRACTION

Procedures for flood cleanup.

SHUT DOWN AND DAILY MAINTENANCE

Steps for turning off and daily upkeep.

FREEZE PROTECTION

Methods to protect the unit from freezing.

WINTERIZING YOUR UNIT WITH ANTI-FREEZE

Detailed winterization steps.

REMOVING ANTI-FREEZE FROM THE UNIT

Steps to prepare the unit after winter.

SECTION FOUR: MAINTENANCE and SERVICE

6. MAINTENANCE

Details scheduled maintenance tasks.

MAINTENANCE CHART

A schedule of maintenance tasks and intervals.

ENGINE

Maintenance procedures for the engine.

VACUUM PUMP

Maintenance for the vacuum pump system.

WATER PUMP

Maintenance procedures for the water pump.

VACUUM INLET FILTER

Instructions for cleaning the vacuum filter.

DRIVE BELTS, PULLEYS and HUBS

Maintenance of drive components.

CHEMICAL METERING SYSTEM

Maintenance of the chemical system.

PRESSURE REGULATOR

Maintenance of the pressure regulator.

VACUUM HOSES

Care and maintenance of vacuum hoses.

BATTERY

Maintenance and safety for the battery.

7. GENERAL SERVICE ADJUSTMENTS

Covers adjustments for optimal performance.

ENGINE SPEED

How to adjust engine speed.

VACUUM RELIEF VALVE

Adjustment of the vacuum relief valve.

WATER PUMP DRIVE BELT

Instructions for tightening the water pump belt.

SOLUTION OUTLET CHECK VALVE

Maintenance of the check valve.

CHEMICAL PUMP

Service procedures for the chemical pump.

8. TROUBLESHOOTING

Provides solutions for common problems.

Loss of solution pump pressure

Troubleshooting low pump pressure.

Loss of solution volume at cleaning tool orifice

Troubleshooting low solution volume.

Loss of vacuum

Troubleshooting lack of vacuum.

Excessive Vacuum

Troubleshooting for too much vacuum.

Loss of chemical

Troubleshooting chemical flow issues.

Solution pump does not engage

Troubleshooting pump engagement.

Engine will not start

Troubleshooting engine start issues.

Starter turns over engine, but will not start

Troubleshooting engine crank but no start.

Engine stops running

Troubleshooting engine shutdown during operation.

Excessive heating

Troubleshooting unit overheating.

Loss of temperature

Troubleshooting low heat output.

Automatic waste pump is malfunctioning

Troubleshooting waste pump issues.

SECTION FIVE: PARTS and ACCESSORIES

9. ILLUSTRATED PARTS LISTINGS

Lists and illustrates all parts.

FRAME, CONTROL PANEL & HOODS

Parts for chassis and controls.

FRONT SHEET METAL

Parts for the front housing.

CONTROL PANEL ASSEMBLY

Detailed parts for the control panel.

WATER BOX ASSEMBLY

Parts for the water box assembly.

ENGINE ASSEMBLY

Parts related to the engine assembly.

ENGINE FUEL SYSTEM

Parts for the fuel delivery system.

BLOWER, BELT GUARD ASSEMBLY

Parts for the blower and guard.

VACUUM PUMP ASSEMBLY

Parts for the vacuum pump.

CHEMICAL PUMPING SYSTEM

Parts for the chemical pump system.

GENERAL CHEMICAL PUMP

Specific parts for the chemical pump.

WASTE TANK ASSEMBLY

Parts for the waste tank.

Decals

Lists warning and control decals.

Electrical Diagram

Shows the unit's wiring schematic.

10. ACCESSORIES

Describes available accessories.

Sapphire Audio 370 SS Specifications

General IconGeneral
BrandSapphire Audio
Model370 SS
CategoryCleaning Equipment
LanguageEnglish