Step Step 16
å
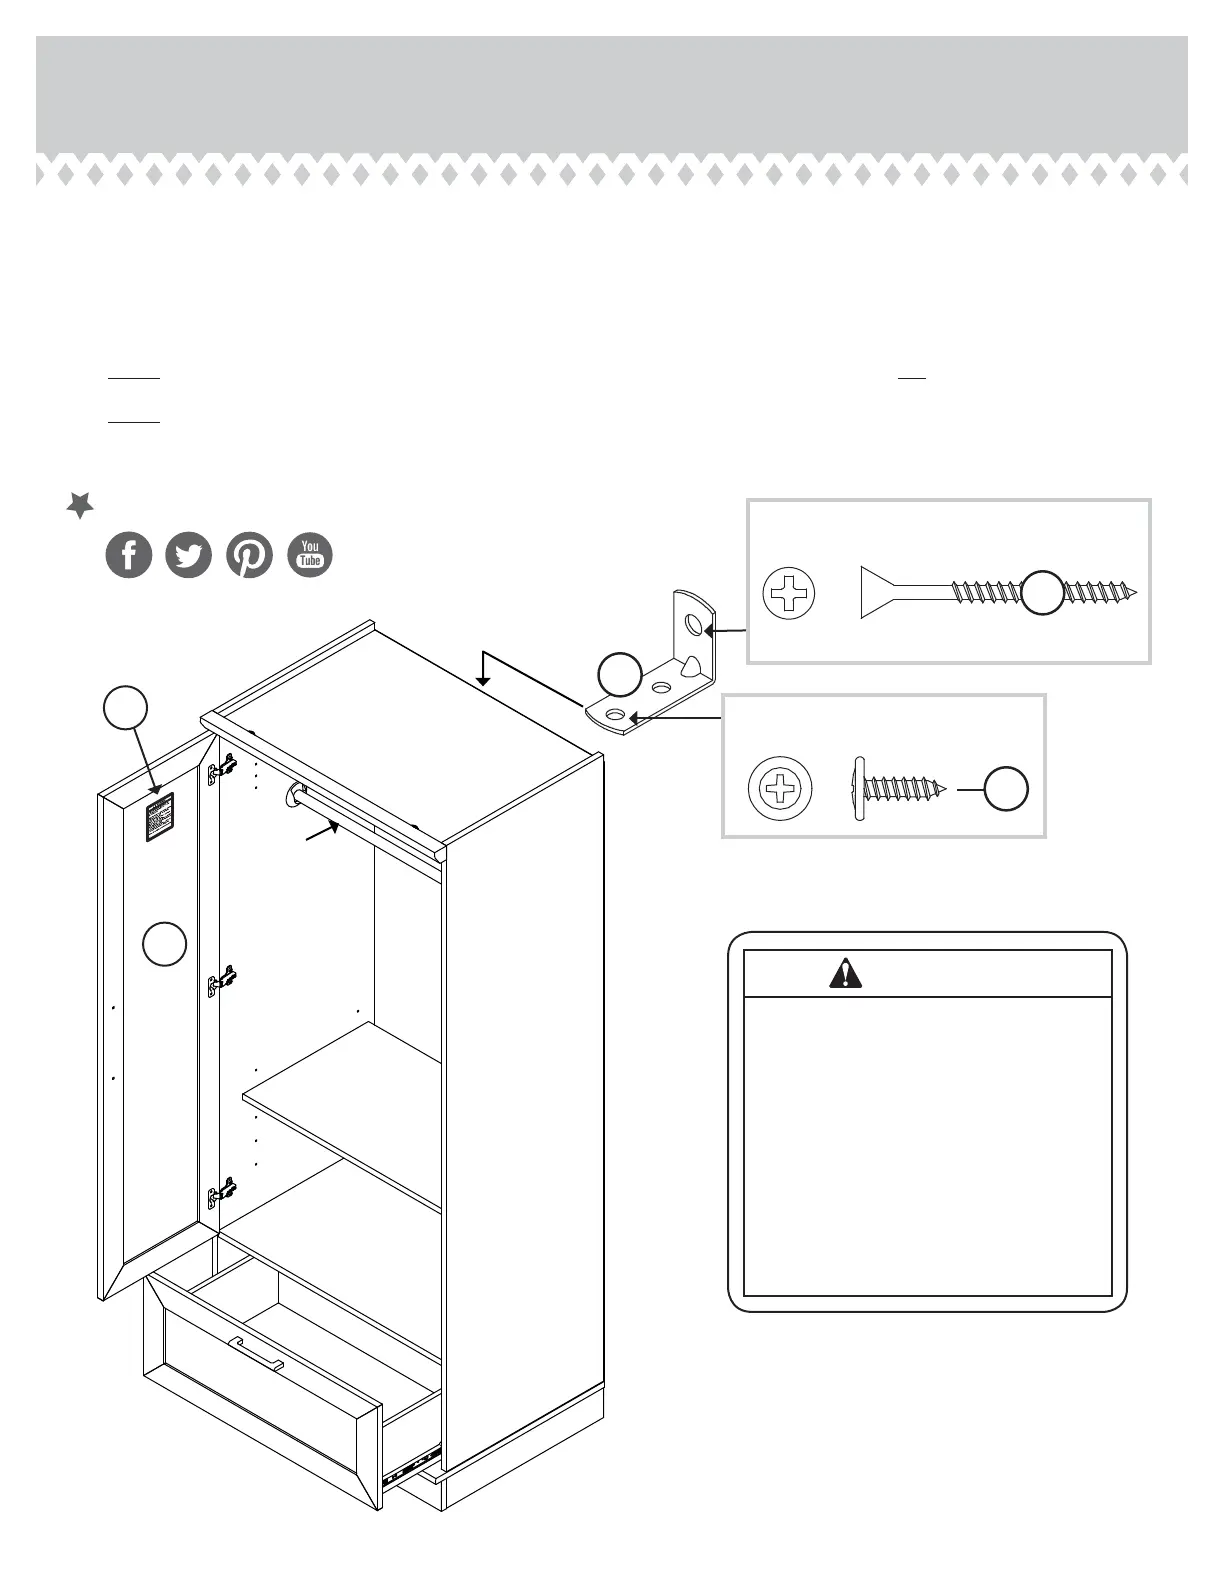
Fasten the SAFETY BRACKET (1G) for added stability. Use a BLACK 9/16" LARGE HEAD SCREW (1S) into the top of the
unit and a BLACK 1-7/8" FLAT HEAD SCREW (2S) into a stud in your wall.
å
Apply the WARNING LABEL (5L) to the left DOOR (H). You should be able to read the label when the DOOR is open.
When the DOOR is closed, it will hide the label. Peel o the backing and apply the label as shown in the diagram.
å
NOTE: This is a permanent label intended to last for the life of the product. Once applied, do not try to remove it.
å
NOTE: Please read the back pages of the instruction booklet for important safety information.
å
This completes assembly. Clean with your favorite furniture polish or a damp cloth. Wipe dry.
Page 21
5L
H
Serious or fatal crushing injuries can
occur from furniture tip-over. To help
prevent tip-over:
-Place heaviest items in the lowest drawers.
-Unless specifi cally designed to accommodate,
do not set TVs or other heavy objects on top of
this product.
-Never allow children to climb or hang on
drawers, doors, or shelves.
-Never open more than one drawer at a time.
-If equipped with a drawer interlock system, do not
defeat or remove it.
Use of tip-over restraints may only reduce,
but not eliminate, the risk of tip-over.
WARNING
1G
1S
BLACK 9/16" LARGE HEAD SCREW
(1 used into the top of your unit)
BLACK 1-7/8" FLAT HEAD SCREW
(1 used into a stud in your wall)
2S
No load
40 lbs.
25 lbs.
50 lbs.
35 lbs.
And to celebrate, why not share your success story?
 Loading...