EasyManua.ls Logo

Sauder Shoal Creek 411201 User Manual

Sauder Shoal Creek 411201
32 pages
To Next Page IconTo Next Page
Page #1 background imageLoading...
Page #1 background image
Need help? Visit Sauder.com to view video assembly tips or chat with a live rep.
Prefer the phone? Call 1-800-523-3987.
Share your journey!
sauder.com
NOTE: THIS INSTRUCTION
BOOKLET CONTAINS IMPORTANT
SAFETY INFORMATION.
PLEASE READ AND KEEP FOR
FUTURE REFERENCE.
Enlish p 1-22
Français p 23-25
Español p 26-28
Lot # 397446 10/31/16
Purchased: __________________
Be sure to ive us a rin before
makin any returns. 1-800-523-3987
Dresser
Shoal Creek Collection | Model 411201
WARNING
CHOKING HAZARD - Small Parts
Not for children under 3 years.
Adult assembly required.
Question and Answer IconNeed help?

Do you have a question about the Sauder Shoal Creek 411201 and is the answer not in the manual?

Sauder Shoal Creek 411201 Specifications

General IconGeneral
BrandSauder
ModelShoal Creek 411201
CategoryIndoor Furnishing
LanguageEnglish

Summary

Assembly Tools Required

Part Identification

Hardware Identification

Assembly Steps

Step 1: Assemble Unit with Hidden Cams

Attaching hidden cams and cam dowels to unit panels.

Step 2: Attach Cam Screws to Legs and Drawer Fronts

Inserting cam screws into front legs and drawer fronts.

Step 3: Fasten Rear Legs

Securing rear legs to the unit ends using flat head screws.

Step 4: Secure End Moldings

Attaching end moldings to unit ends with flat head screws.

Step 5: Attach Front Legs to Ends

Fastening front legs to the other surface of the unit ends.

Step 6: Attach Cabinet Rights and Lefts

Securing cabinet sides to unit ends and upright using screws.

Step 7: Connect Left End and Upright to Top

Attaching the left end and upright panel to the top panel.

Step 8: Insert Metal Pins and Fasten Bottoms

Installing metal pins and securing bottoms to the unit.

Step 9: Attach Right End to Top and Bottoms

Fastening the right end panel to the top and bottom panels.

Step 10: Secure Brace and Foot Base

Attaching the brace and foot base, then inserting the foot.

Step 11: Unfold and Fasten Back Panel

Attaching the back panel using nails.

Step 12: Assemble Drawer Boxes

Constructing the drawer boxes by joining sides, bottoms, and backs.

Step 13: Install Drawer Slides

Attaching drawer slides to the drawer sides and cabinet.

Step 14: Attach Drawer Knobs and Pulls

Fastening knobs and pulls to the drawer fronts.

Step 15: Stand Unit Upright and Install Safety Bracket

Positioning the unit and securing it with a safety bracket.

Step 16: Adjust Foot and Apply Warning Label

Adjusting the foot leveler and applying the safety warning label.

Step 17: Adjust Drawer Alignment

Fine-tuning drawer front alignment for proper closure.
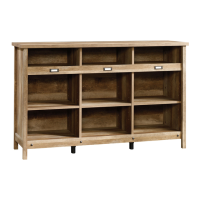
Safety Information

Limited Warranty

Related product manuals