Do you have a question about the Sauder HomePlus 411572 and is the answer not in the manual?
Lists all necessary tools for assembling the storage cabinet.
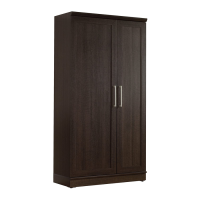
Identifies cabinet components with letter codes for assembly reference.
Identifies all screws, fasteners, and hardware pieces with codes.
Insert twist-lock fasteners into cabinet panels for frame assembly.
Connect the top panel and large shelf to the side panel using fasteners.
Secure the upright to the top panel with screws and twist-lock fasteners.
Fasten the top molding and small shelf to the cabinet structure.
Connect the small end panel to the top panel and small shelf.
Attach the bottom panel to the cabinet ends and upright using screws.
Attach feet, adjustable glides, and side skirts to the cabinet bottom.
Secure the back panel with nails and attach foot bases to the unit.
Mount door shelves onto pins in the door end and upright.
Attach strike plates, pull, and hinges to the small door panel.
Connect the small door assembly to the cabinet using hinges and screws.
Mount spring hinges onto the large door for later attachment.
Attach the large door to the cabinet and install the door pull.
Fine-tune door alignment for smooth operation and appearance.
Insert shelf snaps, pins, and rubber sleeves to install adjustable shelves.
Fasten safety bracket, add hole plugs, and clean the unit.
Crucial advice to prevent accidents, tip-overs, and property damage.
Guidelines on proper cleaning and maintenance for furniture longevity.
Details warranty coverage, terms, conditions, and exclusions for the product.
| Product Name | Sauder HomePlus 411572 |
|---|---|
| Product Type | Storage Cabinet |
| Category | Storage |
| Material | Engineered wood |
| Assembly Required | Yes |
| Dimensions | 71.1 x 29.4 x 15.5 inches |
| Finish | Laminated |
| Number of Shelves | 4 |
| Color | Soft White |
| Adjustable Shelves | Yes |